Five Questions

Five Questions: Light Painting Headlights, Moonrises and Sunsets, Auroras and More

You ask questions, we give answers. (When weโ€™re not shooting. Which is why we donโ€™t do this feature more often.)

This installment of our โ€œFive Questionsโ€ series features inquiries about light painting headlights, tripods, open hours for national parks, moonrises at sunset and lens choices for aurora.

If you have any questions you would like to throw our way, please contact us anytime. Questions could be about gear, national parks or other photo locations, post-processing techniques, field etiquette, or anything else related to night photography. #SeizeTheNight!

1. Light Painting Headlights

Pickup in Nelson Ghost Town, Nevada. ยฉ Tim Cooper. Nikon D4, Nikon 24-70mm f/2.8 lens. 3 minutes, f/8, ISO 100.

Q: When light painting old cars/trucks at night, how do you get the headlights to look like they are on? I have an old tractor in a field that I would like to practice on. โ€” Brien R.

A: We love light painting, especially old cars! Who doesnโ€™t?

Light painting the headlights is a tricky but rewarding thing to practice.

If the headlights have the glass still intact, use a very low-power light source (e.g., a Maglite or a Coast G5). Stand about 2 to 3 feet from the headlight, but to the side so you arenโ€™t blocking the camera. Shine the flashlight into the headlight brieflyโ€”1 to 3 seconds is generally enough. Then walk over to the next headlight and do the same.

Hereโ€™s a key to this working: Stay invisible. Be careful and use your body to block the light source (i.e., the bulb) from being seen by the cameraโ€”we want to capture only the light reflecting from the headlights. I also advise dressing all in black, including black gloves. Sometimes the light bouncing off the headlights can freeze your hand or face in the frame, and you end up being ghosted in the picture. If that is the case, youโ€™ll need to move farther out of the scene and then snoot your flashlight with a long tubeโ€” think PVC or a paper towel core. This will give you a more precise paintbrush to place the light.

Finally practice, practice, practice! And then feel free to share your results with us. โ€” Gabriel

2. Lanceโ€™s Tripod

Q: Iโ€™m trying to figure out which tripod Lance showed in your CreativeLive class. I went back and watched the class again and figured out that it may be a Manfrotto 190 carbon fiber with a leveling center column. Can you please confirm this? Also, for a tripod this size would you still suggest that setup or has something else come out that you like better? Finally, which ball head would you suggest for this combo? โ€” Marc S.

A: You are correct that I was using the Manfrotto 190 with a leveling head in the video. The head is great, but only for panoramas. Itโ€™s unnecessary otherwise.

If I were to buy today, Iโ€™d go with the Manfrotto 190go! Carbon Fiber M-Series Tripod with MHXP RO-BHQ2 XPRO Ball Head RC2 Kit. I like the twist locks better than the flip locks, which can pinch if you are not careful. However, these days Iโ€™m mostly using my Gitzo Series 2 Traveler Carbon Fiber Tripod with Center Ball Head.

Several of us at National Parks at Night are big fans of the Acratech GP-ss Ballhead With Lever Clamp. It is designed for compact travel tripods. Itโ€™s not quite as compact as the Gitzo head, but is easier to work with and the lever clamp is awesome. โ€” Lance

3. Hours at National Parks and Monuments

Arch Rock, Valley of Fire. ยฉ 2014 Matt Hill. Nikon D750, Nikon 14-24mm f/2.8 lens at 14mm. 30 seconds, f/2.8, ISO 500.

Q: Thank you for your recent article on whether light painting is allowed in national parks. However, it seems there is an even more important issue, which is if visitors are actually allowed to enter certain parks at night. My wife and I visited a number of national parks and monuments in recent years, but in places like Valley of Fire, Hovenweep or National Bridges we were told by rangers that weโ€™d be in trouble if we were seen out there at night. On the other hand I have seen plenty of photos taken by the National Parks at Night team or other professionals at exactly these places. Are there different rules for the average photographer? โ€” Lambert

A: Most of the 400-plus National Park Service units are open 24 hours to all visitorsโ€”including Natural Bridges National Monument, so Iโ€™m not sure why that ranger told you otherwise. In fact, night skies are part of how Natural Bridges actively entices people to visit. Itโ€™s also a feature that Hovenweep plays up, though only some sections of the park are open at night.

All of the national parks are open 24 hours per day, except Petrified Forest, but you can get a camping permit to stay overnight, or pay for a Special Use Permit to shoot after hours. Some of the national seashores are closed at night unless you have a camping or special use permit. National wildlife refuges are mostly closed at night, but those are units of U.S. Fish and Wildlife, not the NPS.

The Oliver Cabin is one of the many wonderful night photography subjects in Great Smoky Mountains National Parksโ€™ Cades Cove region. Cades Cove is closed to vehicles at night, but you can walk or bike the 11-mile loop road all night if youโ€™d like. ยฉ 2017 Chris Nicholson. Nikon D3s, 17-35mm f/2.8 lens, light painted with a Coast HP7R flashlight. 30 seconds, f/5.6, ISO 3200.

However, note that even if a park is open at night, thereโ€™s a chance that certain features are closed. In addition to Hovenweep, this is also the case at Mesa Verde National Park, which closes access to the ruins after sundown. Another example is Great Smoky Mountains National Park (where weโ€™re hosting a workshop this April): Cades Cove, an amazing place to shoot; it is closed to motor vehicles at night, yet remains open to foot traffic.

As for Valley of Fire, thatโ€™s a state park, and as with any state land is run under local regulations that the NPS guidelines donโ€™t affect. For night access to Valley of Fire, you need either a permit or to be camping in the park. (Or you to be on our workshop this April, which happens to have one spot remaining.)

No matter where youโ€™re going to shoot at night, we always recommend checking the hours and letting the rangers (or other appropriate authorities) know what youโ€™ll be up to. Not because you necessarily need permission to engage in night photography on public lands, but because it sometimes makes their jobs easier if they know youโ€™ll be out there. Not to mention that they might share some valuable local knowledge about the location. โ€” Chris

4. Aurora Lenses

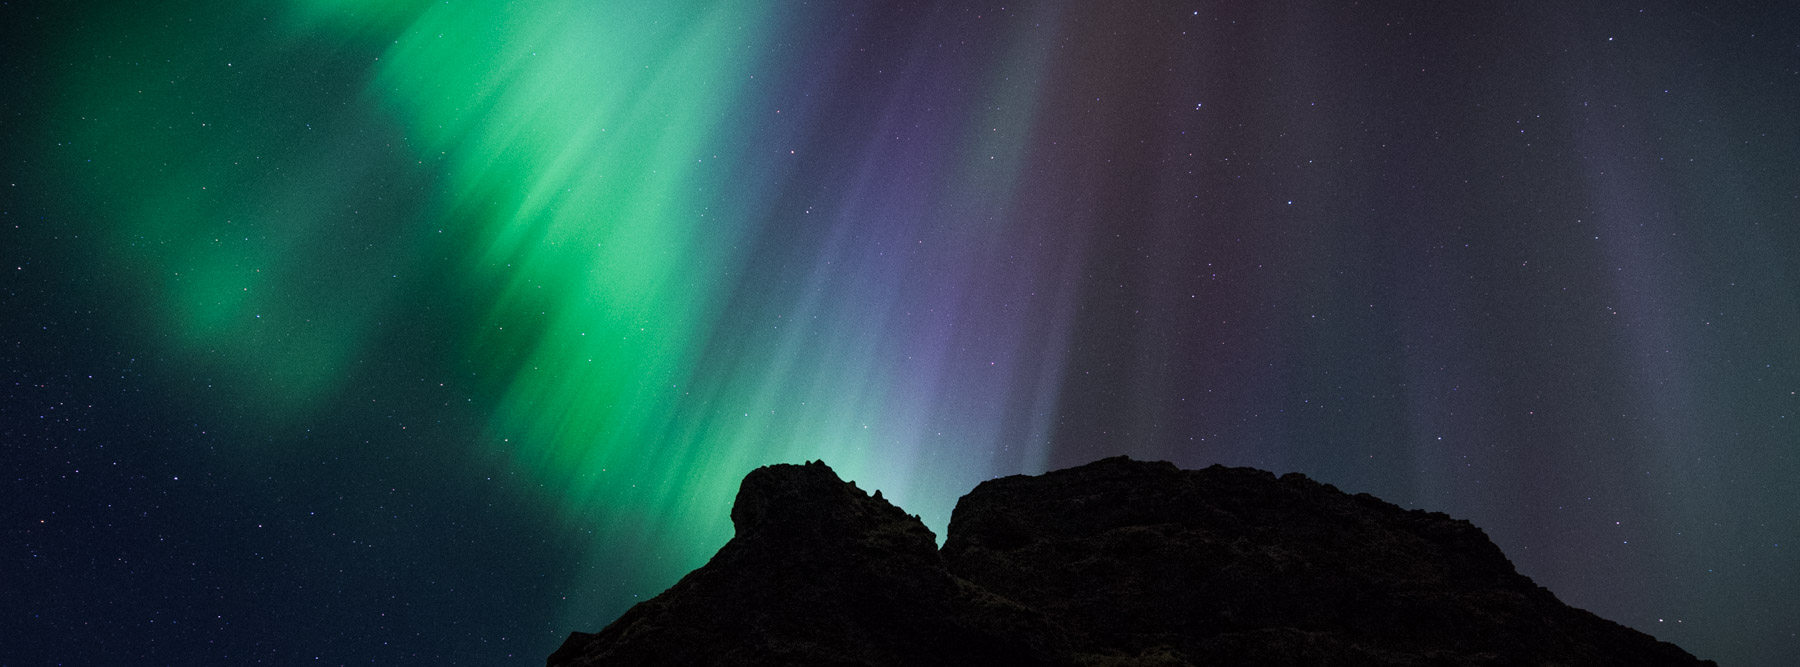
Aurora over Westfjords, Iceland. ยฉ 2012 Lance Keimig. Canon 5D Mark II, Nikon 20mm f/3.5 lens. 15 seconds, f/5.6 ISO 3200.

Q: Iโ€™ll be traveling to Iceland in March to shoot auroras. Which lens would you recommend between a Sigma 20mm f/1.4 and a Sigma 14mm f/1.8? Or is there another lens youโ€™d recommend instead? Iโ€™m shooting with a Sony a7R III. โ€” Jeff

A: Congrats on your Iceland trip! Our No. 1 bit of advice is to get off of the main ring road and explore the random back roads to avoid the crowds. It can be busy over there!

As for your lens question, the wider-aperture model will probably be more useful, but itโ€™s always good to have options. If the sky really lights up, youโ€™ll want the widest lens you can get, but the 14mm is crazy wide for general shooting. Also, you donโ€™t necessarily need superfast lensesโ€”with a good aurora, you will probably be stopping down a few stops anyway.

For more advice on shooting the northern lights, see our two blog posts โ€œCapturing Clouds of Light: How to Photograph the Aurora Borealis.โ€ and โ€œNorthern Exposure: 8 Illuminating tips for Photographing Auroras.โ€ โ€” Lance

5. Moonrises at Sunset

Day before full moon, Death Valley National Park. ยฉ 2005 Tim Cooper. Canon 1Ds, 16-35mm lens at 31mm. 4 seconds, f/8, ISO 100.

Q: We learned from PhotoPills that sunsets can be spectacular when the moonrise and sunset occur within an hour of each other. But the moon rises in the east and the sun sets in the west, so weโ€™re stumped. Any ideas? โ€” Barbara E.

A: I suggesting thinking about it this way: What will be illuminated from the west when youโ€™re facing east, with a great view of the moon rising behind it? The idea isnโ€™t to shoot the sun and moon together, but rather to shoot the full moon rising among beautifully sunlit scenery or among the delicate light of a just-set sun.

The other advantage to this scenario is that the brightness of sunset balances well with the moon, which equalizes the intensities to get it all in one shot (as opposed to having to HDR the scene, which is so often the need when trying to shoot the moon over a landscape).

For a crispy moon, keep those exposure times shortโ€”donโ€™t be afraid to ramp up your ISO to keep things sharp. Ideally, you want a big olโ€™ moon coming just off the horizon with gentle, ruddy sunlight kissing your subjects.

Grab your phone and scout with PhotoPills! Use it to see just where that moon will peek up to be sure you will see it during that sweet spot of sunset with the moon on the horizon.

And please send us photos of your success! โ€” Matt

Chris Nicholson is a partner and workshop leader with National Parks at Night, and author of Photographing National Parks (Sidelight Books, 2015). Learn more about national parks as photography destinations, subscribe to Chris' free e-newsletter, and more at www.PhotographingNationalParks.com.

UPCOMING WORKSHOPS FROM NATIONAL PARKS AT NIGHT

Five Questions: Yes, Light Painting is Allowed in National Parks, and More

You ask questions, we give answers. (For the record, we do other things too. And we assume you do as well. But we all love night photography, so here we go.)

This installment of our โ€œFive Questionsโ€ series features inquiries about light painting in national parks (hint: yes), focusing at night, an amazing national park in Utah, better batteries for the Luxli Viola, and the direction of star trails.

If you have any questions you would like to throw our way, please contact us anytime. Questions could be about gear, national parks or other photo locations, post-processing techniques, field etiquette, or anything else related to night photography. #SeizeTheNight!

1. Yes, Light Painting is Allowed in National Parks

A great example of low-level lighting: In Joshua Tree National Park, Arch Rock, at 30 feet high, was light-painted by just three battery-operated votive candles. Illumination barely visible to the naked eye even from close-up. Six stitched frames shโ€ฆ

A great example of low-level lighting: In Joshua Tree National Park, Arch Rock, at 30 feet high, was light-painted by just three battery-operated votive candles. Illumination barely visible to the naked eye even from close-up. Six stitched frames shot with a Nikon D750 and a Tamron 15-30mm f/2.8 lens at 15mm Photo ยฉ 2017 Lance Keimig.

Q: I saw an article online that said light painting is no longer allowed in national parks. Is this true? โ€” Pretty Much Everyone Who Has Emailed or Spoken to Us in the Last 18 Months

A: The headline of that article misled the reality of the situation. About 18 months later we still get this question, so letโ€™s set the record straight.

First of all, it is true that a few National Park Service units have gotten hesitant about light painting. However, as far as we are aware, this has happened at only five NPS unitsโ€”out of about 420. So to insinuate that night photography is being hampered at all national parks is a massive overstatement.

It should also be noted that of those five units, four (Arches National Park, Canyonlands National Park, Natural Bridges National Monument and Hovenweep National Monument) are administered by the same office, so itโ€™s mostly just one rule thatโ€™s affecting a few places. Itโ€™s not like a bunch of parks have independently decided they donโ€™t like night photography. In fact, we find that almost every park we visit loves the night, loves night photography, and encourages visitors to enjoy the darkness of the parkness either without or with a camera.

Those four Utah NPS units acted with exactly that feeling in mind. Michael Hill, who works in the district, and with whom we have communicated, is very clear that they felt light painting โ€œconfuses visitorsโ€ and they leave because of this confusion. We get that, and we are respectful of it.

However, that rule has been amended. As of earlier this year, those Utah parks allow Low-level Landscape Lightning (LLL), which is essentially very low levels of light that build up over the course of a long exposure.

In Lassen Volcanic National Park, Lance and I used a pair of Luxli Viola panel lights to illuminate Cinder Cone, which is approximately 1,000 feet in diameter. We were relatively far away from our giant subject with relatively dim illumination. We could barely see where the light was hitting, but over the course of a 15-second exposure at a high ISO, that little bit of light was enough to do the job. Nikon D5 and 14-24mm f/2.8 lens. 15 seconds, f/3.2, ISO 6400. Photo ยฉ 2018 Chris Nicholson.

For example, at our workshops we often employ LLL by using a Luxli Viola set to 1 percent brightness. That gentle glow is barely visible to the naked eye, but is extraordinary for cameras at high ISOs. That works out very well, and we cannot imagine that it would ruin the experience of any non-photographer who might happen to be there too. (For the record, usually no one else is there. We find it rare to encounter anyone else out at 1 a.m. other thanโ€”seldom but occasionallyโ€”other night photographers.)

In the case of the Utah parks, how low is acceptably โ€œlow-levelโ€? Good follow-up question. When in Canyonlands last month, I asked a ranger, and he admitted the threshold is a bit subjective. He added that as long as the light isnโ€™t disturbing wildlife or interfering with the enjoyment of other park visitors, then itโ€™s probably OK. For commercial groups, the permit regulations stipulate that waving flashlights around is a no-no, but low-level static lighting is fine.

(Note: Since publication, this rule has since been amended again. As of 2020, no light paintingโ€”not even LLLโ€”is permitted in the four Utah parks mentioned above. In 2021, Capitol Reef also prohibited light painting, bringing the total to six National Park Service units doing so.)

So, thatโ€™s the scoop with that set of four Utah units. The fifth unit in question is Grand Teton National Park in the beautiful state of Wyoming.

Grand Teton is an interesting case, because the parkโ€™s concern appears to really be in regard to shining artificial light on wildlife. Weโ€™re on board with whatever helps in that regard. Of course we donโ€™t want to use flashlights for โ€œspottingโ€ wildlife, which in hunting is known as โ€œjacklighting.โ€ As people who use the parks for artistic inspiration and growth, we also have a responsibility to respect and preserve the natural environment, and that includes not disturbing the animals that call those places home.

There are many ways to photograph Grand Teton National Park in low light without light paintingโ€”such as by moonlight. Nikon D3 and 28-70mm f/2.8 lens. 1/50, f/ 4, ISO 400. Photo ยฉ 2012 Chris Nicholson.

That said, Grand Teton curbing light painting is a curious decision, as the park has a highway that runs right through it, along with plenty of private property that people drive on. Cars have headlights. Thereโ€™s also an international airport thatโ€™s in park boundaries, and airplanes have lights too. The however-many cars and planes in the park each night illuminate far more than a few photographersโ€™ flashlights do. So weโ€™re not sure why photographers are the ones getting their lights extinguished. (Weโ€™ve heard of at least one photographer who light-painted by โ€œaccidentallyโ€ sweeping his flashlight across the scene. Perhaps that kind of behavior has something to do with photographers being mistrusted there.)

Regardless of our personal feelings about any of this, National Parks at Night always preaches respect for the land, and that means respect for the park regulations, for equal access for all visitors, and for the rights of animals not to be blinded with sun-guns.

To that end, on our workshops we are very clear that if someone from outside our group approaches with a light on or wants to walk where we are shooting, they have a right to do so. If they want to linger in the same place weโ€™re shooting, they have a right to that too. We should all share the space, and we should all share the darkness. If what we as photographers are doing will disrupt another visitorโ€™s enjoyment of the park, we can find another way or another moment to do it.

Letโ€™s end with this thought: Rather than making negative assumptions and predictions based on some (very few) new obstacles at a tiny minority of parks, we instead implore our fellow night photographers to ensure this does not become an actual issue anywhere else.

How? By being responsible with our practices. That could be by employing LLL lighting techniques, or by light painting at a location only when alone or with other night photographers, or by shooting just the dark skies. Whatever works for you in the moment.

And finally, by encouraging other night photographers to do the same. โ€” Chris

2. Focusing from Foreground to Infinity

Pemaquid Point, Maine, sharp from front to back after focusing to a hyperfocal distance of 18 feet. Nikon D750, Sigma 24mm f/4 lens. 488 seconds, f/3.5, ISO 800.

Q: On a recent night shoot at the Devils Garden in Utah, I was really disappointed in the fuzziness (not in good focus) of the rocks in the foreground of my shots. I may just have screwed up the focus on infinity, and I should have zoomed in on the first few shots to ensure clarity. Should I have focused on infinity and assured/assumed that the depth of field would maintain focus throughout the range, or should I have focused on a hyperfocal distance to ensure the full range of focus, which would have included my foreground rocks and out to infinity? โ€” Michael D.

A: Anytime you have foreground subject matter, hyperfocal (providing it is done accurately) is the way to go. Itโ€™s a technique that is designed to maximize the available depth of field rather than focusing at infinity and sacrificing sharpness in your foreground.

To learn more about that technique, read my 2016 blog post โ€œUse Hyperfocal Distance to Maximize Depth of Field at Night.โ€ Then follow that up with a post that Chris wrote, โ€œStaying Sharp: 8 Ways to Focus in the Dark.โ€ โ€” Lance

3. Capitol Reef Night Programs

The night skies of Capitol Reef National Park are worth a trip. Nikon D750, Zeiss 15mm Distagon f/2.8 lens. 154 seconds, f/4, ISO 100. Photo ยฉ 2016 Matt Hill.

Q: I would love to go to Capitol Reef National Park to see the stars. Are there any nighttime programs available? โ€” Nancy

A: There certainly are! Capitol Reef is an awesome place to view and photograph night skiesโ€”and they know it, and theyโ€™re happy to help you enjoy what they have.

Check the Ranger Programs resource on the park website. They recommend the following special programs (check at the visitor center for schedules and meeting points):

  • guided hikesโ€”60 to 90 minutes

  • star programsโ€”tour the night sky in a gold-tier International Dark Sky Park

  • full moon walks

Have fun, send pictures! โ€” Matt

4. Superpowering the Luxli Viola

Q: I was first introduced to Matt and Chris through a seminar held at B&H Photo in New York City. I proceeded to order the Luxli Viola LED light and am looking forward to working with it. I recall a reference to a better battery to use with the Viola than the one that comes with it (due to the short life of the battery), but I canโ€™t find it in my notes. Please help me find the best battery for this kit. โ€” Debi F.

A: First, I wouldnโ€™t say the Violaโ€™s battery has a short life. In fact, Chris claims to recharge his only every couple of months or so. Thatโ€™s because he shoots mostly still photos, and he uses it only at night when very little power is needed to light a scene.

But if your usage drains your Viola faster than you prefer, you can get more run time by using the Watson NP-F550 replacement battery, which from my experience is very reliable.

If you want even longer run time for other applicationsโ€”say, if youโ€™re shooting video, when youโ€™d probably leave the light on for hours at a time at full powerโ€”you can get the even larger Watson NP-F770 battery. That should about double your run time.

If you want to spend a little more, the Sony versions of the NP-F battery are supposedly the best to be found. โ€” Matt

5. Stars Trailing in Different Directions

Sotheast view in Sedona, Arizona. Nikon D4s, 14-24mm f/2.8 lens. 4 minutes, f/4, ISO 200. Photo ยฉ Tim Cooper.

Q: In Timโ€™s recent blog post โ€œMaking the Move to Manual White Balance,โ€ I canโ€™t figure out how, in the last pair of photos outside Sedona, he managed to get the stars moving other than in concentric circles. Were some of them mirror-imaged to fill in areas where there was too much light, to let the stars show through? Thank you for satisfying my curiosity! โ€” Marilyn O.

A: No mirror-imaging involved or required! Star trails move in different directions, angles and arcs depending on which direction youโ€™re facing.

  • You get concentric rings from star trails only when you are shooting due north.  

  • When you are shooting east, they move from upper right to lower left.    

  • When you are facing west, stars move from upper left to lower right.

  • When facing due south, the stars go nearly horizontal across your frame.

For the image in question, I was facing southeast, so you are seeing the divergence of the east and south views.  If I had turned right a little bit more (south), I would have ended up with nearly all horizontal trails. If I had turned a little more to the left (east), the trails would have moved from upper right to lower left. I shot this photo with a very wide 14mm lensโ€”so wide that I actually captured a little of both views! โ€” Tim

Chris Nicholson is a partner and workshop leader with National Parks at Night, and author of Photographing National Parks (Sidelight Books, 2015). Learn more about national parks as photography destinations, subscribe to Chris' free e-newsletter, and more at www.PhotographingNationalParks.com.

UPCOMING WORKSHOPS FROM NATIONAL PARKS AT NIGHT

Five Questions: Flashlights, Big Bend, Fireflies and More

Once again, weโ€™re ready to take a swing at the questions you pitch. This installment of our โ€œFive Questionsโ€ series features inquiries about light painting tools, built-in timers, hot parks, dewy lenses and bright bugs. If that all seems fuzzy, read on and it will all come into focus.

If you have any questions you would like to throw our way, please contact us anytime. Questions could be about gear, national parks or other photo locations, post-processing techniques, field etiquette, or anything else related to night photography. #SeizeTheNight!

1. Shedding Light on Coast

The Twins, Capitol Reef National Park. Nikon D750, Zeiss Distagon 15mm f/2.8, Coast HP7R flashlight. 26 seconds, f/3.2, ISO 6400. ยฉ 2018 Matt Hill.

Q: Can you tell me what you like in particular about Coast flashlights? Other than sturdy durability, which seems obvious. Are the beams adjustable? The couple of times Iโ€™ve fooled around with light painting, I found it was difficult to be exact with what I had. โ€” Therese I.

A: You hit it the nail on the head. The Coast flashlights feature an adjustable zoom optic. At its widest, it is an even illumination with a crisp edge. This is fantastic for slowly illuminating a large area evenly. At its narrowest, it is very intense with a rapid falloff from center to edge. This is ideal for lighting something distant.

We often add a Light Painting Brushes Universal Connector as a snoot for very small detail work, or we cup our hands around the end and squeeze open a small crack for fine lighting work. On top of that, Coast lights are waterproof and the rechargeable versions have long-lasting batteries you can charge via USB.

The only downside is that the color temperature of Coast lights is kind of cool for night photography work. But a small CTO gel fixes that. Warms it right up. (You can read more about this in Tim Cooperโ€™s blog post โ€œLevel Up With Light Painting: Correcting the Color of Your Flashlight.โ€)

Light painting is part science and part art. Exact is something you obtain only after thousands of hours of practice. And even then itโ€™s generous to call the craft exact. โ€” Matt

2. Built-In Intervalometers

Q. I just got a Fuji X-T2 and I have a question. Do I still need an intervalometer? Thereโ€™s one built in, so Iโ€™m not sure if I need another. โ€” Anne K.

A: Generally speaking, the built-in intervalometers are more complex to use than an external intervalometer. Thereโ€™s also the issue that in many cameras, the length of the shutter speed is limited (often to a maximum of 30 seconds) with the internal option. Not ideal for long-exposure work.

However, with the X-T2 in particular, Iโ€™ve used the built-in intervalometer with star stacks and had no problem. The built-in shutter speeds for that camera (with the latest firmware upgrade) go to 1 minute, 2 minutes, 4 minutes, 8 minutes, 15 minutes! Itโ€™s awesome. If you are comfortable with the internal option, then go for it! If not, nothing wrong with using an external option. โ€” Chris & Tim

3. Big Bend in Summer

Agave on the South Rim, Big Bend National Park. Nikon D850, Nikon 14-24mm f/2.8. 2 minutes, f/5, ISO 1000. Light painted with a Coast HP7R. ยฉ 2018 Chris Nicholson.

Q: I noticed you havenโ€™t offered a workshop at Big Bend last year or this year. I am headed there this summer in hopes of photographing the Milky Way and other nighttime objects under a new moon sky. Do you not offer workshops there because the location just isnโ€™t that great? Iโ€™m wondering if youโ€™d turn me on to any spots that are preferred for astro-landscape photography. โ€” Alison C.

A: Itโ€™s not that we donโ€™t offer a workshop in Big Bend, just that we havenโ€™t yet. I can assure you that this Texas park is amazing for photography, day or night.

However, as for your trip, not to dissuade you, but summer is an incredibly uncomfortable time of year to be in Big Bend. Thereโ€™s always a chance that youโ€™ll catch a break with the weather, but generally summer there is stifling and unbearable. Moreover, that same heat at night will likely create considerable long exposure noise in your Milky Way photos. Iโ€™d avoid any exposures over 30 seconds or so (depending on your camera), and Iโ€™d certainly use Long Exposure Noise Reduction.

As for locations, probably the best in the park is the South Rim, but I wouldn't advise hiking out there in summer. There are a lot of fantastic spots accessible via the primitive roads, but again, I canโ€™t advise venturing out those ways at this time of year, because of safety in the extreme heat should the car break down or get a flat tire.

However, you can find plenty of great spots to photograph that are closer to the safety of the main roads. I would definitely check out the Chisos Basin and Santa Elena Canyon, and you can find interesting ruins in the surrounding towns that are good for light painting.

No matter where you go, always have a good supply of extra water in the carโ€”not just enough to drink for the shoot duration, but enough to drink in desert heat should you run into car issues. Have I mentioned this place is hot in summer? โ€” Chris

4. Aurora and Condensation

Aurora, Westfjords, Iceland. Nikon D750. ยฉ Lance Keimig.

Aurora, Westfjords, Iceland. Nikon D750. ยฉ Lance Keimig.

Q: Iโ€™ve taken an interest in nighttime photography in Canada to capture the aurora. It appears to my eyes to be just a white glow (only my rods are sensing the light), but when I take the photo, voila, it is green! One of the main problems Iโ€™ve hadโ€”both in Yellowknife, Northwest Territories, in February (-24 C), and in Ontario in Septemberโ€”is condensation on my lens or filter as the camera cools off. I recently purchased a wrap-around lens heater, and am excited to try it in Ontario this August during the Perseids meteor shower. โ€” Gil J.

A: Yes, faint aurora can be hard to differentiate from plain old clouds sometimes, which is why using an app like Aurora Forecast can give you a heads-up to be on the lookout.

As for lens wraps for condensation, they can make the difference between the end of your night and a killer shot. Once the temperature reaches the dew point, condensation can form quickly. Iโ€™ve been in situations where I had to wipe the lens mid-exposure, which can introduce all sorts of problems. For a DIY version, Iโ€™ve cut a beer koozie so it can wrap around the lens, and put a chemical hand warmer inside. Sometimes even a hand warmer with a rubber band to hold it to the lens will work in a pinch! โ€” Lance

5. Fireflies

Fireflies in Cuyahoga Valley National Park. Nikon D3s, Nikon 24-70mm f/2.8. 90 seconds, f/2.8, ISO 1600. ยฉ 2018 Chris Nicholson.

Q: I have a pressing summer question: How does one photograph fireflies? Iโ€™ve seen them and I want to try it! โ€” Susanne H.

A: Thatโ€™s a fun question, and definitely a fun thing to do. Weโ€™re about to start our workshop on the Blue Ridge Parkway, and weโ€™re hoping to see some fireflies on those mountain nights!

I recommend a few strategies:

  • Get into into a dark, wooded area, or at the edge of one, that has lots of firefly activity.
  • Focus on the closest trees or a solid subject.
  • Use a fast telephoto lens, like a 70-200mm f/2.8, so that you can zoom into the area of activity and concentrate a bunch of fireflies in the frame. I was recently trying with a wide-angle lens and didnโ€™t get any good results.
  • Shoot wide open to collect all the light.
  • To really maximize the effect, shoot a lot of frames and stack them in Photoshop (using the Lighten blend mode, just like we do for star stacking).

Have fun and please share your results in the Comment section! โ€” Gabe

Chris Nicholson is a partner and workshop leader with National Parks at Night, and author of Photographing National Parks (Sidelight Books, 2015). Learn more about national parks as photography destinations, subscribe to Chris' free e-newsletter, and more at www.PhotographingNationalParks.com.

UPCOMING WORKSHOPS FROM NATIONAL PARKS AT NIGHT

Five Questions: Moon Lenses, Smoky Summer Landscapes, Noise Tests and More

We get a lot of questions. We hope we have a lot of answers. Today, at least, we have the same number of each. Five, to be specific. Five questions from night photographers just like you, and five answers from the five of us.

If you have any questions you would like to throw our way for a future โ€œFive Questionsโ€ blog post, please contact us anytime. Questions could be about gear, national parks or other photo locations, post-processing techniques, field etiquette, or anything else related to night photography. #SeizeTheNight!

1. Moon Lenses

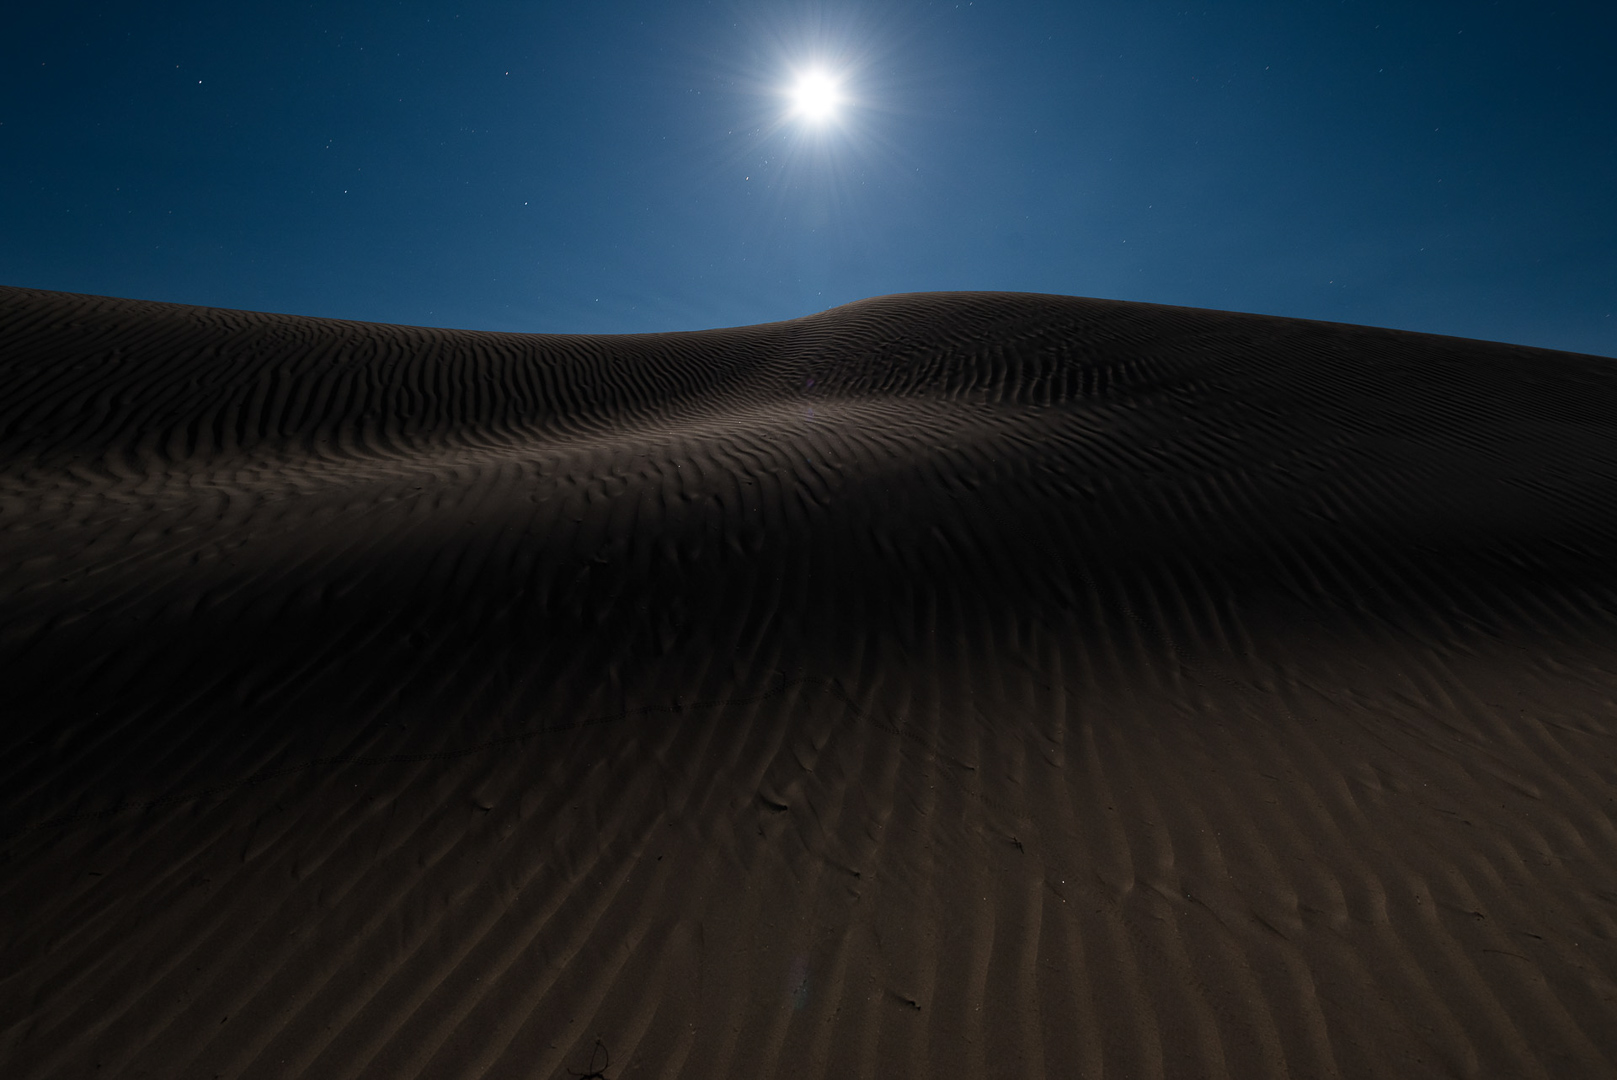
The moon rising over Mesquite Flat Dunes, Death Valley National Park. Nikon D750, Tamron 15-30mm f/2.8. Dunes light painted with a Coast HP5R flashlight. ยฉ 2016 Lance Keimig.

The moon rising over Mesquite Flat Dunes, Death Valley National Park. Nikon D750, Tamron 15-30mm f/2.8. Dunes light painted with a Coast HP5R flashlight. ยฉ 2016 Lance Keimig.

Q: I wanted to get a shot of the recent super blue moon full lunar eclipse, but I wasnโ€™t sure which lens would be a good one to use. I wanted to get the moon as part of the landscape, with an in-camera shot (rather than just a zoomed shot of the moon). It would have been OK if the moon wasnโ€™t super huge in my shotโ€”I just wanted a nice overall image. This was with my Nikon D750, and I have a 70-200mm lens. For the next time, should I rent something zoomier (a 200-500mm)?  โ€” Tracy W.B.

A: Lens choice questions are really hard to answer. So much depends on the shot that you have in mind. We recommend using PhotoPills (see their website or in-app links for tutorials and ideas) to plan your shot if you have a location in mind, and then plan your strategy from there. If you donโ€™t have a specific location in mind, then start by thinking about places you could shoot with a good view of the moonrise, figure out exactly where the moonrise will be using PhotoPills, and do some test shots beforehand to see which focal length will work best.

You shouldnโ€™t need to rent a lens since you donโ€™t have a specific shot in mind. Instead, build a shot around the lens you already have! โ€” Lance

2. Cords vs. L-Brackets

Q: When I shoot in portrait orientation with my L-bracket on, I have the problem of not having access to my USB port to connect a remote release, since it is on the left side of the camera where the mounting bracket also is. Do you know of a way to solve that issue? โ€” Michael M.

Custom-designed L-brackets (such as the Kirk model for the Nikon D750, pictured here) allow the photographer to access all the jacks, ports, controls and so on.

A: I love that youโ€™re using an L-bracket! I could barely survive on a shoot without mine. But yes, I understand your issue, as itโ€™s one Iโ€™ve had.

First, if youโ€™re using a generic L-bracket, that could certainly cause this issue. Generic models have the advantage of being less expensive. But the more-expensive custom models (such as those made by Really Right Stuff and Kirk Photo) are designed for specific camera bodies. One of the advantages is that space is left around each jack and port, so you should have ready access to plug in anything you want.

However, that doesnโ€™t mean you canโ€™t still run into problems. For instance, on my Nikon D3s with the Kirk L-bracket attached, I canโ€™t connect a proprietary power cable to an external battery because of the way the plug is designed. Another example is exactly whatโ€™s happening to you: Plugs that stick straight out from the jack (rather than at a right angle) might not work when the L-bracket is mounted to a tripod head vertically (which kinda defeats the reason for using the bracket).

I suggest contacting the manufacturer of the accessory youโ€™re trying to plug in and asking if they can supply or recommend an alternative cable. Or, if the accessory is the cable, only buy one with that right-angle-type connector.

Ironically enough, this could also be a case where a generic L-bracket could serve you better; one thatโ€™s designed a little taller than your camera could allow enough space to mount the vertically oriented body off-center, providing room for your connector underneath, out of the way of the tripod head. โ€” Chris

3. Wildfires and Smoke in the Northwest U.S.

Q: My experience living in the Pacific Northwest is that, over the past four to five summers, forest fires in Washington, Oregon, Idaho, Montana and British Columbia have produced serious haze conditions for both day and night photography in July, August and September. Youโ€™re doing a workshop in Glacier National Park this summer. How would you adjust shooting for this possibility? โ€” Dave E.

A: Yes, the past couple of years have been kind of smoky up here! I live in Montana, so I know what you mean.

However, I have been visiting Glacier National Park in summer for over 20 years and have been unable to make images only a couple of times. The images below are from last summer during the height of the fire season and during the infamous Sprague Fire in Glacier that burned down the Sperry Chalet. (Which, incidentally, is being rebuilt!)

Night photos in Glacier National Park during the 2017 Sprague Fire. Nikon D4s. ยฉ 2017 Tim Cooper.

Thatโ€™s not to say there is no risk, but wind conditions, locations of fires, etc., play such a big part. Itโ€™s really hard to guess when fires will happen and when they will inhibit photography.

That being said, if I did run into an abundance of smoke, I would be looking all over the park and surrounding areas for clearer skies. All of us at National Parks at Night love light painting, full-moon shooting and all types of night photography. Shooting the Milky Way and star trails is just one part of what we focus on, so smoke certainly wouldnโ€™t make us pack up the cameras for the night. Iโ€™ve been in many situations where the skies were overcast and the image-making was great due to other aspects of the scene. โ€” Tim

4. Intervalometers for Fuji X-T Bodies

Q: I recently attended one of Mattโ€™s speaking engagements and it definitely sparked an interest to experiment with some night photography in the coming months. I have a Fuji X-T2 kit that includes a 10-24mm lens, along with a nice stable tripod. Iโ€™m planning to purchase an intervalometer cable release next week. Have you used a wired or wireless intervalometer shutter release with an X-T2 with success? โ€” Elliot R.

A: Yup. There are two intervalometers that I find work well with the X-T2. For a wired model, I recommend the Vello ShutterBoss II (ignore that it says itโ€™s for Canonโ€”it also works with your Fuji!). For wireless, I recommend (surprise!) the Vello Wireless ShutterBoss II.

I use the wired model all the time with my X-T1 for time-lapses. Gabe uses an X-T2 with the same wired release.

However, before choosing, I do recommend considering the pros and cons of a wired versus wireless intervalometer. See my 2017 blog post โ€œRemote Question: Wireless or Wired Intervalometers for Camera Triggering?โ€ โ€” Matt

5. Noise With Varying-Quality Cameras

A side-by-side comparison of ISO 100 (left) and ISO 51,200 (right) images from a camera noise test.

Q: In the descriptions of your workshops you say to know your DSLR or high-end mirrorless, but Iโ€™m not sure what is considered โ€œhigh-end.โ€ I have a Sony Alpha a6000. I have tried a few times doing night photography using that with a Samyang 12mm f/2. I also see you guys mention full-frame; how important is full-frame versus crop sensor when doing night photography? I have seen amazing night photography pictures using the Sony a6000. โ€” Kylee W.

A: While there are plenty of crop-sensor cameras that do well with night photography, I have found the a6000 and a6300 get rather noisy with long exposures. But everything is definitely subjective, and my tolerance for noise might be less than yours. The best advice I would offer is to test your camera, figure out how noisy it gets and establish your own parameters. You can run this test either in the field or in the comfort of your home.

Take a picture of something that has shadows in it (because noise appears in the shadow areas first). Put your camera on a tripod and take a series of shots at ISOs of 1600, 3200, 6400, etc.

Then (and, for this, you might have to turn your lights low and stop down your ISO and apertures), do a series of images at various shutter speeds: 15 seconds, 30 seconds, 1 minute, 2 minutes. ... Keep doubling your time and adjust your ISO and apertures (or lighting), and end at somewhere around 8 minutes.

Do these tests with your cameraโ€™s noise reduction features off, and then again with the noise reduction features on. See if that makes a difference.

Download the images to your computer and inspect them at 100 percent. Look for two things:

  1. When your image gets too grainy for your taste, that is the ISO that you will want to avoid.
  2. In your long-exposure images, look for red, purple and other colored specks. That is color noise from the long exposures. Again, determine the ISO at which that becomes unacceptable to you.

This test will help you establish the parameters in which you can successfully operate your camera (according to your own tastes) with both the high ISOs and the long shutter speeds that are needed for most night photography.

If youโ€™d like to see a more detailed rundown on how to perform a high ISO test, along with sample images, see our 2016 blog post โ€œKeep The Noise Down: How To Take An ISO Test With Your Camera.โ€ โ€” Gabriel

Chris Nicholson is a partner and workshop leader with National Parks at Night, and author of Photographing National Parks (Sidelight Books, 2015). Learn more about national parks as photography destinations, subscribe to Chris' free e-newsletter, and more at www.PhotographingNationalParks.com.

UPCOMING WORKSHOPS FROM NATIONAL PARKS AT NIGHT

Five Questions: Meteor Showers, Pano Stitching, and Lots and Lots of Gear

Welcome again to the National Parks at Night Q&A, where we share some of the great questions weโ€™ve received via email. This time around we're featuring Qโ€™s and Aโ€™s about post-producing meteor shower photos, advice about five different camera systems, pano vignetting and wide-angle lens choice from the Nikon world.

If you have any questions you would would like to throw our way, contact us anytime! Questions could be about gear, national parks or other photo locations, post-processing techniques, field etiquette, or anything else related to night photography. #SeizeTheNight!

1. Meteor Showers Post-Production

Great Sand Dunes National Park, Colorado. Nikon D750, 15mm Zeiss Distagon f/2.8 lens. 234 images at 22 seconds, f/2.8, ISO 6400, plus a single exposure at 382 seconds, ISO 2000 for the landscape after moonrise. Photo ยฉ 2017 Matt Hill.

Q: Regarding your recent blog post โ€œMeteors and Eclipses and Comets, Oh My!โ€”The Celestial Events of 2018,โ€ one of the spectacular photos that has me asking โ€œHow did he do that?โ€ the loudest is Mattโ€™s photo of the meteor shower in Great Sand Dunes National Park.

As a novice to post-processing, I can only assume that the 234 photos were somehow aligned so that the stars did not turn into trails, while ignoring the meteor shower streaks that were not in the all of the other frames, and then overlaying or merging in the foreground. Is that an oversimplification? โ€” Rex

A: We are planning an in-depth post about this exact technique that will run this summer. But Iโ€™m happy to give you a light preview that should answer your question. The heart of the technique is this:

I used PhotoPills to scout the shot. It was also my fourth visit to Great Sand Dunes, and my second during the Pereid Meteor Shower (the first time I totally botched it!). This time I approached it with better planning (and with better physical conditioningโ€”those dunes are difficult to climb!). From PhotoPills, I knew that astronomical twilight ended at a certain time and the moon rose at a certain time. The latter was important because I knew that the dunes just donโ€™t look right without a little sidelight.

I set up my shot, started the sequence of exposures and waited patiently for moonrise. Others in our group who didnโ€™t wait for the moon to side-light the landscape have radically different foregrounds in their final images, with less detail and muddy shadows. But I understand their hesitance to stay out so late; honestly, I would have light painted the dunes instead if the descent and subsequent ascent wasnโ€™t so difficult. Besides, I was enjoying the showโ€”lots of meteors all over the sky that evening.

When it came to post-processing, I was deeply inspired by David Kinghamโ€™s generous video from a few years ago. An even better explanation that you can hold in your hand is available courtesy of my National Parks at Night colleague Lance Keimig, who has a full description of the technique in his book Night Photography and Light Paintingโ€”Finding Your Way in the Dark (on pages 114 to 119).

I used a very similar technique to isolate the meteors with layer masking in Photoshop, and rotated those layers to align with the stars in the base image layer. (Another option is to use Starry Landscape Stacker.) I then layered in that moonlit foreground, performed some minor tweaking, and voila!

(You can also see my sequence of images rendered as a time-lapse on our Instagram account.)

So, in short, your guess about the technique is in part not oversimplified, but in part is. Watching the video, reading Lanceโ€™s book and waiting for our summer blog post will all help to clarify this in-some-ways simple yet in-some-ways complex technique that is, either way, tremendously rewarding.

Also, we are planning a one-night event during the Perseids this yearโ€”to be announced. Stay tuned for details! โ€” Matt

2. Full-frame Camera for Milky Way Photography

Q: In one of your blog posts (by Lance Keimig, I believe), a comment was made about full-frame cameras being best for star and/or Milky Way photos. In the same post it was mentioned that most of the newer full-frame cameras should be able to handle ISOs in the 3200 to 6400 range. My question is: How new?

I am looking to upgrade from a crop-sensor to a full-frame DSLR in the Nikon series. The D810 is way out of my price range, but I am thinking about the D610, or possibly the D750 if I can get a great deal on a used model. Would the D610, which entered the market in 2013, handle the 3200 to 6400 ISO range well, or should I really focus on trying to find a D750 in my price range? โ€” Larry G.

A: I would strongly recommend going for the D750. It is without a doubt the best value in DSLRs for night and astro-landscape photography. If you want a minimal kit, consider adding a Tamron 15-30mm f/2.8 lens, and that will be pretty much all you need, provided that you already have a decent tripod. The D610 is OK, but the D750 is stellar! โ€” Lance

3. Pano Vignetting

Milky Way pano over Montana. Seven stitched images shot at 30 seconds, f/4, ISO 6400. Nikon D750 with Nikkor 14-24mm f/2.8 lens at 14mm. Photo ยฉ Gabriel Biderman.

Q: In shooting panos of the Milky Way and sunrises, etc., Iโ€™m having vignetting issues in Lightroom. When stitching, it creates vertical darker areas at the overlap portions of pano. Do you guys use third-party software to make night panos, or do you use Lightroom and Photoshop? โ€” Steve W.

A: We are big fans of panorama night photography, but it definitely has its challenges.

While I have not noticed a heavy vignette in any of my panos, you might want to make sure you are applying your lens corrections prior to stitching. We generally work on all the individual images and correct them before stitching in Lightroom. Wider lenses definitely vignette more, especially when shooting wide open.

Lightroom and Photoshop do a pretty good job at single-row panos, but they can struggle with double-row and low-contrast scenes. Iโ€™ve just started playing with Autoan, which lets you take more manual control over your stitching. We will definitely be bringing this topic to our blog in the next few months as we do more testing and stitching! โ€” Gabe

4. Canon, Phase One, Sony Options for Night Photography

Q: In building a kit for astro-landscape photography, do you know about the results from the Canon 5D as well as the 50-megapixel Canon camera? How about the Phase One IQ3 100-megapixel system? I have also heard the Sony system is great for astro-landscape images. โ€” Jeannine H.

A: For astro-landscape photography, the best Canon cameras would be, in order of preference:

The 5DS and 5DS R are not built for high ISO or high dynamic range imaging, and as such are not well-suited for astro-landscape photography.

In terms of value, the 6D will by far get you the most for your money, but it is also an older camera that should be replaced soon. The next best value would be the 5D Mark IV. The minimal quality gain from the 1D X is not worth the extra money or weight in your bag. If you were stuck on Canon, Iโ€™d go for the 5D Mark IV.

As for the Phase One, in general, I have not been impressed by the high ISO performance of any of the medium format cameras, and the return on investment is definitely not there for night photography.

Regarding Sony, the a7S II and a7R II perform very well in low light and at high ISOs, and the live view in low light is great. However, I find the menu navigation is so awkward that it makes the cameras burdensome to use. (But it should be noted that learning menu structures from brand to brand tends to be like learning a languageโ€”the first you learn is the easiest, and everything after seems foreign.)

At National Parks at Night, most of us use the Nikon D750 at least part-time, if not full-time. Itโ€™s a great all-around camera, and a great value. The D750 and D850 outperform all of the Canons.

Another viable option you didnโ€™t ask about is Pentax. The Pentax K1 combined with the 15-30mm f/2.8 lens is an outstanding value and is excellent for night photography. โ€” Lance

5. Nikon Wides vs. Wide Zoom

Q: What is the advantage of the Nikon 14-24mm f/2.8 at $1,900 versus, say, their 24mm f/1.4 at about the same price? Thereโ€™s more flexibility with the zoom, of course, but the f/1.4 is two full f-stops better. In night shooting, I guess that is really significant. But canโ€™t you just increase the exposure time (leaving ISO alone) to compensate for the slower lens and obtain the same result? It seems the 14-24mm would be more useful presuming that f/2.8 will get the shot. Also, is there much difference in f/1.4 (24mm) versus f/1.8 (20mm) besides $1,200? โ€” B.R.

A: Lots to consider here! But first, allow me to point out a misconception in your premise: You canโ€™t just increase the exposure time and get the same results. Why? Because stars move. A 15-second exposure at f/1.4 would become (while leaving ISO alone, as you indicated) a 1-minute exposure at f/2.8; the former would likely produce sharp star points, while the latter would produce short star trails.

Now, on to the crux of your question: Why would we choose the slower 14-24mm over the faster 24mm f/1.4 or 20mm f/1.8?

Rocky Mountain National Park, Colorado. Nikon D810 and 14-24mm f/2.8. 15 seconds, f/2.8, ISO 6400. Photo ยฉ 2017 Chris Nicholson.

Yes, a wider aperture will allow you to expose with a faster shutter speed, which is important if you want to shoot a sharp Milky Way or star points, rather than longer exposures that create star trails. For example, say weโ€™re shooting at a focal length of 20mm on a standard-size full-frame camera. Using the relatively accurate 400 Rule, weโ€™d know that our maximum shutter speed for keeping the stars as points is 20 seconds. With that shutter speed on a new-moon night, at f/2.8 weโ€™d need to shoot at about ISO 6400 to get a correct exposure. Whereas if you could shoot at f/1.8โ€”an aperture 1 1/3 two stops widerโ€”you could use ISO 2500, resulting in less high ISO noise in the image. Shooting at f/1.4 would be even better, because you could get the same exposure at ISO 1600.

That makes it sound like we should always use the widest aperture (and thus the fastest lens) possible. The caveat, though, is that not all lenses are created equal. For our purposes, there are two main points to consider:

  • Many lenses are sharpest (in terms of focus) with the aperture closed down a couple of stops.

  • All lenses suffer from some degree of comatic aberration, otherwise known as "coma." This aberration can cause starsโ€”particularly those in the corners of the frameโ€”to appear distorted, looking like tiny comets or flying saucers when viewed at 100 percent.

That brings us back to your question about why we might recommend the Nikon 14-24mm over the 24mm f/1.4 or the 20mm f/1.8. The reason is because from our experience with those latter two lenses, they show very apparent coma when shot wide open; with both, you need to stop down to about f/2.8 to get the coma to a level we believe is acceptable by our image quality standards. However, the 14-24mm produces so little coma that you can shoot it wide open and get the same results.

So, if youโ€™d need to shoot those faster primes at f/2.8 anyway in order to get the same results as shooting the 14-24mm at f/2.8, then to us it makes sense to just use this fantastic wide-angle zoom instead and get the additional benefits of the variable focal lengths. โ€” Chris

Do you have a question the NPAN team might able to answer? Email us today!

Chris Nicholson is a partner and workshop leader with National Parks at Night, and author of Photographing National Parks (Sidelight Books, 2015). Learn more about national parks as photography destinations, subscribe to Chris' free e-newsletter, and more at www.PhotographingNationalParks.com.

UPCOMING WORKSHOPS FROM NATIONAL PARKS AT NIGHT