Note: This is the first in a two-part series about creating a Milky Way panorama. Part I, below, covers planning and shooting. Come back next weekend for Part II, in which Tim Cooper goes over how to put it all together in post.
We’re a little more than half way through “Milky Way Season”—the time of year when it’s easiest to see and photograph our galaxy. And there’s plenty of time left to shoot Milky Way panoramas—the technique that results in the iconic image of the galaxy arching from horizon to horizon (which I like to call “starbows”).
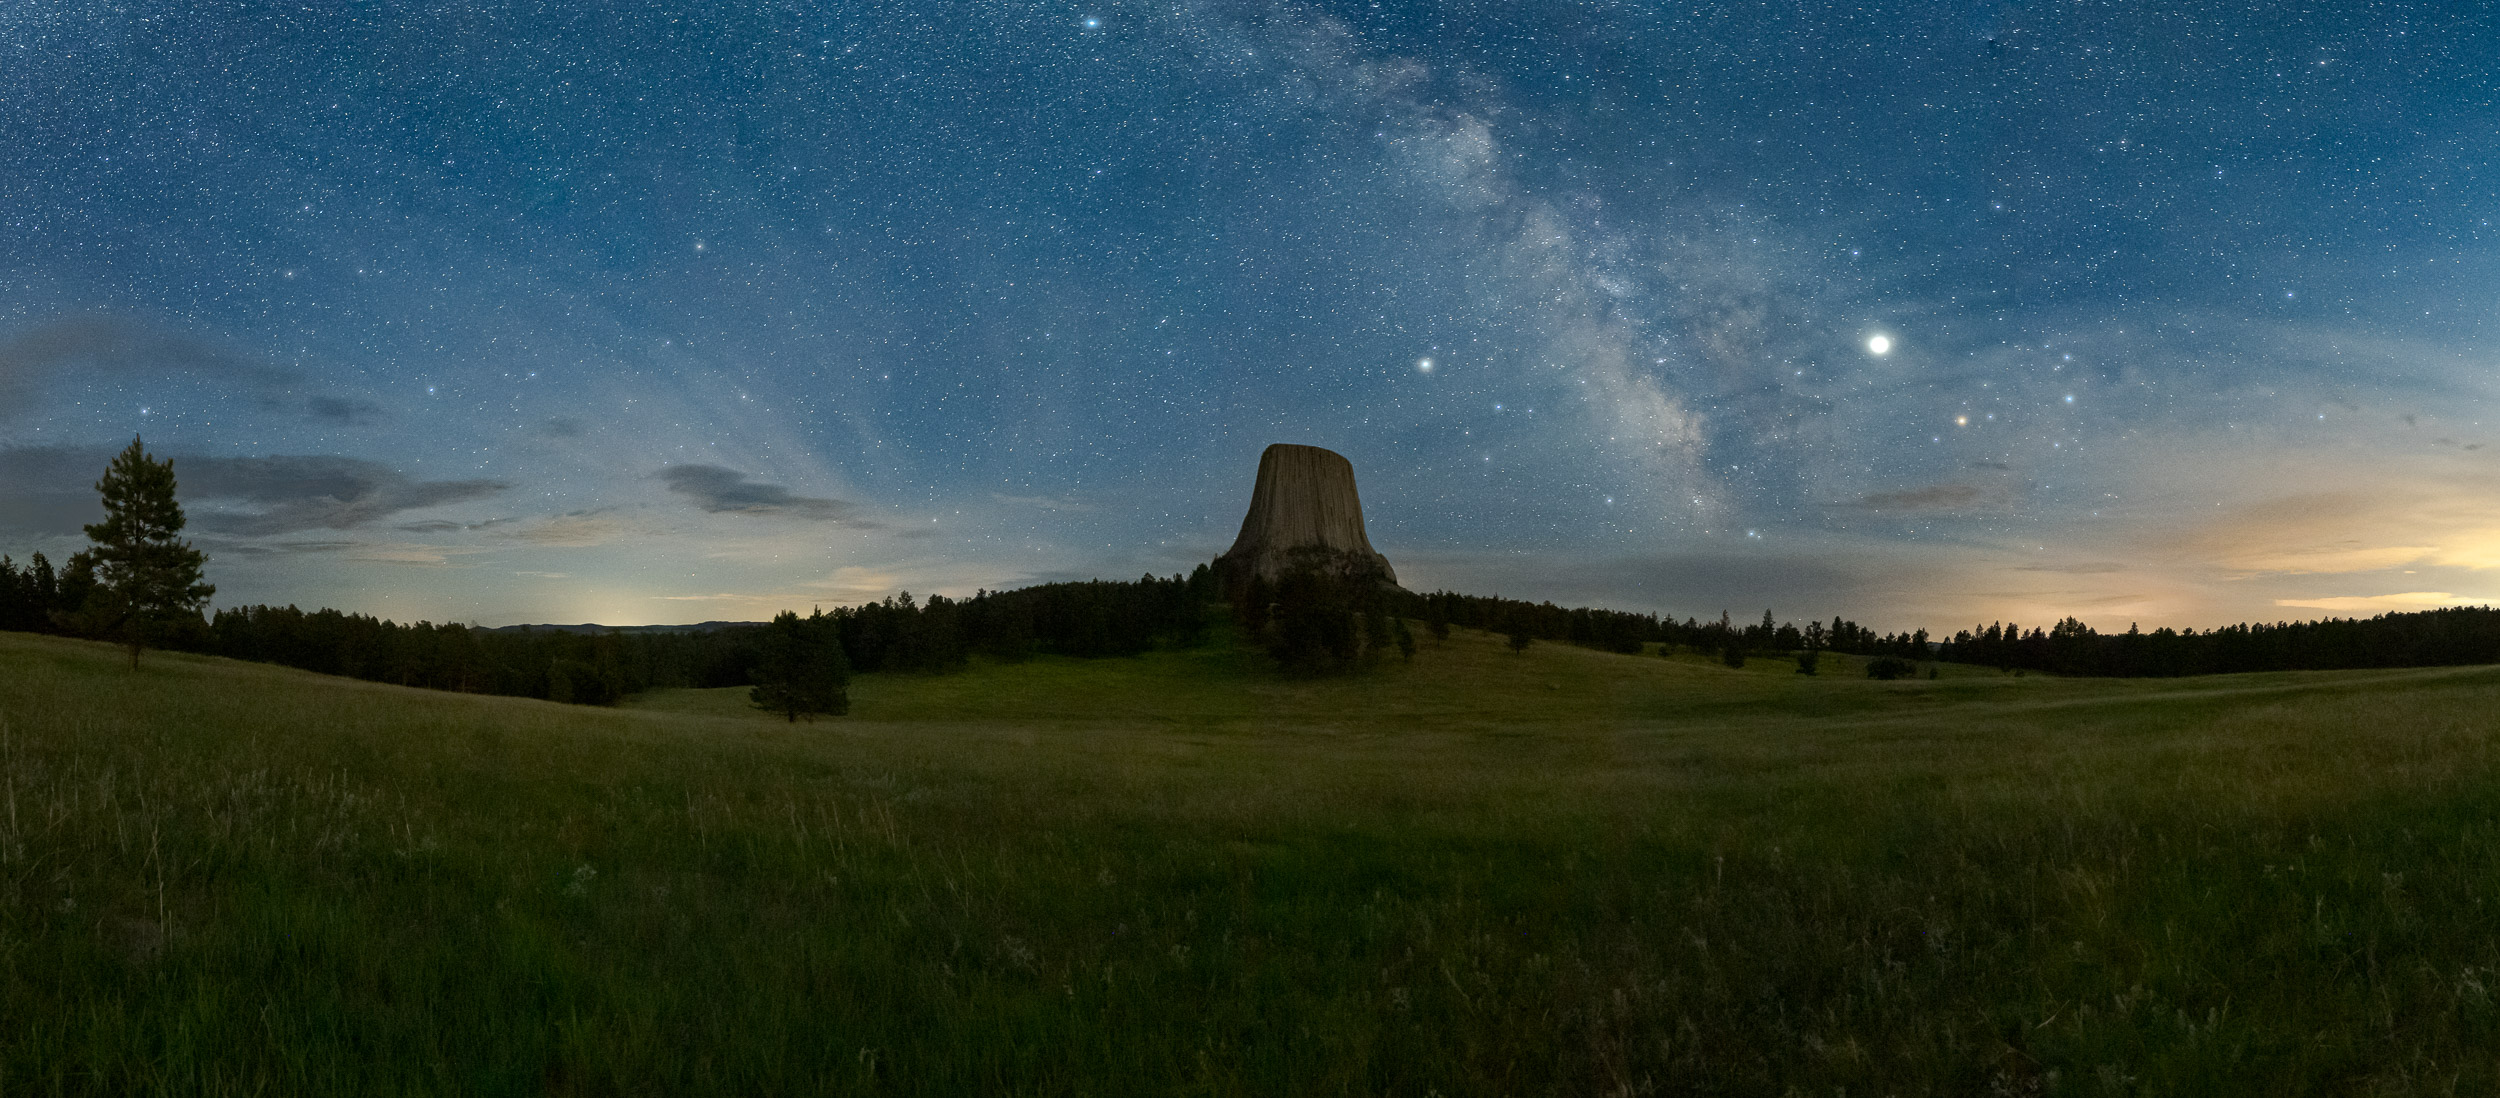
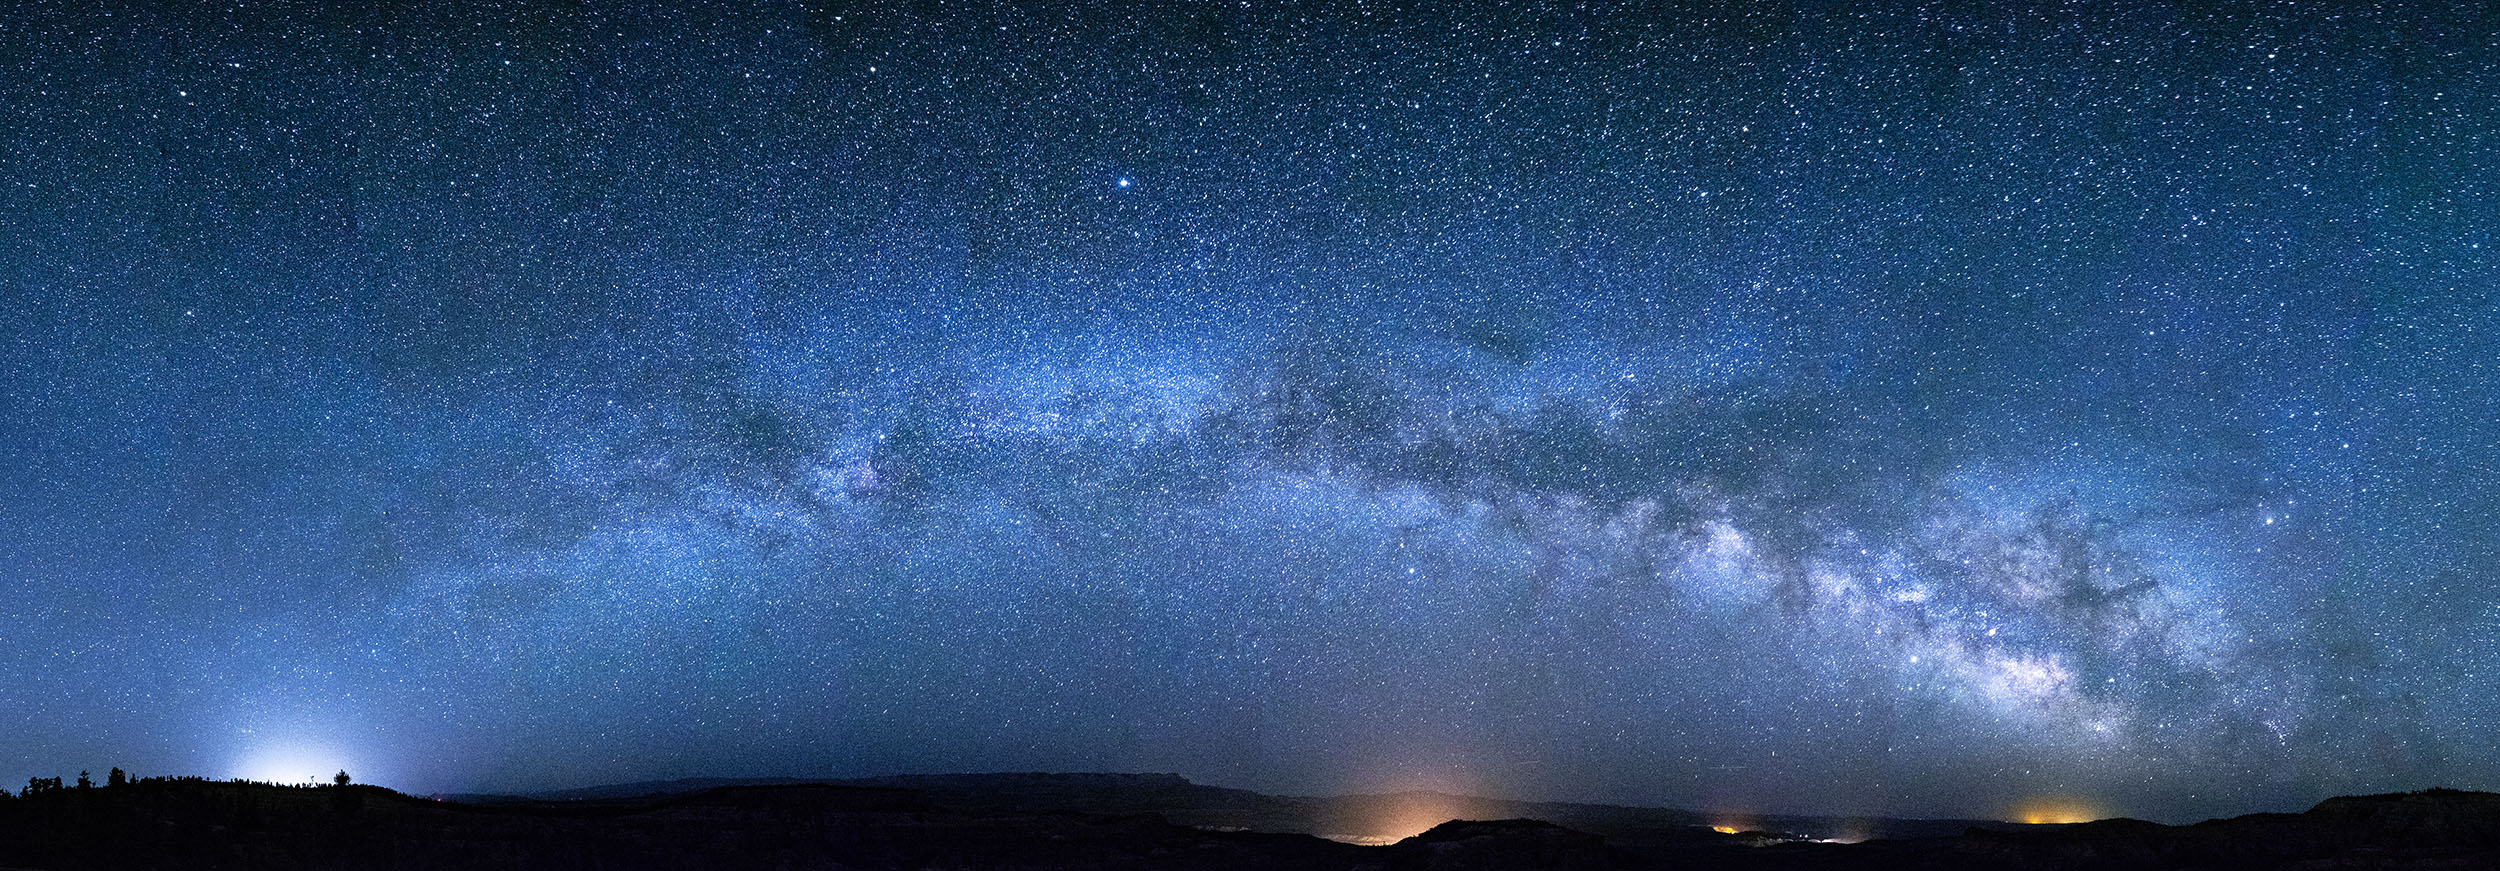
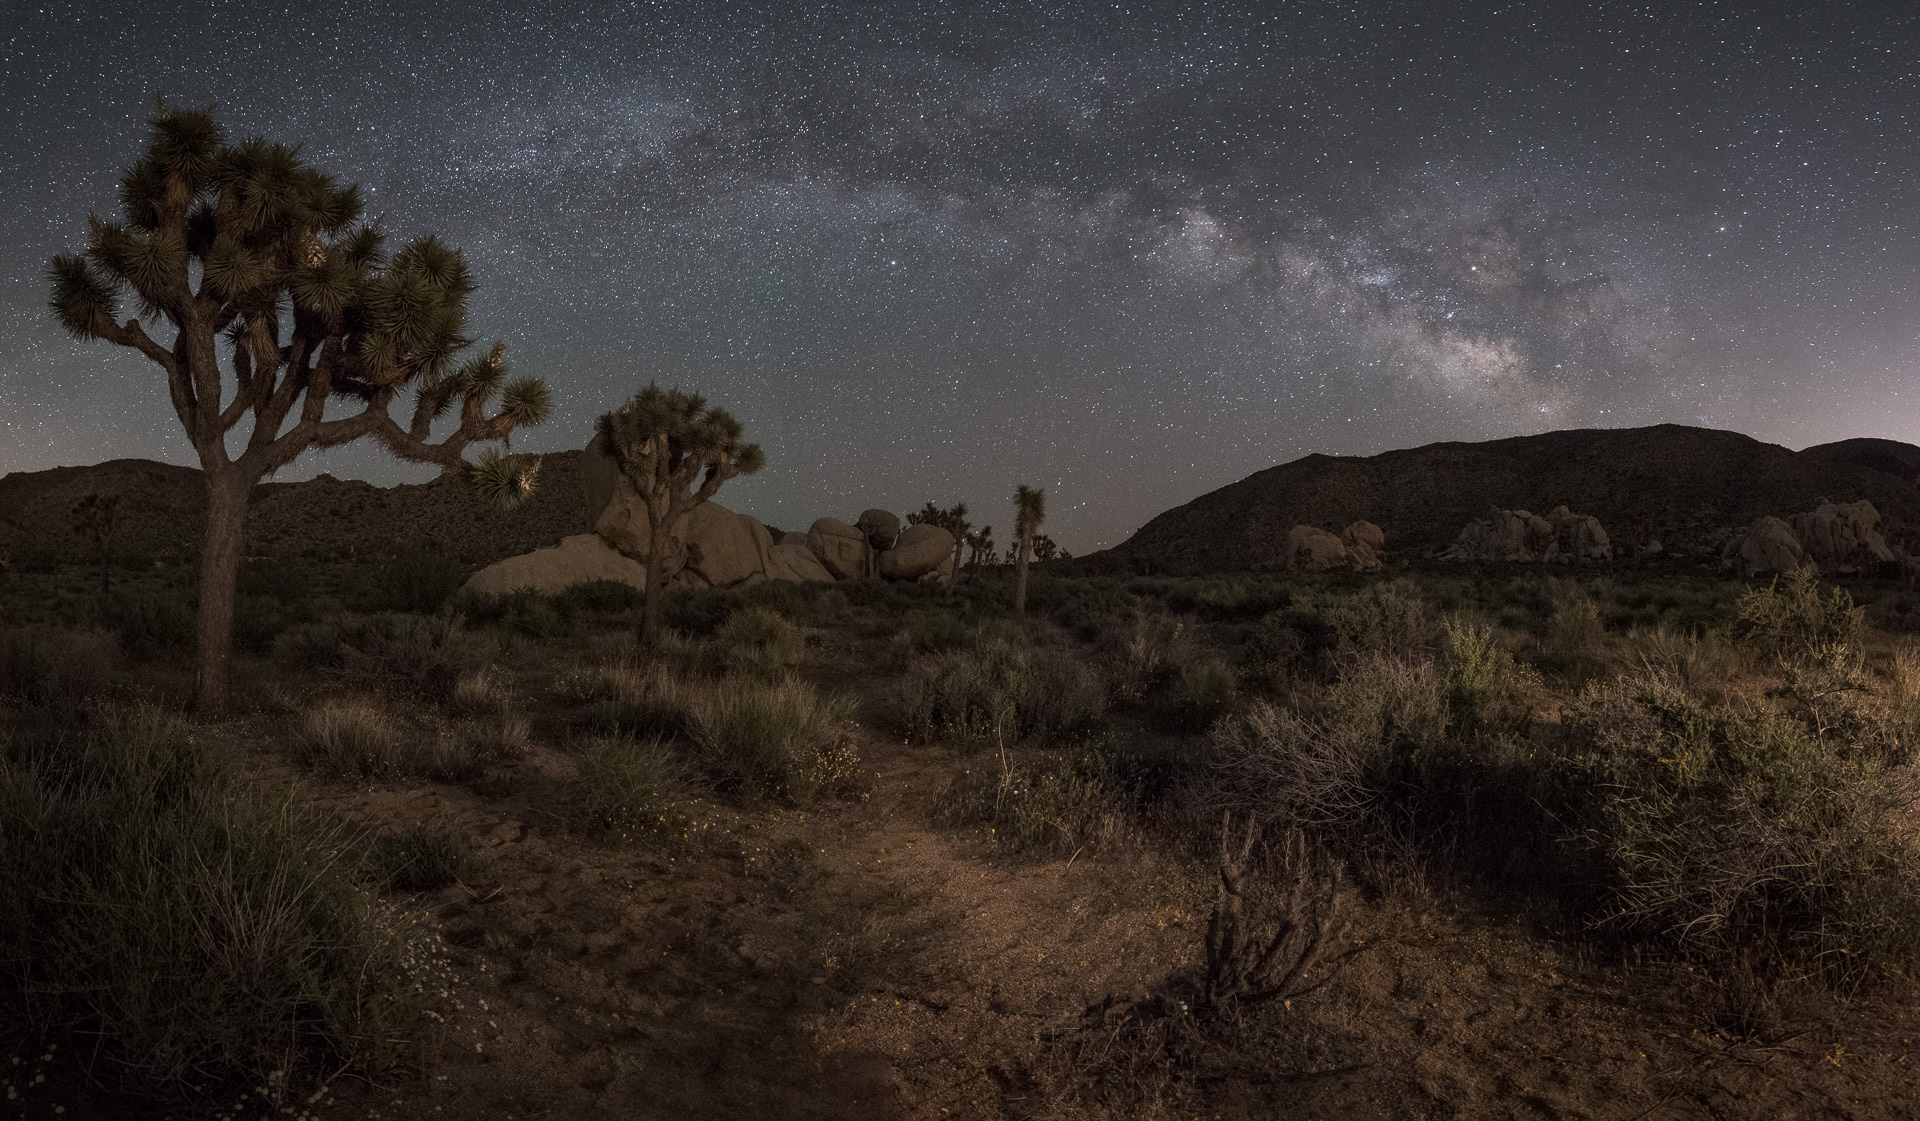
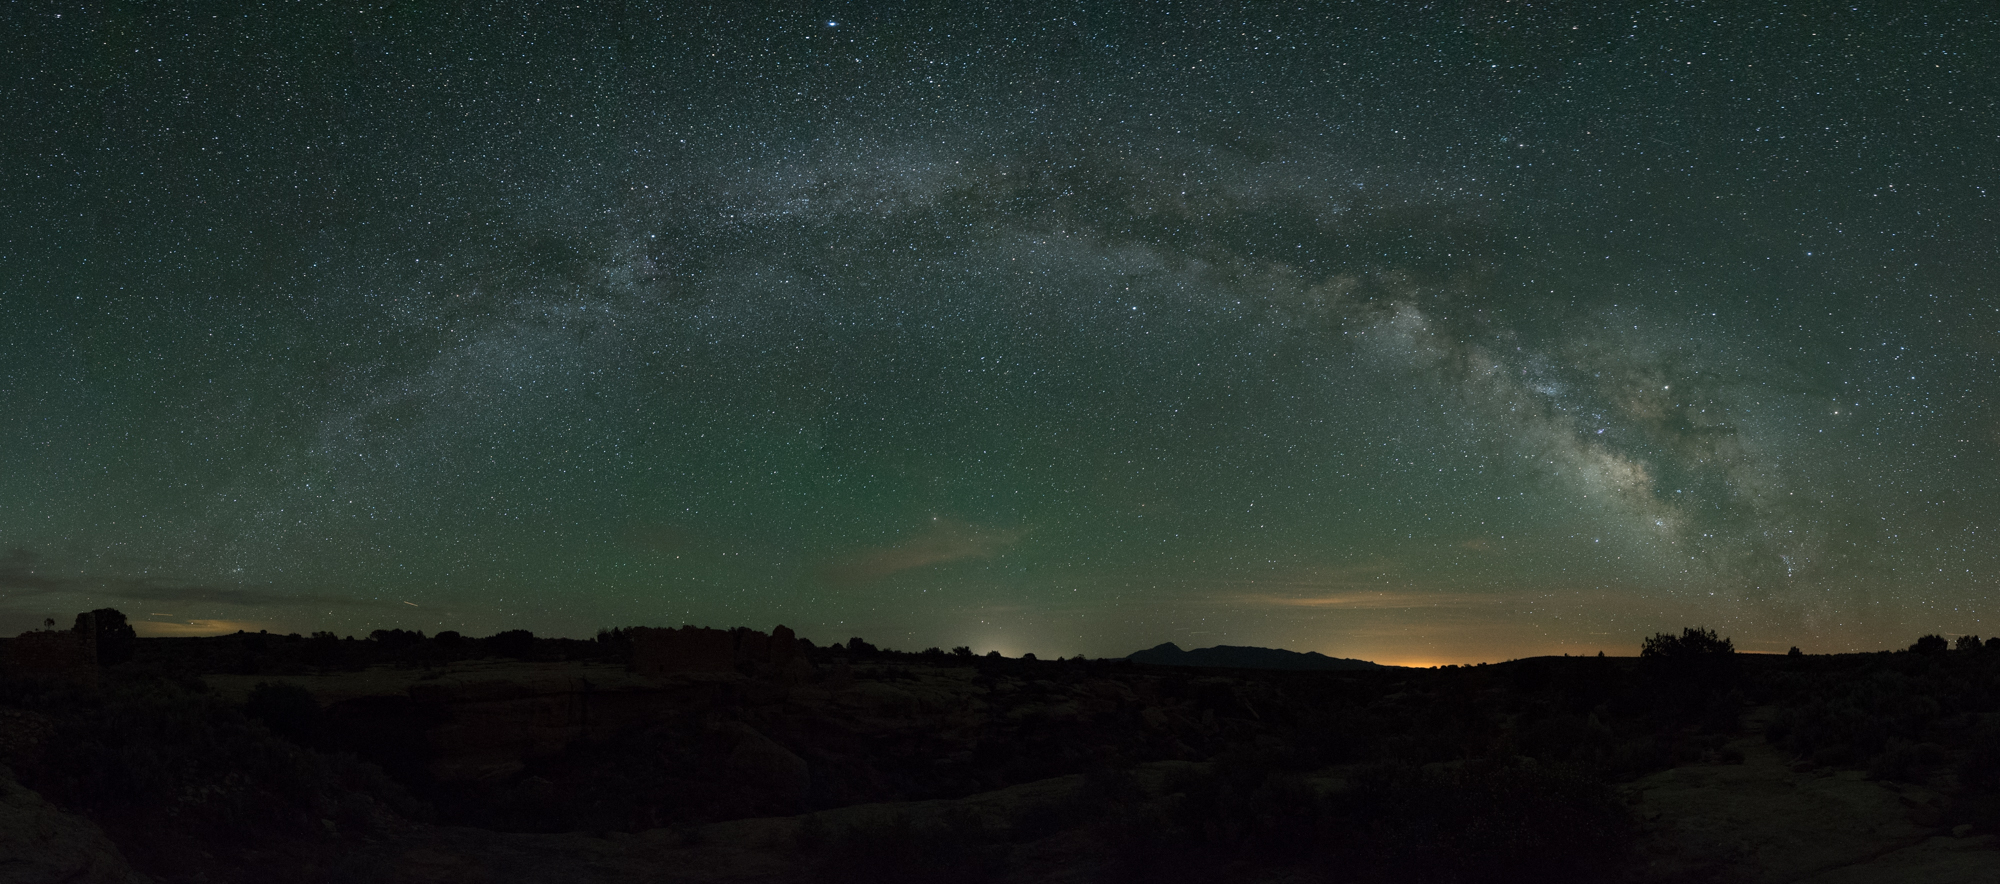
Here are a few examples from myself and my National Parks at Night partners:
This technique requires shooting multiple photographs, which means you’re creating a composition that will require stitching during post-processing.
Let’s walk through all the steps it takes to make a Milky Way panorama happen—from planning to scouting to gear to shooting—so that you can go forth and make your own!
When is the best time of year?
You can capture the Milky Way any time of year, but capturing the galactic core—the brightest and most notable portion—happens only at certain times of the year. The galactic core is what most people want to see and shoot. Similarly, you can see the arch of the Milky Way any time of year—it’s just without the core during certain months.
Furthermore, capturing an arch that spans from horizon to horizon, that includes the galactic core and that happens during nighttime—this all comes together during a limited window of the calendar. And this varies a bit depending on where you live.
Northern World
In the northern hemisphere, the galactic core can be photographed from the end of March to the beginning of October. Common wisdom is that “prime” viewing dates are late April to late July, because that’s when the galactic center is visible for longer during the night. But every season has disadvantages to be aware of:
In early spring the core rises very late—or early, depending on how you look at it—either way, well after midnight. Most people don’t want to stay up that late or get up that early.
In midsummer the core is technically above the horizon longer, but there are fewer hours of darkness to shoot in. Late sunsets = less night.
As of August the core is too high above the horizon to create panoramas with the longer range of wide angle lenses (e.g., 35mm), so you’ll be cornered into using the superwide family—think 15mm, 14mm, 11mm. (More on lens choice later.) You might even need to let the Milky Way arch out of the composition (see Chris’ Devils Tower pano above).
In September and early October the core is setting not terribly long after twilight ends—so again, not a lot of time to shoot.
Southern World
In the southern hemisphere, the galactic core is visible from February to the beginning of October. Between April and August are the best months to photograph the Milky Way because of the much longer nights, but the prime of that time falls in the middle of winter (brrrr).
For the rest of this article, I will focus on the Northern Hemisphere, where I spend most of my time. But the techniques apply to our southern night photographer friends as well.
For ideal lack-of-light conditions, consider shooting during the few days before and after new moon.
When is the ideal moon phase?
To best capture the delicate features of the Milky Way in all its glory, you ideally want to shoot when the moon is not lighting the sky. That means the four nights prior to or after the new moon.
But this poses a problem: Without moonlight, how do you illuminate the foreground?
Being an astro-landscape photographer, I want the people viewing my images to see context. So the landscape needs light. You can make a Milky Way pano image while the moon is present. But keep in mind, you will lose the dimmest of the stars to moonlight in the atmosphere. So I like to choose a time when the moon is 60 to 90 degrees away from the core—i.e., a crescent. And the dimmer, the better—around 20 percent is ideal, give or take.
If you shoot in complete darkness, to reveal the foreground, consider Low-level Landscape Lighting, traditional light painting, or making a second run of panoramic images at a longer exposure length and perhaps a lower ISO for more quality. (For more on that last option, see Gabe’s write-up about his Hovenweep photo.) Or … embrace the dark. Use silhouettes with intent. Darkness is OK if harnessed with skill.
Scouting
First, check your weather. I prefer the Weather Underground app, but use whatever works for you.
Weather Underground’s prediction for Bryce Canyon National Park. Looks great for night photography!
Choose someplace dark. Why? The Milky Way has a lot of subtle, faint parts, so give yourself the best chance for success by choosing a location away from light pollution. When shooting in Bryce Canyon with Tim Cooper this past June—specifically, in Fairyland Canyon, where we intended to make a pano—we knew we could expect great dark skies, because we had e-scouted the location with Light Pollution Map:
Light Pollution Map rendering of the Bryce Canon region.
I also love using the PhotoPills app to drop a pin and then scrub though which night is best. I look for when twilight is just ending, and the arc of the arch.
PhotoPills Planner view of the Fairyland Canyon pano.
Gear
In addition to a capable camera for night photography and an intervalometer, I recommend the following:
● good tripod (like my trusty Gitzo Traveler Series 2)
● panoramic leveling base (like my Acratech)
● good ball head (like my Acratech GP-ss)
● nodal rail (like my Acratech Nodal Rail)
● L bracket (like my Acratech Universal L Bracket)
● a lens focal length somewhere between 14mm and 50mm—preferably 20mm to 35mm, and preferably a prime lens
My Nikon Z 6 atop my Acratech Nodal Rail, atop my Acratech GP-ss ball head, atop my Acratech leveling base, atop my Gitzo Traveler Series 2.
Starting from the ground up:
Get your tripod legs spread wide. Get it tightened up and as stable as possible.
Mount the leveling base on the tripod legs. Level it. (If you don’t have a leveling base, then level the tripod itself using a built-in or external bubble level, adjusting each leg accordingly.)
Mount your ball head on top of the leveling base. Level that.
Mount your nodal rail to your ball head.
Secure your L bracket on your camera and mount the camera on the tripod in vertical position. (Vertical frames will give you more information to work with than horizontal frames will. Always shoot pano frames vertical.)
Mount your lens. Historically I used my Sigma 35mm f/1.4 Art lens for pano stitches. I find its flat field makes stitching easier with less overlap. But lately I’ve fallen in love with the Viltrox 20mm f/1.8, because it comes in a Nikon Z-mount and is crazy-easy to focus manually.
Attach your intervalometer.
Why the nodal rail?
If you have elements in your foreground that have to be stitched, using a nodal rail properly will eliminate parallax. That will make your pano stitching software very happy.
Essentially, to set up a nodal rail, you place something tall and skinny close to your camera, such as a street sign, lamp post or tree, or even another photographer’s tripod with the center column raised. Then rotate your pano base left and right, observing the item. Slide the nodal rail forward and backward until the test object doesn’t move left or right when you swing your camera. That’s the point at which you’ve eliminated parallax.
Camera Settings
OK, let’s lock down a few variables and settings to get the pano shot right.
Focus
If possible, focus during daytime and tape it down with gaffer tape. (Or, use other ways to get proper focus.)
Exposure
Now we are getting serious! You have to choose—are you shooting to:
● share on a small to medium screen, or
● print and/or sell
If the former, use the 400 Rule to determine your longest viable shutter speed; if the latter, use the NPF Rule. I want sharp stars, so I use the NPF Rule on Default. But I’m not making wall murals, so I don’t choose the Accurate setting.
Here are my settings for the Bryce Canyon pano:
ISO: 6400
Aperture: f/2.8
Shutter speed (with intervalometer): To test different focal lengths, I used the NPF Rule with three lenses—the Zeiss 15mm Distagon f/2.8 (18 seconds), Viltrox 20mm f/1.8 (14 seconds) and Sigma 35mm f/1.4 Art (8 seconds). (More on the results when we get to the post-processing in Part II.)
Framing
Face east. This is the center of your panoramic image. Look left, then right. Your pano stitch will begin to the north and end facing south. And this will move more to the right as the galactic core rises and the Milky Way rotates clockwise. (Reminder: I’m speaking specifically about the Northern Hemisphere.)
Then you shoot, one frame at a time, moving left to right, overlapping at least one-third. (That is, including one-third of what was in the last frame in the current frame—overlapping visual information, so the software has context when it starts stitching.) Repeat as many times as you need to cover the range of your composition.
Notice I say at least one-third. I always overshoot panoramas. Meaning, I overlap each frame way more than I geometrically need to—approximately 50 percent, to be approximately precise. Why? I want to give the post-processing program as much information as possible to stitch a great pano; those extra pixels are a good hedge on your photo bets. If you don’t give your stitching program enough to work with, you fail—and going back is kinda hard, right?
When rotating the camera between frames, I do not use the markings on the base of my ball head. With my eye, I look at something in my frame that is in the middle, then loosen the pano base and rotate the camera until that object almost hits the left edge of the frame.
PhotoPills angle of view data for my 20mm mounted on my Z 6.
Yes, you can instead use the degree markings on your ball head to do this more precisely. I choose not to, and I see no ill effect on the final image due to opting for this preference. But if you want to use math to capture accurately spaced pano slices in the fewest number of frames, then look up the angle of view for your lens (you can do this in PhotoPills—and remember to look up the angle for portrait mode), then divide it by 2 or 1.5. The result is the number of degrees you rotate the panning base on your ball head between each frame.
For example, see the included screen shot. PhotoPills reveals that the angle of view for my 20mm mounted on my Z 6 is 61.72 degrees. To make the math easy, let’s call it 60 degrees. (Even when being precise, we really only need to be approximately precise.) Divide 60 degrees by 2, and that tells me to rotate my camera 30 degrees between frames. On a ball head with markings at the base, it’s more than easy to see when you’ve moved the camera 30 degrees.
Shooting
Now … go for it! You are ready. Make those exposures.
All my frames for the Bryce Canyon pano, from each of the three lenses.
Points to Review
Your keys to success:
Lock and unlock your pano head for every exposure. It’s a pain, but one little slip in your sequence and you cannot stitch it! It’s soul-crushing. Believe me.
Use the start-stop on your intervalometer (as opposed to pressing the body’s shutter release) to eliminate camera shake.
Make the pano exposures back to back, one immediately after the other. Don’t dally. Stars move a lot in 8, 10, 20 seconds. Too much time between your frames will make bad panos or awkward duplications of stars in the overlapped areas. Astronomers and pixel-peepers will notice.
Post-Production
Those are the nuts. Now for the bolts. (And by “now” we mean “next week.”)
I’m going to hand off this topic to Tim, who in our next post will cover how to process these frames into a glorious stitched panoramic image. Stay tuned!


