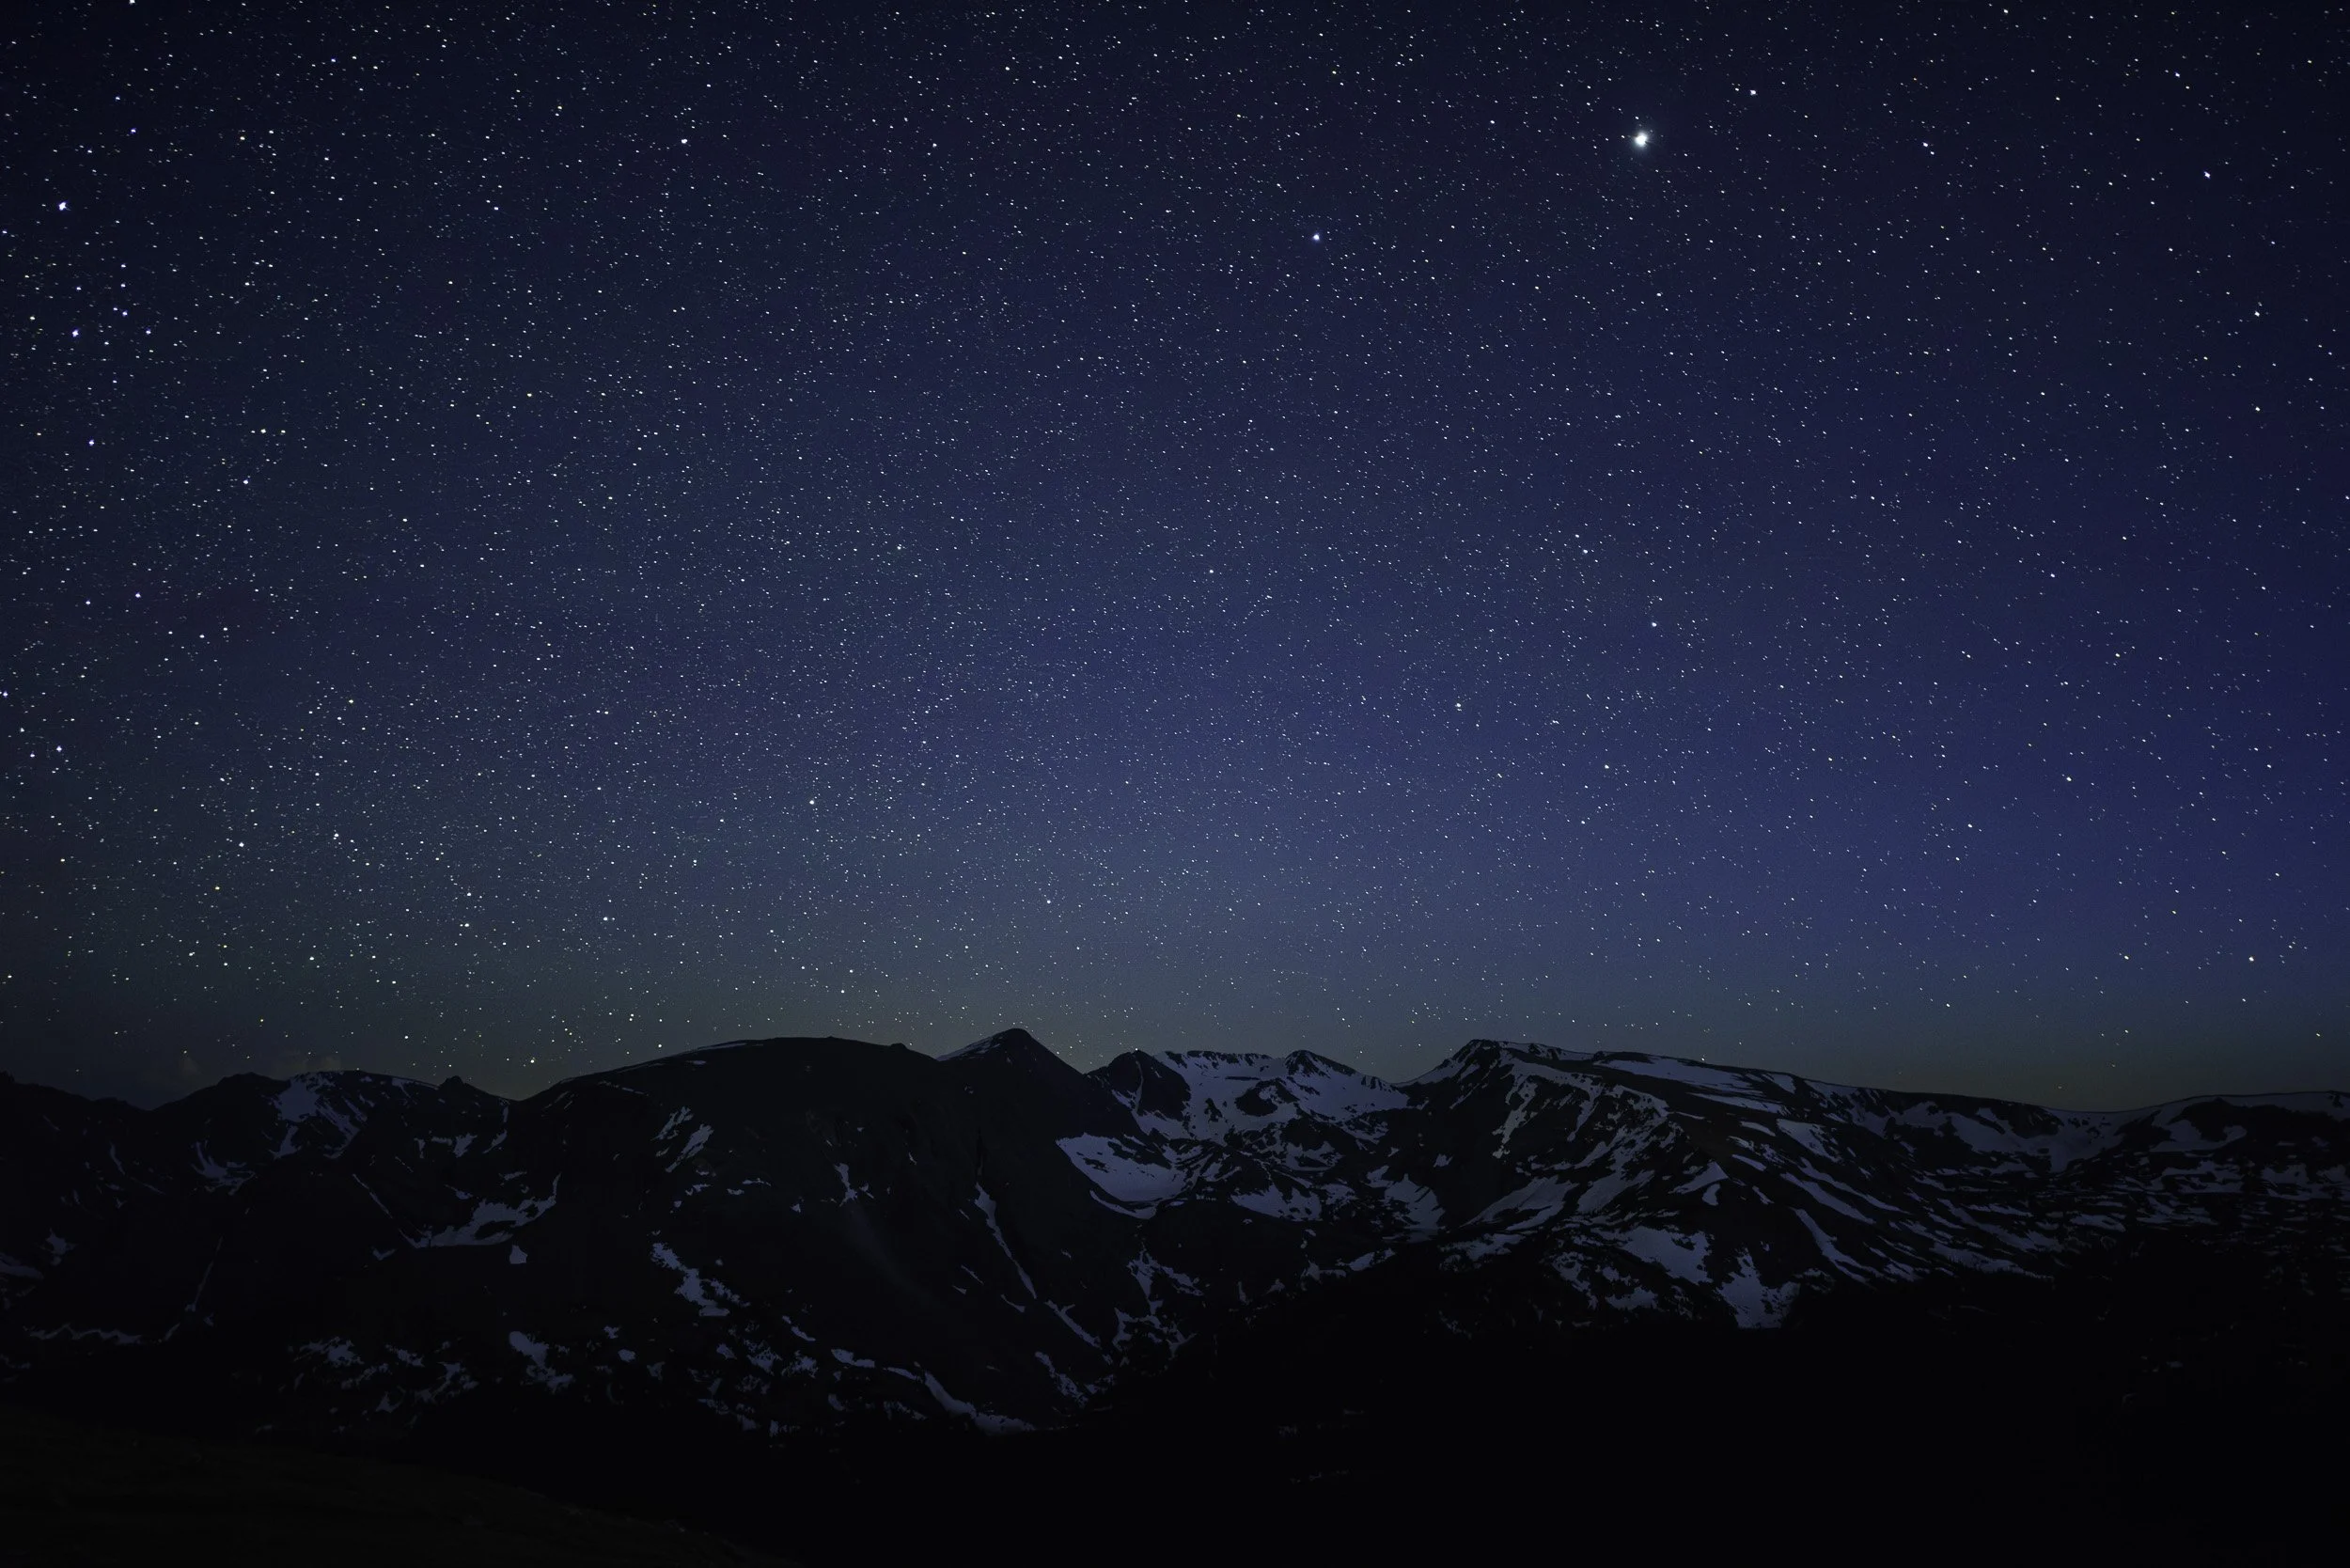
Ubehebe Crater, Death Valley National Park. Nikon D5 with a Nikon 14-24mm f/2.8 lens at 24mm. 11 stitched frames photographed at 10 seconds, f/5.6, ISO 2500.
The Location
Ubehebe Crater could be the most underrated natural feature in Death Valley National Park. Lots of folks know about Badwater Basin, where hexagonal formations rise from the salt flats; and Mesquite Flat Dunes, where sand rises and dips in patterns that lead toward desert-mountain backgrounds; and Racetrack Playa, where rocks appear to sail across the dried, cracked mud.
Figure 1. Look out!
All those things are well-renowned, and they should be. But I’m continually bemused at how few people know about Ubehebe, a half-mile-wide, 600-foot-deep volcanic crater. Why? Because it’s amazing!
Standing at the edge (carefully, Figure 1) reveals a beautiful, mesmerizing landscape. Standing at the bottom is awe-inspiring, as you look up and marvel at the power of nature to blast such a massive amount of earth over an area of 6 square miles.
It’s also a fun place to hike, as immediately to the south sit a few more smaller craters. You can hike along the rims or to the bottoms and explore the wonders of geology and wilderness.
However, one thing that Ubehebe Crater is not? Easy to photograph. The main attraction is the main crater, and it’s a pretty massive subject.
The first time I photographed it, in 2017 (Figure 2), I used a Nikon 14-24mm lens at its widest zoom, which was OK, but I could barely fit the whole crater in the frame. Moreover, at that wide a focal length you really need foreground material to help create a sense of depth in the composition, and the crater rim offers very little of that.
In 2018 I got to try shooting the crater with the rectilinear Irix 11mm lens (Figure 3). That allowed me to get the whole crater into a 35mm frame, and some wild clouds helped add a special dynamic to the scene, but I still wasn’t thrilled with the photo. I visited again in 2019, and didn’t even bother shooting. I was completely out of ideas for how to make the scene work in a photograph.
Figure 2. Nikon D3s with a Nikon 14-24mm f/2.8 lens. 1/1250, f/8, ISO 400.
Figure 3. Nikon D5 with an Irix 11mm f/4 lens. Three blended exposures of 1/640, 1/1250 and 1/2500, at f/8, ISO 100.
Another challenge to photographing the crater is that its sharp angle of decline prevents sunlight from fully illuminating the interior unless the sun is relatively high in the sky. So on a bright day, you need to choose between harsh light at midday or big shadows earlier or later. You might think that overcast conditions are the answer, but I’ve tried that too. Flat light wipes out all depth and diminishes the warm-toned hues on the eastern flank that are such a crucial part of the crater’s aesthetics.
Honestly, as much as I love Ubehebe Crater, by early 2019 I’d just about given up trying to make a photograph of it that I like.
The Aha Moment
Then in February 2020 I was back at Death Valley for National Parks at Night’s very first Alumni Excursion, a 5-night, 6-day photography jaunt through this amazing place. Toward the end of the workshop, we made a day and night trip to Racetrack Playa, and on the way we stopped at Ubehebe Crater.
I was leading this workshop with Lance Keimig and Matt Hill, and Matt had never been to the crater before. As most people do, he loved it. And he said, “On the way back tonight it’d be awesome to shoot a moonlit pano of this.”
Aha! That was the answer. I knew it right away. I had to get this image.
So, we scouted. Matt went off to explore his idea for the photograph, and I went off to explore mine. I hiked along the northern rim to find an angle where I could get a good vantage point over the crater with the snowy peaks of Hunter Mountain in the background. I made a quick auto-pano using my cell phone, just to make sure the composition would work the way I wanted (Figure 4). Then I checked PhotoPills to confirm a suspicion: That evening, I could shoot the full moon drifting through background of the scene. That was my shot. It was scouted and ready to be executed hours later, in the dark of the California desert.
Figure 4. A daylight test pano from my scouted spot, using my Google Pixel 3a.
The Shoot
Unfortunately, the Racetrack is hard to leave, and we stayed late. By the time we returned to Ubehebe, the moon had drifted way out of the scene. But it was still high, and delicately sidelighting the crater, and that was beautiful.
The hour was late—well after midnight on what had been a long day at the end of an adventure-filled week—and I was exhausted. But I was also determined. I was getting this image.
With my eyes half closed, I carried my tripod, Nikon D5 and two lenses one-quarter mile to my spot. I set up, tested each lens, and decided the Nikon 14-24mm (zoomed all the way to 24mm) was my best option for creating the image I had in my mind.
The first key to shooting a pano is to level the entire setup. I own a Gitzo GSLVLS Leveling head, but unfortunately didn’t have it with me. So I needed to level manually. That required three steps:
leveling my tripod legs by using the bubble level on the top as a guide (Figure 5, left, bottom circle)
leveling my ball head by using its bubble level the same as above (Figure 5, left, top circle)
using the in-camera Virtual Horizon to ensure that all the leveling was correct by panning the setup left to right and back again and watching to see that the camera stayed level across the scene (Figure 5, right)
Figure 5. Perfectly level in every way.
I fired off a couple of test photos to nail down an exposure. The NPF Rule told me I could shoot as long as 10 seconds before the stars began to trail. That was easy under moonlight, as I could achieve that shutter speed at ISO 640 with the lens wide open. However, I unconditionally trust the ISOs of the D5, so I pushed to ISO 2500, which allowed me to close the aperture to f/5.6 and really take advantage of the best sharpness levels of the lens.
I was finally ready to shoot. I started with the camera panned far to the left, way past where I needed it for the final composition, to give myself flexibility to crop in later. I shot the first frame. Using the engraved degree markings on the bottom of my Really Right Stuff BH-55 ball head, I rotated the camera 15 degrees to the right, then shot again. (That’s really more overlap than I needed, but I always prefer to have more than less.) I repeated this nine times, until I was shooting far right of my composition, for a total of 11 frames.
The Post-Production
The only change I wanted to make before assembling the pano was to apply lens corrections. This is best practice when making panos (particularly at night), so that any natural vignetting of the lens is removed. Otherwise, the color and brightness of the sky can fluctuate across the final panorama.
In Lightroom, I selected all 11 images in Grid view (Figure 6), then clicked to the Develop module. At the bottom right, I toggled the switch next to the Sync button to enable Auto Sync (Figure 7). Then I opened the Lens Corrections panel, then checked the boxes to turn on Remove Chromatic Aberration and Enable Profile Corrections. Then I went back to the bottom right and turned off Auto Sync.
Figure 6.
Figure 7.
To start the stitch, with the 11 frames still selected, in the menu I chose Photo > Photo Merge > Merge to Panorama. In the resulting dialog (Figure 8), I selected Spherical for the Projection, because it created the look I had in mind more closely than Cylindrical. I choose not to use Boundary Warp, Fill Edges, Auto Crop or Auto Settings, because I prefer to perform those tasks manually and deliberately. I did, however, click on Create Stack, because I like my multi-frame images to be neatly organized in the Lightroom catalog.
Figure 8.
I clicked Merge, and Lightroom did a great job stitching the 11 frames.
I switched to the Basic panel to apply some basic edits to Whites and Clarity, to make the overall image “pop” a little, then I manually made my crop to hone in on the elements I felt were most important to the composition (Figure 9).
Figure 9.
I felt the sky and stars needed even more punch, so I used the Graduated Filter tool to create a mask over the top half of the frame. I wanted the changes to affect only the sky, and not the mountains, so I enabled Range Mask and chose Color. Using the Color Range Selector (the eyedropper) to sample the blue sky, then used the Amount slider to tweak the selection. When I was happy with my mask (Figure 10), I made minor adjustments to Contrast, Highlights, Shadows, Blacks, Texture, Clarity and Sharpness—all to add just a little extra “oomph” to the sky, to make it appear in the image how it looked to me in person.
Figure 10.
Because the moon was off camera-right, the right side of the sky was noticeably brighter. To tone that down a bit, I created another mask in the same way as above, but instead of the top of the frame, I targeted the right (Figure 11). I then brought up Dehaze a bit to increase the local contrast of that portion of the frame, making it appear a little darker, and massaged the mask a bit to ensure a transition that looks natural.
Figure 11.
Wrapping Up
The final image. Ubehebe Crater, Death Valley National Park. Nikon D5 with a Nikon 14-24mm lens at 24mm. 11 stitched frames photographed at 10 seconds, f/5.6, ISO 2500.
That’s how I finally, after four tries, made an image of Ubehebe Crater that I’m happy with.
The 3-year process from first visit to final image reinforced three ideas:
Revisiting locations almost always leads to making better photographs.
Photographing at night almost always allows for a unique way of photographing a scene.
Creative breakthroughs can come from listening to what others think. I love teamwork and collaboration! (Thank you, Matt!)
Am I now done with Ubehebe? No way! On my hike back to the car that night, I thought of another idea, and I’m confident it will work. Stay tuned. Some night I’ll shoot that idea too.
