Astronomical Events

Meteors and Eclipses and Comets, Oh My!—The Celestial Events of 2018

A happy new year to all of our readers! 2017 was pretty amazing for all of us at National Parks at Night. We led workshops at nine different locations in the United States and Iceland. We witnessed auroras, the total solar eclipse, meteor showers, and billions and billions of stars.

2018 is looking just as exciting. We are kicking the new year off with a blue supermoon in Biscayne National Park, celebrating both the Biscayne and Redwood National Park 50th anniversary with a group show that will feature our students’ work at both parks in October, and will be offering 12 workshops including stops in Scotland, South Iceland and all along the Blue Ridge Parkway, to name a few. (Three workshops are sold out, but if you are interested in those, sign up for the wait list, as anything can happen!)

We hope that you join us for an adventure sometime soon. Whether you’re coming with us or heading out on your own, there are as many reasons to photograph at night as there are stars in the sky. Shooting any night can be, and often is, spectacular, but there are also some special dates to get outdoors with your camera, as there are scores of notable celestial events to photograph in 2018.

You already know about many of these if you own a copy of our 2018 calendar, “Shots in the Dark,” where they’re marked conveniently for you! As for any specific times mentioned, we gleaned that information by using our favorite photo-planning app, PhotoPills. The approximate times in the list below are based on the U.S. Eastern time zone—so if you live elsewhere, we recommend double-checking the times in the planner section of PhotoPills.

It also goes without saying that most of these celestial events are best viewed in dark sky locations—of which our National Park system has plenty! If you live in an area with high levels of light pollution and want to find darker skies, we recommend checking out Dark Site Finder.

With no further ado, here’s the list of great night sky happenings to focus your wide apertures on in 2018! (The first two of these have already passed, but we’re including them for the sake of being comprehensive.)

January 2: Full Moon/Supermoon

Supermoon through 3 Bridges. Nikon D750 and Tamron 150-600mm f/5-6.3 lens. 1/2 second, f/11, ISO 400. © Gabriel Biderman.

We immediately led off the year with a full moon—and a supermoon, no less! A supermoon occurs when the full moon coincides with the moon’s closest approach to Earth. The moon is super because it appears closer and brighter than normal. Your best bet for photographing it is during moonrise the day before (in this case, January 1) so that you can have better balanced exposure with the twilight foreground. Find and interesting foreground like I did in capturing the moon rising between the Brooklyn, Manhattan and Willaimsburgh bridges in New York City (above). (Rest assured, these tips will become useful again at the end of the month.)

January 3-4: Quadrantids Meteor Shower

There was no rest for the night photographer, as right after the full blue moon kicked off, the first meteor shower of the year hit! (Stay tuned for an article on how to photograph and process meteor showers, coming later this year.) The peak of the shower has passed, but you may be able to spot some sky streaks this weekend. (It’s good to note throughout this article that, just like with fall foliage, the peak times are the best for shooting meteor showers, but they’re not the only times. You should be able to find streaks in the sky for several nights before and after peak.)

Quadrantids is an above-average meteor shower with up to 40 meteors per hour at its peak, which lasts from the evening of January 3 into the early morning of the 4th. The field of meteoroids was produced by the now-extinct comet 2003 EH1, which was discovered in, you guessed it, 2003. The meteors appear to radiate from the constellation Bootes.

Best Viewed: after midnight

Moon Phase: waning gibbous 95% that will be up all night

Worth Shooting? This is a tough one. The full moon will make all but the brightest meteors invisible. If you are in a warm, dark sky location—why not? But in the north, we might sit this one out.

January 31: Full Moon, Supermoon, Blue Moon and Total Lunar Eclipse

Full Moon over Hudson. Nikon D700 and Zeiss 21mm f/2.8 lens. 2 minutes, f/11, ISO 200. © Gabriel Biderman.

OK, lots going on this night. We will be leading a workshop in Biscayne National Park (still a couple of spots left!), which will be a perfect location to view the supermoon rising over the forever horizon. We may even explore some reflecting moon trails as we explore this water world of a park.

A total lunar eclipse happens when Earth blocks the sun’s light from directly hitting the full moon. During this time, the moon is in Earth’s shadow—no direct sunlight reflects off the lunar surface. However, the 0.12-albedo surface does catch some scattered light, which causes the moon to still be visible with a slight reddish hue. This is sometimes called the “blood moon.”

The total lunar eclipse will not be viewable in Biscayne, but will be in many other national parks and wild spaces in large parts of the world. If you live in western North America, eastern Asia, Russia, Australia or around the Pacific Rim, you’ll be in the path of totality.

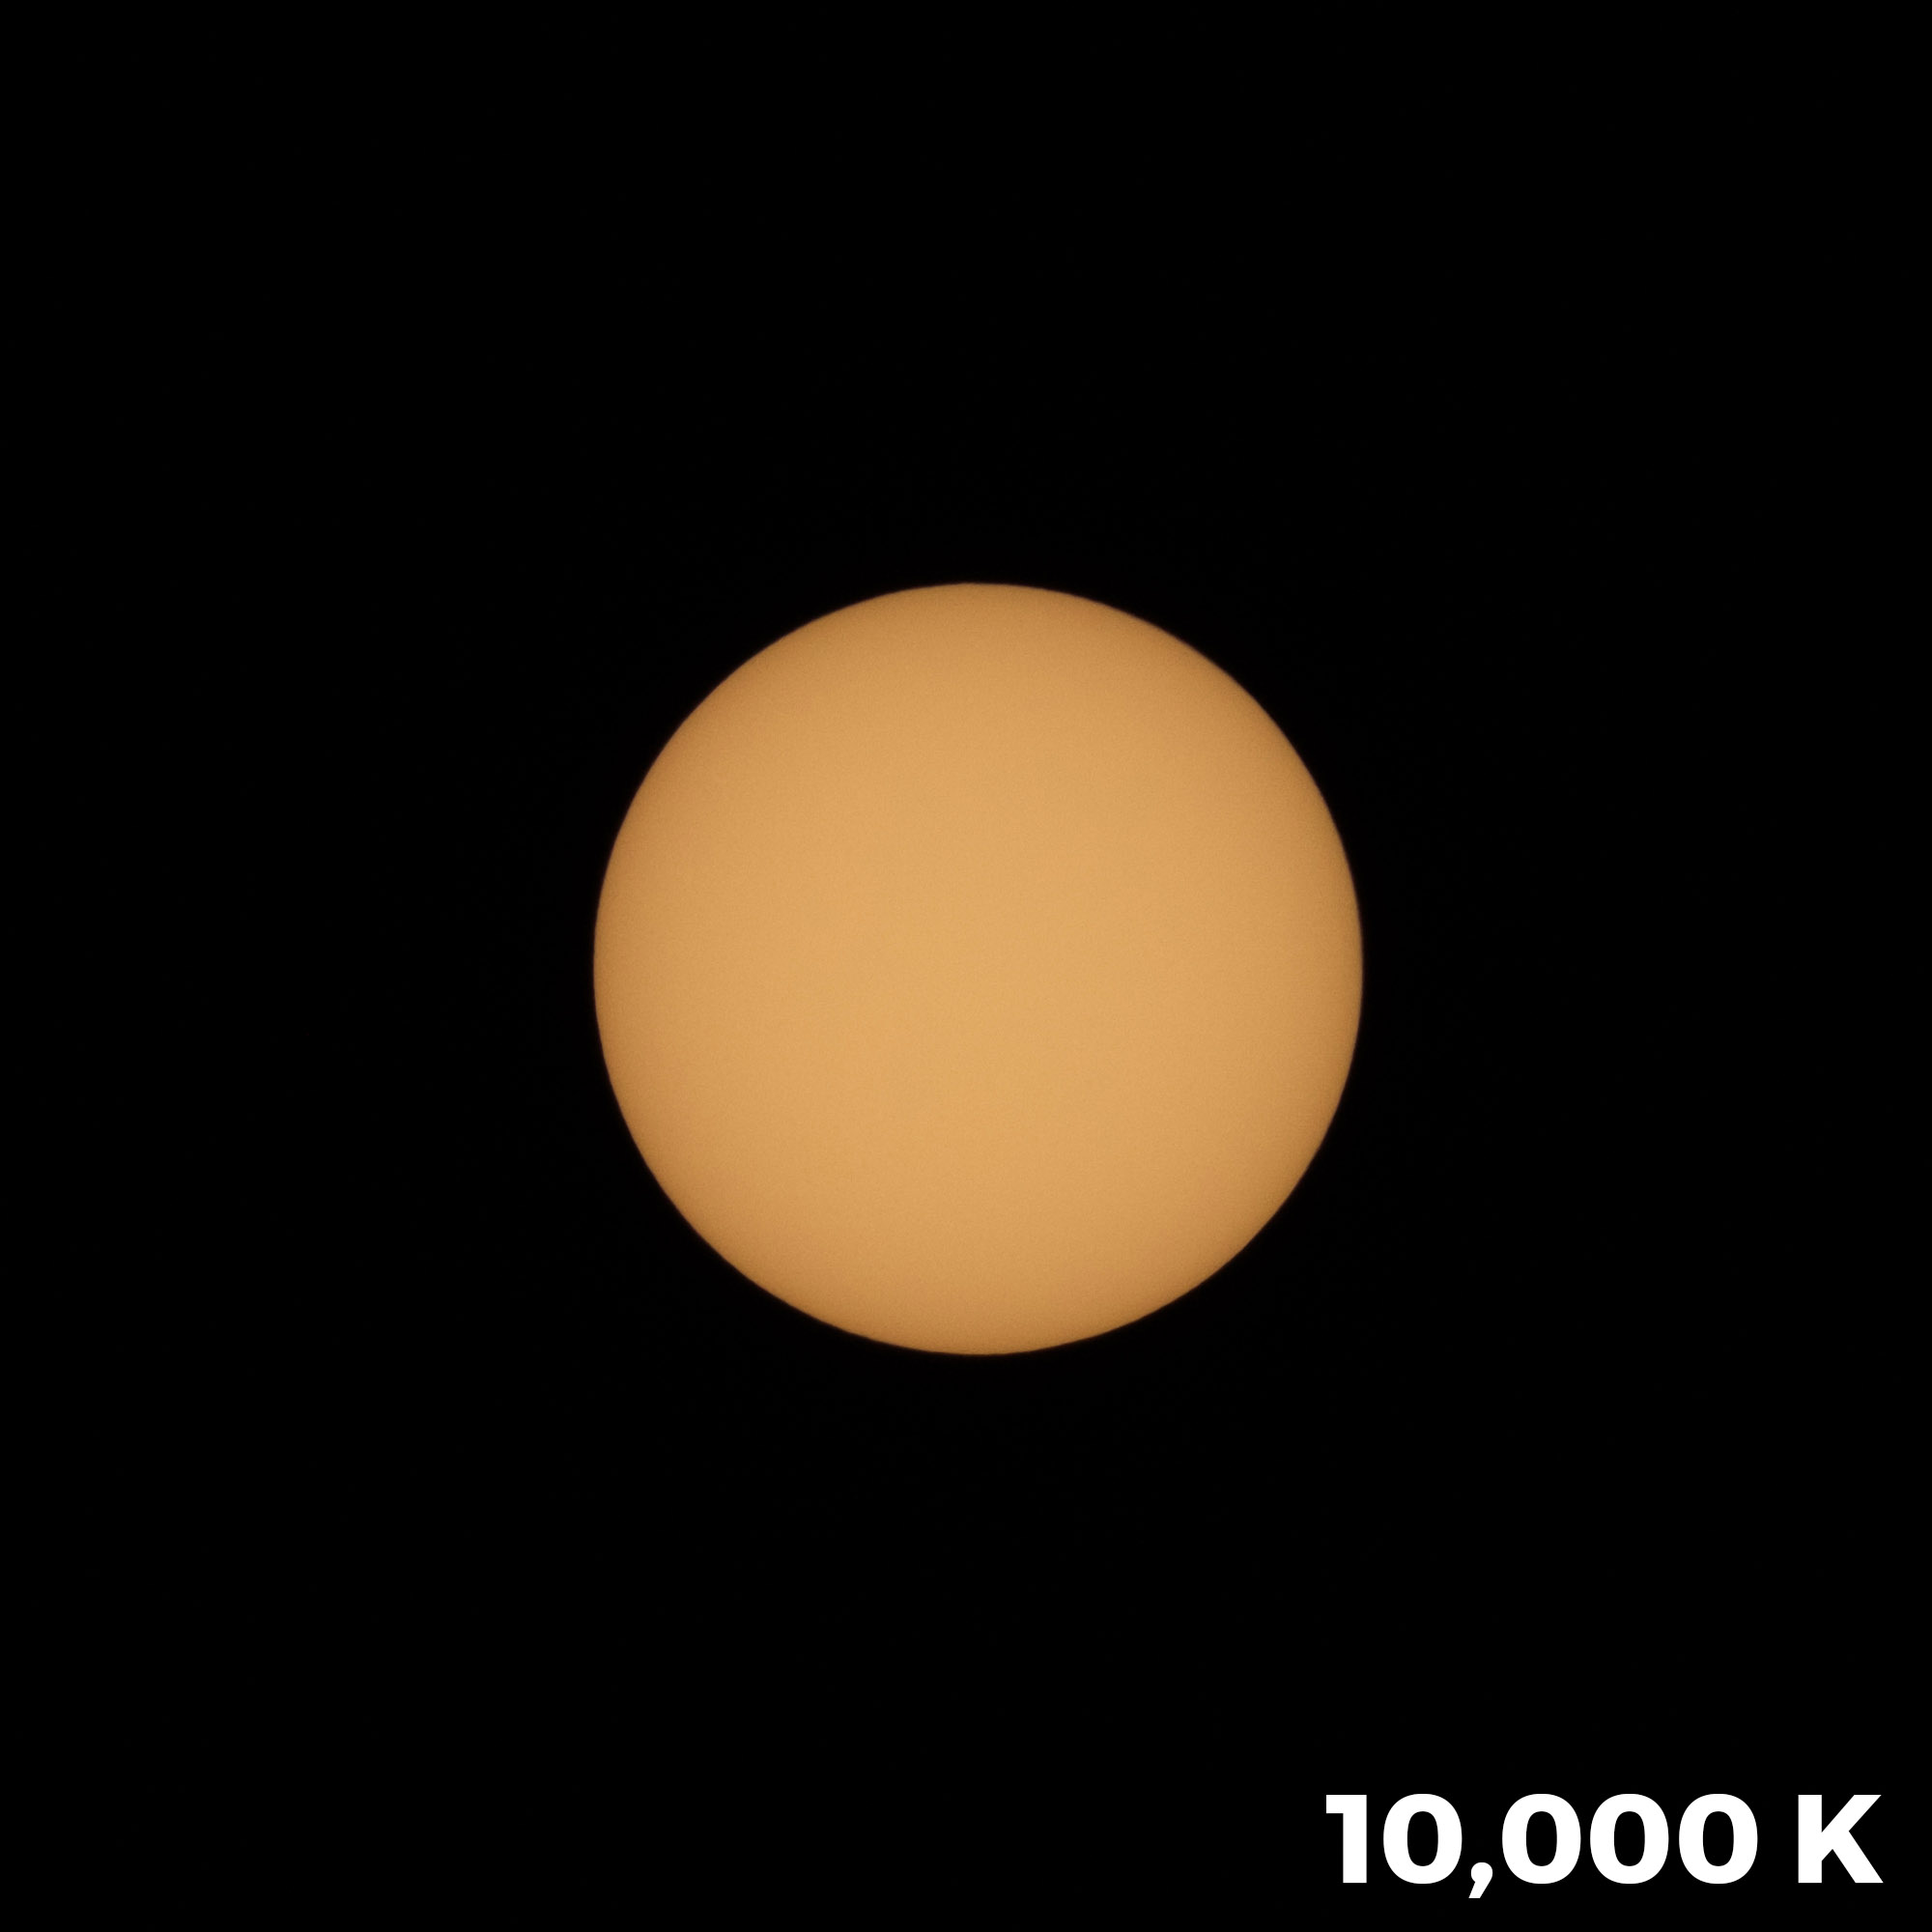
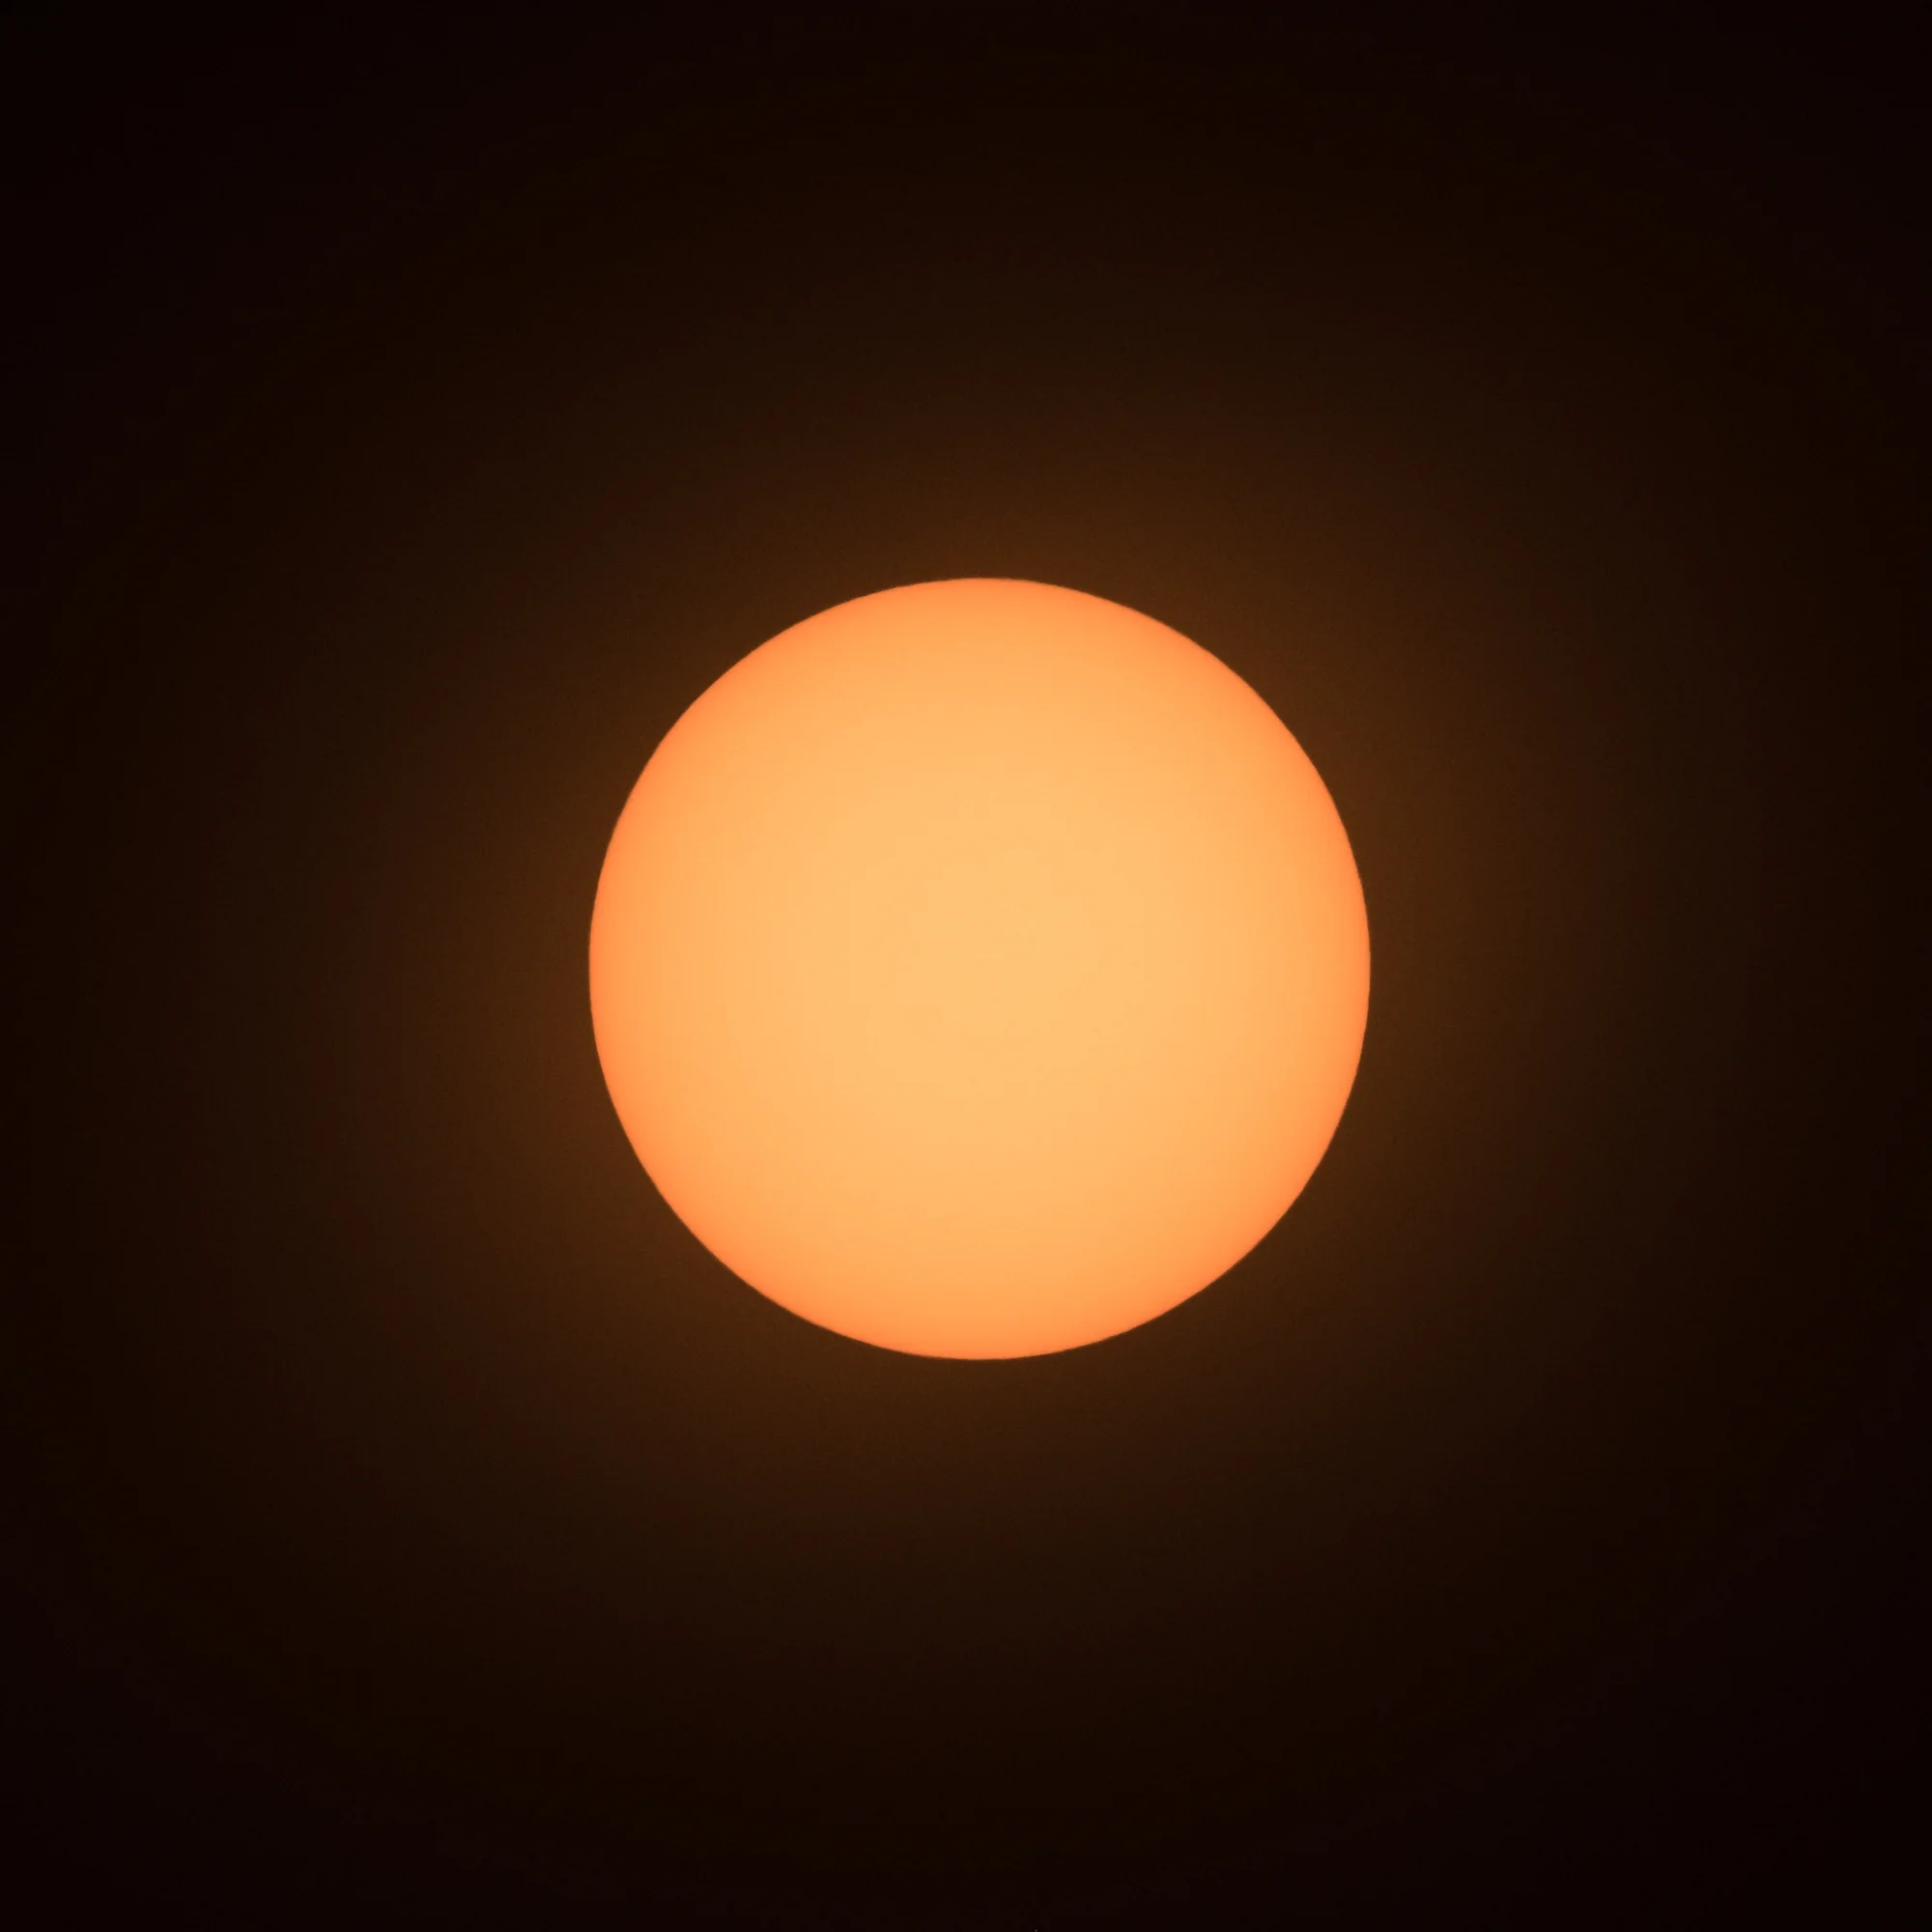
February 15: Partial Solar Eclipse

Taking a bite out of the Great American Solar Eclipse. Fujifilm XT-2 and 100-400mm f/4.5-5.6 lens. 1/250, f/8, ISO 800. © Gabriel Biderman.

If you live in Chile, Argentina or are planning a trip to Antarctica, this would be a fun day to be outside with a camera. This will not rival the total eclipse we saw in the U.S. last year; instead it will look like a bite is taken out of the sun when viewed with solar glasses and filters. But it’s absolutely still worth shooting. (For advice about gear, techniques and safety when photographing an eclipse, see our free e-guide, “Here Comes the Sun.”)

March 20: Vernal Equinox (Northern Hemisphere), Autumnal Equinox (Southern Hemisphere)

Winter is over and there will be equal parts of day and night … with the days slowly getting longer, boohoo!

March 31: Full Moon, Blue Moon

Full Moon through the Auroras, Iceland. Sony A7s and Zeiss 21mm f/2.8 lens. 15 seconds, f/8, ISO 25,600. © Gabriel Biderman.

Our second blue moon in the first three months of the year. This is unique, as is the interesting fact that 2018 features no full moon in February.

April 16: First New Moon of the Milky Way season

You’ll need to stay up late. Depending on where you are, the return of the Milky Way’s core to the night sky is reason to celebrate! It should break the horizon around 1:30 a.m. and hang around for three hours before the morning twilight erases the stars.

April 22-23: Lyrids Meteor Shower

Lyrids is an average shower that can have about 20 meteors per hour at its peak on the evening of April 22 and the early morning of the 23rd. The shower is produced by dust particles left behind by comet C/1861 G1 Thatcher, which was discovered in 1861. The meteors appear to radiate from the constellation Lyra.

Best Viewed: after midnight

Moon Phase: first quarter 50% that will set at 1:46 a.m.

Worth Shooting? Yes! With the half moon setting after midnight, the Lyrids could definitely put on a good show.

May 6-7: Eta Aquarids Meteor Shower

Eta Aquarids is an above-average shower that can have up to 30 meteors per hour in the Northern Hemisphere, and up to 60 per hour in the Southern Hemisphere! Its peak is on the evening of May 6 into the early morning of the 7th. It is produced by the dust particles left behind by the famous Halley’s Comet, which has been recorded since ancient times. The meteors appear to radiate from the constellation Aquarius.

Best Viewed: from 10 p.m. to 2 a.m.

Moon Phase: waning gibbous 59% that will rise at 1:41 a.m.

Worth Shooting? Yes. With no moon to begin the night, you should be able to see the start of the show during clears skies. After 1:30 a.m., only the brightest of the meteors will be visible.

May 15: New Moon

The Ruins of Hovenweep. Hasselblad X1D and 30mm f/3.5 lens. Blend of foreground at 6 minutes, f/4, ISO 800 and sky at 23 seconds, f/4, ISO 6400. © Gabriel Biderman.

Welcome the Milky Way galactic core someplace dark, as it rises around 11 p.m.!

June 13: New Moon

Milky Way Arching over Centennial Valley, Montana. Nikon D750 and 14-24mm f/2.8 lens. Five-image panorama at 30 seconds, f/4, ISO 6400. © Gabriel Biderman.

Even better Milky Way core, as it will be up around 9:15 p.m.—during nautical twilight in most of the U.S. Prime time of the year for the Milky Way arching shots!

June 21: Summer Solstice

Shortest night of the year. Boo!

July 13: New Moon, Partial Solar Eclipse (way south)

Under Sipapu, Natural Bridges National Monument. Nikon D750 and 14-24mm f/2.8 lens. 20 seconds, f/2.8, ISO 6400. © Gabriel Biderman.

The Milky Way will be high in the sky during twilight. Perfect for straight-through-the-sky Milky Way shots. (To learn more about the difference between this type of Milky Way photo and arching panos, see our “Five Questions” blog post from last July.)

Also on this day is a partial solar eclipse for our friends in southern Australia and Antarctica.

July 27: Total Lunar Eclipse

Higher Rolling with the Blood Moon, Vegas 2014. Sony A7r and Nikon 70-200mm f/2.8 lens. 4 seconds, f/11, ISO 800. © Gabriel Biderman.

Visible throughout most of Europe, Africa, western and central Asia, the Indian Ocean, and Western Australia. (Visit the NASA website for more information.)

July 28-29: Delta Aqaurids Meteor Shower

This is an average shower, with 20 meteors per hour during its peak from the evening of July 28 through the early morning of the 29th. These meteors are produced from the debris left behind by the comets Marsden and Kracht, and they appear to radiate from the constellation Aquarius.

Best Viewed: after midnight

Moon Phase: waning gibbous 99% (essentially, a full moon) and will be up all night

Worth Shooting? Probably not. The full moon will obscure all but the brightest of meteors. (Though you can be sure we’ll be on the lookout during our Blue Ridge Parkway workshop.)

August 11: New Moon, Partial Solar Eclipse

The August Core over Centennial Valley, Montana. Nikon D750 and 14-24mm f/2.8 lens. 20 seconds, f/2.8, ISO 6400. © Gabriel Biderman.

During this new moon, the Milky Way will appear high in the sky immediately as darkness falls.

This partial solar eclipse will be seen in parts of northeast Canada, Greenland, extreme northern Europe, and northern and eastern Asia. Best viewing will be in northern Russia with 68 percent of the sun blocked.

August 12: Perseids Meteor Shower

Great Sand Dunes National Park, Colorado. Nikon D750 and 15mm Zeiss Distagon f/2.8 lens. 234 images at 22 seconds, f/2.8, ISO 6400, plus a single exposure at 382 seconds, ISO 2000 for the landscape after moonrise. © 2017 Matt Hill.

One of the best meteor showers of the year, with 60 per hour during its peak on August 12 into the early morning of the 13th. These meteors are produced from the comet Swift-Tuttle, and they appear to radiate from the constellation Perseus.

Best Viewed: from darkness to morning

Moon Phase: waxing crescent 3%, but will have set by nightfall

Worth Shooting? Yes, yes, yes! This is our personal favorite meteor shower. Lots of meteors, new moon and comfortable temperatures. So fingers crossed for clear skies, and fire away!

September 9: New Moon

The Milky Way core will be visible for only the first three hours of darkness (will set around 11:30 p.m.).

September 23: Autumnal Equinox (Northern Hemisphere), Vernal Equinox (Southern Hemisphere)

Equal parts day and night (the moon and sun will be rising and setting around the same time)which could create some beautiful twilight photos.

Also, in the Northern Hemisphere, the nights start to get longer—woohoo!

October 8: Draconids Meteor Shower

Draconids is a minor meteor shower which averages 10 meteors per hour during the peak of early evening on October 8. The meteors are produced by comet 21P Giacobini-Zinner, which was discovered in 1900. They appear to radiate from the constellation Draco.

Best Viewed: early evening, from 8 p.m. to midnight

Moon Phase: new moon 0.4%, and will not be visible at night

Worth Shooting? Yes. Even though it is a minor meteor show, no moon means that you’ll see even the faintest meteors in a dark sky location.

October 9: New Moon

Milky Way core will be visible for 1 1/2 hours after astronomical twilight.

October 21-22: Orionids Meteor Shower

Orionids is an average shower that has about 20 meteors per hour at its peak from late on October 21 until early morning on the 22nd. The meteors are produced from the dust left behind by the prolific Halley’s Comet. They appear to radiate from the constellation Orion.

Best Viewed: after midnight

Moon Phase: waxing gibbous 91%—essentially full and will be up most of the night

Worth Shooting? Yes. Even though the full moon will block the fainter meteors, the Orionids produce very bright streaks that should be visible throughout the night.

November 5-6: Taurids Meteor Shower

Taurids is a minor meteor shower that averages five to 10 per hour, and peaks on the evening of the November 5 into the morning of the 6th. They are produced by Asteroid TG10 and comet 2P Encke, and appear to radiate from the constellation Taurus.

Best Viewed: after midnight

Moon Phase: no moon—the thin crescent will set about the same time as sunset

Worth Shooting? I wouldn’t make plans around it, but if you happen to be in a dark location with clear skies, be on the lookout.

November 7: New Moon

Milky Way core will be visible for approximately the first hour of darkness.

November 17-18: Leonids Meteor Shower

Average meteor shower—15 per hour during peak from the evening of November 17 until early morning on the 18th. Produced by the comet Temple-Tuttle, which was discovered in 1865. The meteors appear to radiate from the constellation Leo.

Best Viewed: early morning (before twilight) of November 18

Moon Phase: waxing gibbous 72%, setting at 1:36 a.m.

Worth Shooting? Yes, for the night owl. Factor in the bright moon not setting until 1:36 a.m. on the 18th, but you’ll have between then and 5:30 a.m. to shoot the meteors. (These might add an interesting night-sky component during our black-and-white workshop in Sloss Furnaces National Historic Landmark that week.)

December 7: New Moon

No Core in the Haystack, Oregon 2016. Nikon D750 and 14-24mm f/2.8 lens. 30 seconds, f/2.8, ISO 3200. © Gabriel Biderman.

Milky Way core will not be visible during the night in the Northern Hemisphere.

December 12-16: Comet 46P/Wirtanen

It looks like we will witness the 10th closest comet in modern times! It should be viewable to the naked eye on December 12 as it reaches perihelion—its closest approach to the sun. Look toward the bull constellation, Taurus, that night.

On December 16, the comet will make its closest approach to Earth, soaring by only 7.1 million miles away, and will be visible to the naked eye. Look toward the Pleiades and Hyades star clusters.

For more information, see this breakdown from the University of Maryland.

December 13-14: Geminids Meteor Shower

This is probably the best meteor shower for photography, with an average of 120 multicolored meteors during peak from the evening of December 13 until early morning on the 14th. The roaming meteoroids were produced by Asteroid 3200 Phaethon, which was discovered in 1982, and the meteors appear to radiate from the constellation Gemini.

Best Viewed: after midnight

Moon Phase: waxing crescent 36%, and sets around 10:30 p.m.

Worth Shooting? If you can find someplace not too cold and have clear skies—YES, YES, YES!

December 21: Winter Solstice

Longest night of the year!!!

Warning—Northern Hemisphere nights start to get shorter after this.

December 21-22: Ursids Meteor Shower

Ursids is a minor meteor shower—with an average of five to 10 per hour from the evening of the December 21 until the early morning of the 22nd. Produced by the comet Tuttle (discovered in 1790), the meteors appear to radiate from the constellation Ursa Minor.

Best Viewed: after midnight with your fingers crossed

Moon Phase: waxing gibbous 99%, and sets just before sunrise

Worth Shooting? Probably not—with the full moon up the entire night, likely cold temperatures and not many bright meteors, I’d sit this one out.

Wrapping Up

Phew! That about sums up the top celestial events to photograph in 2018. I hope this inspires you to seize the night in the upcoming year!

As you do, remember that we love to see your night images! Feel free to share them on our Facebook page, or to tag us in Instagram. We always love looking, we will always respond, and we are eager to share in more and more conversations about night photography.

Gabriel Biderman is a partner and workshop leader with National Parks at Night. He is a Brooklyn-based fine art and travel photographer, and author of Night Photography: From Snapshots to Great Shots (Peachpit, 2014). During the daytime hours you'll often find Gabe at one of many photo events around the world working for B&H Photo’s road marketing team. See his portfolio and workshop lineup at www.ruinism.com.

UPCOMING WORKSHOPS FROM NATIONAL PARKS AT NIGHT

Eclipse Lessons: What We Learned from Our Day in the Sun

Wow. That … was epic. Whether you experienced the solar eclipse of 2017 in the mountains or the cities, with a small group of friends or with the masses, or even just online, that was the most universally experienced eclipse ever!

As we slowly come down from the high of the event, we want to share our story with you.

All five of us here at NPAN witnessed the eclipse in different ways. Chris, Matt and I saw totality, and Lance and Tim took time out in their location to stare at the waning sun.

I planned a small, hands-on Adventure Series workshop around the event. We lived on a ranch at Exit 0 in Montana and then drove two hours to the remote wilderness to capture totality.

Matt collaborated with B&H and Atlas Obscura at a Total Eclipse festival in eastern Oregon and made the most of his two minutes by creating eclipse portraits during totality. And Chris probably did the smartest thing and simply shared the whole experience with his 4-year-old daughter, laying together on a blanket in the grass outside a zoo in Greenville, South Carolina.

Tim was leading a workshop in smoky Glacier National Park and guided the students not to shoot the blocked sun but instead to capture the unique rays of light from a minimal sun. And Lance, who had just recently moved to Vermont, took time out of his day to take it all in with his fiancée.

In this post, Matt and I share how we prepared for our shoots, and the ideas we had for capturing and creating during the whole of the eclipse.

Gabe’s Prep

I’m always looking ahead to unique celestial events that we at NPAN can share. When I first learned that the Great American Eclipse was going to be passing through an area I frequent, Montana, I knew I had to start planning!

As it turns out, I was invited to the rural big night skies of J Bar L Ranch in Centennial Valley. Located about one hour from the path of totality, I had initially planned to avoid the crowds and just shoot and share the eclipse at the ranch. When we posted the details of the workshop, we even downplayed the eclipse aspect because you never know with weather. However, we received several emails from “eclipsers” who told us that they would rather see the total eclipse in front of a pile of rubbish than a partial eclipse in the most beautiful place in the world.

So we changed the game plan and I started researching nearby locations in Idaho that would be in the path of totality, which I was able to scout a year ahead of time. My first thought was to go to Sun Valley and get close to Stanley, a small town smack dab in totality, But when I heard that this small town of 50 people was expecting 50,000 visitors, I starting looking for locations even more rural.

Figure 1. Idaho’s Sawtooth Mountains. © Gabriel Biderman.

In the end I was guided by stormy weather and magical light. I was visiting the small towns of Arco and Mud Lake when an impressive storm drew me toward the Sawtooth Mountains (Figure 1).

I pulled off and drove down a dirt road to gain a better vantage point to shoot the rays of light dancing around the mountains. I knew I was in the path of totality and pulled out the PhotoPills app to confirm that the sun would be seen over the Beaverhead Mountain Range at the time of the eclipse.

Figure 2. PhotoPills’ VR overlay of the path of the sun over the Beaverhead Mountain Range.

Figure 2. PhotoPills’ VR overlay of the path of the sun over the Beaverhead Mountain Range.

It was important for me to have an interesting foreground, as I wanted to have our students have a wide-shot option when photographing the eclipse.

Matt’s Prep

(Hi, Matt here!) I was a polar opposite to Gabe. Imagine that.

I wasn’t really interested in photographing the eclipse stages before and after totality. Why? I am happiest shooting at night, and totality was what I was looking for. The heat was on to make a plan for those two minutes.

I love making night portraits. So I challenged myself to stage and shoot as many portraits as I could pull off during totality. I knew the exposure would be akin to end-of-dusk light levels. So I grabbed my Sigma 35mm f/1.4 Art lens to make both the subject and the sun/moon combo a size that felt appropriate to me.

Figure 3. Night at Atlas Obscura’s eclipse festival.

We were set up in a field on a private farm in Durkee, Oregon, for Atlas Obscura’s eclipse event. I was hanging out with the B&H Photo crew, enjoying all the solar-equipped telescopes they brought to observe first bite and the looming totality.

The crowd was abuzz with anticipation (for the eclipse—not for what I was doing.). I grabbed a speedlight and a Luxli Viola, and prepared to test.

Gabe’s Practice and Process

As we discussed in our “NPAN 2017 Solar Eclipse Guide,” the most important thing you can do to prepare for the eclipse is practice shooting the sun.

Zoom lenses need constant monitoring to track the path of the sun in the sky. Solar filters take some getting used to looking through, as they darken everything but the sun. We practiced tracking for several days right before the eclipse. If you can practice during the same time of day, you’ll get a feel for how high you need to track.

I found that the autofocus of the zoom lens did a good job, but because we were pointing directly above us at noon, my lens had issues with creeping. I had to gaff-tape down my zoom ring so that it would stay all the way zoomed out. Investing in a lens that locks its zoom at multiple focal lengths would be very wise.

Matt’s Practice and Process

All of my practice is from years of night photography and flash portraiture. I’ve been shooting in dim light combining those two practices for a while, so I felt confident I could make it happen when the time came.

But it didn’t stop me from thinking though the possibilities over and over while waiting. I did fret a little. But the Light Painting Party the previous evening had me feeling all sorts of good.

Gabe’s Gear and Settings

My wide setup was the Nikon D750 with the Nikkor 14-24mm f/2.8 lens and the cardboard DayStar Solar Filter. My settings during the eclipse (not totality) were 1/125, f/8, ISO 800. I manually set focus at hyperfocal distance so that everything was sharp from 10 feet to infinity.

My telephoto setup was the Fuji XT2 and 100-400mm f/4.5-5.6 lens, with the best filter holder system I have ever used, the Wine Country. Even with the dubious Amazon scare, I stood by my Lee Solar Eclipse Filter, as I had used it for many hours without any issues. My base settings were 1/250, f/8, ISO 800.

I wanted to simplify my shooting during totality as much as possible and set up both cameras to bracket. To capture the “diamond ring,” I closed down to f/22 to heighten the flare, increased the shutter speed to 1/60, and bracketed as best I could. The light bursts were bright and quick and the bracketing worked out really well. The 1/2-second exposure gave me the best corona (see Figure 4) and 1/250 captured the Bailey’s beads (Figure 5). But the most dramatic image was the flare from the diamond ring effect, which worked out best at 1/15, f/22, ISO 800 (Figure 6).

Figure 4. Corona. 1/2, f/22, ISO 800.

Figure 5. Bailey’s beads. 1/250, f/22, ISO 800.

Figure 6. Bailey’s beads, or the diamond ring effect. 1/15, f/22, ISO 800.

During totality I lowered my shutter speed to 1/15 and bracketed again. I should have also opened my aperture, but I was trying to keep things simple while running between two rigs.

The best exposures ended up being 1/15 and 1/30, as exposures at or over 1/8 tended to be too blurry with the rather rapid movement of the sun and moon. In hindsight, I should have opened my aperture to f/8 and kept my shutter speeds in the range of 1/125 to 1/250.

It was very important to put my camera in the highest burst mode, to shoot in RAW (of course) and to still bracket. Keep the trigger firing and take some time to take it all in.

Matt’s Gear and Settings

I popped the CTO-gelled speedlight on a tripod and tested the output. Why CTO? Well, I wanted to shoot with Tungsten white balance and the flash should be neutral.

This is night photography, if but for a moment.
— Matt

I then grabbed the Luxli Viola and set it to 5000 K. I placed it lower than the speedlight, but on axis. I’ve been studying how cinematographers are making the shadows and highlights different color balances. So I wanted a cool shadow undertone from the LED light and neutral/warm from the flash. And the sky would look cool because of the Tungsten setting.

I revved up my Nikon D750 and Sigma 35mm with no filter. Why? It’s totality—this is night photography, if but for a moment.

I worked through a couple of test shots to get the sun/moon exposure while my first subject, John Faison, was making a few images for himself. I asked John to stand in front for a few darker frames at 1/125, f/6.3, ISO 200. Then I wanted some more corona and landscape for context, so I dropped my shutter speed down to 1/25 and then 1/3. (See Figures 7 through 9.)

Figure 7. 1/125, f/6.3, ISO 200

Figure 8. 1/25, f/6.3, ISO 200.

Figure 9. 1/3, f/6.3, ISO 200.

Figure 10.

We swapped places and by the time John shot two frames of me (Figure 10), our two minutes of totality were over. Wow. Talk about pressure!

I asked the next volunteers to step in and it was all over. :-(

Gabe’s Experience/Emotion

Well, that was the quickest two minutes in my life! It was magical to have the sunlight change so drastically and to have hard “night” shadows engulf us. Typically moonlight is very soft, so this was very surreal. I saw only the brightest stars and planets—it was a very silvery civil twilight.

The drastic drop in temperature brought an eerie chill and the only creatures close to us were flies that appeared out of nowhere when the lights came back on.

I did watch too much of totality from the back of the screen and really wish I had spent more than 15 seconds staring at the sky.

Matt’s Experience/Emotion

I was laser-focused on one mission. OK, two. I forgot to mention I was running a time-lapse with a fisheye from ground level on Aperture Priority (see below).

Anyway, my one mission (I told myself) was to do something no one else was likely to be doing. I like to zig when others zag. I’m known for it. It’s curiosity. I love that feeling of, “Oh, this might not work.” In fact, I told John and those who didn’t get a chance to get their portrait done that very same thing.

I was listening intently to everyone around me. I heard the hush of wildlife. I heard the birds all speak up at once, then crickets. I felt the temperature drop and one of the scientists nearby exclaim in glee, “It’s 62 degrees Fahrenheit—a full drop of ten degrees!” I felt the mosquitoes rise up and eat me alive. I heard all the oohs and aahs of everyone marveling about all the stars in the sky behind us. But I saw none of it. I was on task.

Do I regret not enjoying the eclipse with my own eyeballs? Not at all. Because now I would be regretting not trying for something that was a pressure-based stretch goal. I tried, and I believe I succeeded. In fact, I got a diamond ring in my portrait. Pretty rad.

Gabe’s Final Takeaways and Notes for 2024

I was able to share this experience with my dad as well as nine Centennial students, which was incredibly special. We were all alone among the mountains, and it would have been weird to experience it all by myself. Viewing it in a city would have been more of a universal gasp of astonishment, but I really appreciated the people I was with and the earth that surrounded us. We all promised to meet back up in 2024!

It was difficult to remain cool, calm and collected during totality. I totally forgot to turn on my 360-degree video camera, which would have been a unique way to capture the changing light and our reactions. Maybe next time we can work together and have each person be responsible for one way to interpret the eclipse—that way we would be more focused and could share the many results.

Figure 11. Composite of 25 frames showing the full sequence of the solar eclipse. Nikon D750 with 14-24mm f/2.8 lens and DayStar Solar Filter. Each frame (except totality) shot at 1/125, f/8, ISO 800.

In the end, the close-up shots give you a closer look at all the incredible things that happen moments before, during and after totality, but after the rush of it all, I’m really enjoying the wider-view composite shot of all the sun phases over the scene (Figure 11).

I feel like I accomplished the standard takes on the eclipse and look forward to challenging myself for a new perspective in 2024—or before!

Matt’s Final Takeaways and Notes for 2024

I was very fortunate to be where I was, when I was. I wasn’t originally scheduled to go to the festival, but a series of other things put me in a position to represent NPAN at Atlas Obscura’s exclusive event.

I’ve always admired the cut of their jib. Their focus on adventure, satisfying curiosity and generously sharing is right up my alley. And I met a host of like-minded people there. It was kismet and I would do it all over again exactly the same way.

Next time, however, I will bring about five cameras. That may be in Argentina in 2019 or 2020, or much of North America in 2024. I am hooked. That was a truly singular experience.

Did you photograph the solar eclipse? We would love to see your images in the Comments section below!

Gabriel Biderman is a partner and workshop leader with National Parks at Night. He is a Brooklyn-based fine art and travel photographer, and author of Night Photography: From Snapshots to Great Shots (Peachpit, 2014). During the daytime hours you'll often find Gabe at one of many photo events around the world working for B&H Photo’s road marketing team. See his portfolio and workshop lineup at www.ruinism.com.

UPCOMING WORKSHOPS FROM NATIONAL PARKS AT NIGHT

Night in Day: How are you Preparing for and Shooting the Eclipse?

Note: This article is also featured in our brand new free e-book Here Comes the Sun: 2017 Solar Eclipse Guide. The e-book also includes the articles “Parks in the Dark,” a travel guide to all the National Park Service units that the total eclipse will pass over, and “The Right Stuff,” a detailed buyer’s guide for all things related to eclipse photography. Download your copy today!

If you haven’t heard the buzz yet, the continental United States will be experiencing a solar eclipse on August 21. If the weather is good, we will all be able to see … most of it. But lots of lucky folks will be driving to a spot along the path of totality to experience something very rare and surreal: the total eclipse, when day turns into night. For approximately 1 to 2 minutes you’ll be able to see the stars during the day and the wild corona light dance from behind the moon.

The last total solar eclipse to touch the lower 48 was on February 26, 1979. The last time we experienced a total solar eclipse crossing our entire nation from the Pacific to the Atlantic was on June 8, 1918. That was a long time ago; it’s pretty rare.

The good news is that, at least this time around, it won’t be rare for long. The next total solar eclipse in the U.S. after 2017 will be in 2024, when the path of totality will cross from Mexico into Texas and will leave via northern New York and New England on its way to New Brunswick and Newfoundland. So any specialized gear you get now, you can put to good use in seven years!

The last trans-U.S. total solar eclipse happened … well, awhile ago.

Gear you Need to See and Capture

As you have probably guessed in life, it is not a good idea to stare at the sun. The most important thing you can purchase to prepare for the eclipse is a pair of solar glasses for your eyes and solar filters for your camera lenses. Technology continues to get better in this field and the newest international standard rating is ISO 12312-2. If you do not see this certification on the product, you shouldn’t purchase it. Solar filters absorb the ultraviolet, visible and infrared energy of the sun, making our star safe to view and photograph.

Protect your eyes with solar glasses. (Helmet is optional.)

B&H Photo, home of my day job, has been a great resource for embracing the best products and knowledge. To that end, I have been recently practicing shooting the sun and want to share this knowledge with you.

As far as glasses go, any simple paper pair will do, as long as it has the aforementioned ISO rating. A cool thing that B&H is doing is packaging free solar glasses with most of their solar filters! So you can kill two birds with one stone, all while not killing your eyes or camera sensor.

Let’s focus on the filters from a photographic point of view. There are three types of solar filters you can choose from:

  • screw-in filter
  • glass drop-in filter for a filter holder system
  • inexpensive and universal paper or adjustable aluminum alloy filters that are easy to take on/off

The screw-in filter is the one I would least recommend. Even though it seems to be the most popular, think of this: The common strategy for shooting the eclipse is to have a filter over your lens so that you can capture a properly exposed and non-flaring sun. Once we enter the small window of totality, when the moon will eclipse the sun, it will be safe to take the filter off and adjust your exposure accordingly for that beautiful shot of dark sky and the white ring around the moon. You must wait until after the “diamond ring effect”—when the sun flares one last time from behind the moon—before taking off the filter. You don’t want to waste precious time (5 to 10 seconds) unscrewing a screw-in filter when you could instead take 1 to 2 seconds to remove a drop-in filter or universal filter cap. The average time of totality will be from 1 to 2 minutes and you want to photograph it but also experience it. Don’t waste precious time fumbling around with your gear!

If you want to look into the available filters and other eclipse equipment, an easy way is to search all the gear and articles that B&H has been working on for the last year. Type “Solar Eclipse” into the search engine at www.bhphotovideo.com and you’ll be taken to this very resourceful page:

Start Practicing Now

The first time you shoot the sun shouldn’t be on August 21. Get some solar filters and start practicing shooting the sun now! I’ve been doing this over the summer, which has given me a chance to test exposures and specific gear before the big day.

I recently purchased the Solar Eclipse Filter by Lee for my Wine Country Filter Holder system, as well as the Daystar universal solar lens filter. My MrStarGuy Adjustable Objective filter is on back order, but should be shipping soon.

Lee is one of the top-end filter companies. Their filter mentioned above is equivalent to a 20-stop neutral density, but also is ISO certified and should be used only for solar work—not for long-exposure landscape photography.

Wine Country Filter Holder system and 100-400mm lens.

The Lee filter is made of glass, and I find the image quality is excellent. The suggested settings from Lee with this filter are 1/800, f/8, ISO 800. Think crazy eights! This was pretty spot-on while the sun was high in the sky around 2 p.m.

With Auto white balance, I found the Lee filter produced a clean white sun. I experimented with the white balance and preferred cranking it to 10,000 K for a nice yellow/orange sun that is more visually familiar. You can see the two compared below:

I also tested the Daystar slip-on filter and found that to be of very good quality as well. It was a bit deeper orange/yellow than the Lee with the white balance set to 10,000 K. I also found the Daystar to be 1 1/2 stops faster than the Lee, as my final exposure setting was 1/500, f/5.6, ISO 800.

Sun shot with Daystar filter at 10,000 K white balance. 1/500, f/5.6, ISO 800.

Sun shot with Daystar filter at 10,000 K white balance. 1/500, f/5.6, ISO 800.

Lens(es) and Game Plan

There are multiple ways to capture and create some unique images of the eclipse. Search Google Images to see what resonates with you.

I definitely recommend using a telephoto lens and getting a somewhat tight shot of the different phases of the eclipse. The careful thing to consider is not getting in too tight. When the total eclipse starts you’ll see the breathtaking corona light start to spill out from behind the moon. This can spread pretty far and create some beautiful patterns. If you are in too tight, you’ll frame it out.

When testing, I was using a 100-400mm lens on an APS-C crop sensor, and the far end of that focal range seemed like the sweet spot for a good telephoto capture. That’s 600mm to 800mm with a full-frame sensor, which you can achieve with really big glass or with a 1.4X or 2X teleconverter. But if you have a crop-sensor camera, that would be the one I’d lean on for this project.

The trick to the telephoto shots will be tracking the sun as it quickly moves through your frame. Depending on how tightly composed your shot is, this setup could require constant attention and adjustments. Having a sturdy tripod is a must, especially if you add a tracking device to a long lens and camera. Make sure your tripod head and legs are rated to hold the combined weight over a long period of time.

Many people will be using digiscoping (attaching a camera to their telescope) to get even closer images of the sun and eclipse. We really haven’t experimented with digiscoping at NPAN, but our good friend Todd Vorenkamp at B&H Explora discuses those considerations in his very informative article, “How to Photograph a Solar Eclipse.”

I’d also bring another, separate camera setup for capturing a wider view that includes the landscape. The telephoto phases of the eclipse are cool to capture, but they are generally featured against a dark black sky. If you use a medium telephoto or wide-angle, you can include some subject matter that gives your composition depth and scale. You’ll still need to have that solar filter on to capture more phases of the sun, but you’ll also want to get a properly exposed foreground—ideally once the uneclipsed sun is well out of the frame—to layer together in Photoshop.

Two tips to consider when using that technique:

  1. Underexpose the foreground shot so all the solar disks will stand out against that hopefully deep blue sky.
  2. Once the eclipse starts to happen, keep an eye on your settings and make adjustments to open up your exposure as the sun gets thinner and fainter.

Be Flexible and Keep an Eye on the Weather

This is going to be the most viewed and recorded solar eclipse ever. You’ll be able to watch it in and around populous cities such as Kansas City, St. Louis, Nashville and Charleston, as well as in national parks such as Great Smoky Mountains and Grand Teton, and in many rural national and state forests.

Do you want to experience this event in a city or town with tons of people and lots of rooftops and amenities, or do you want to go someplace more remote and get a darker sky?

Staying flexible with weather is key. There are plenty of apps (we like Weather Underground) that can share predicted cloud cover. It’s a good idea to have a Plan B and C that are within a 1- to 3-hour drive from your Plan A. You obviously want to avoid overcast and thick cloud cover, but sometimes stray clouds and wisps are unavoidable. Do your best to adapt or adjust—we are wishing you the clearest of skies, of course!

Most hotels are sold out within the path of totality, but campgrounds and private property are “renting” space to eclipse chasers. I will be leading a sold-out workshop with NPAN at a private ranch in the Centennial Valley in Montana, but we will dip down into Idaho to get into the path of totality. We will also be participating with Atlas Obscura and B&H Photo on a Total Eclipse festival in eastern Oregon that just sold out. (There is a wait list that they might open up—click here for more info.)

To find more events in areas that you will be close to, check out these listings:

Don’t forget to enjoy and EXPERIENCE it!

Sure, most of the United States will be watching the eclipse on TV, and that is … two-dimensional. But to actually experience the eclipse is something very special. Animals and humans both react to this astronomical phenomenon in extraordinary ways, and nothing can really prepare you for when the darkness takes over the land and sky. There is a reason people become eclipse chasers and travel the world to keep searching out this experience. Each eclipse and location is unique and different. We look forward to sharing photos of ours with you and vice versa.

A couple of other fun things to prep you for the eclipse:

  • Read Tyler Nordgren’s book Sun, Moon, Earth—A History of Solar Eclipses from Omens of Doom to Einstein and Exoplanets. We are also a big fan of Tyler’s other book, Stars Above, Earth Below—A Guide to Astronomy in National Parks. He makes the science of astronomy very engaging, easy to understand and to get excited about.
  • Send an eclipse to someone you love! The United States Postal Service has released a unique Total Eclipse of the Sun forever stamp. The stamps show the total eclipse, but when you touch them with your finger the eclipse reveals the moon. They used thermochromic ink that reacts to the heat of your finger! So stock up on these stamps and send a letter or post card from wherever you are experiencing the eclipse!

Download our Eclipse E-book

Finally, if you want to learn some more about how and where to photograph the eclipse, download our free Here Comes the Sun: 2017 Solar Eclipse Guide e-book today! It includes this article, along with a travel feature about all the units of the National Park Service in the path of totality, as well as recommendations about photography gear and services, and eclipse information and swag.

Carpe eclipse!

Gabriel Biderman is a partner and workshop leader with National Parks at Night. He is a Brooklyn-based fine art and travel photographer, and author of Night Photography: From Snapshots to Great Shots (Peachpit, 2014). During the daytime hours you'll often find Gabe at one of many photo events around the world working for B&H Photo’s road marketing team. See his portfolio and workshop lineup at www.ruinism.com.

UPCOMING WORKSHOPS FROM NATIONAL PARKS AT NIGHT