Irix

Five Questions: Nikon Z 8 for Night, Perseids, Aurora Apps and More

The night photography world is full of questions, and we’re happy to help with answers.

This installment of our “Five Questions” series features inquiries about the new Nikon Z 8, locations to shoot the Perseids, aurora apps, filter systems and an Irix lens.

If you have any questions you would like to throw our way, please contact us anytime. Questions could be about gear, national parks and other photo locations, post-processing techniques, field etiquette, or anything else related to night photography. #SeizeTheNight!


1. The Nikon Z 8 and Night Noise

Question:

Since the Nikon Z 8 was announced this week, do you have an opinion about it with respect to night photography and noise, and how it compares to Nikon’s other mirrorless cameras? I’m currently shooting with a D850, which I really like but it’s getting long in tooth. In your opinion, what is the best high-res Nikon mirrorless camera for night photography at this point? — Jeff

Answer:

Three of our team members shoot with the Nikon Z 6II, one with the D780 and one with the D5. Between all of us, we’ve shot the Z 7 and Z 9, but none of us owns one, and none of us intends to own one. That tells you something about our preferences, but it doesn’t mean those are bad cameras, even for night photography. Shooting priorities matter.

We haven’t done methodical comparisons between the Z models, and the Z 8 is not yet shipping, so we have no experience with that model. But from our experience shooting Z cameras, here’s what we know:

We have found that the Z 6II has a slight edge in high ISO characteristics, with the Z 9 not that far behind. The Z 8 features the same 45.7-megapixel full-frame sensor and Expeed processor as the Z 9, so the former should perform as well as the latter does for a high-resolution camera at night. In other words, the Z 8 is kind of a mini Z 9, so we’d expect the same results.

That would mean the Z 6II would still be the best option for low-light photography in terms of high ISO noise, all things being equal.

However, all things usually aren’t equal. There is a lot that goes on in determining the best noise characteristics of any given camera. You could do a side-by-side test by shooting the same scene with all of same parameters, but that may not be the best test for night photography.

For example, when shooting to freeze star points, you need to use a faster shutter speed on a camera with a higher pixel count than you would on one with a smaller pixel count to achieve the same visual result. This means you need to use a faster ISO on that higher-resolution camera. Now you are no longer comparing apples to apples.

The Z 8 autofocus is sensitive down to -9.0 EV, making it the best camera autofocus for low-light photography.

There are other considerations with the higher pixel count as well. Such as:

  • Do you like to do a lot of star stacking? High-resolution files can really bog down that process due to their sheer size.

  • Do you like to make giant prints? If so, a higher-resolution camera could be a great choice.

  • Another consideration would be the better low-light focusing the Z 9 and Z 8 have—a feature called “Starlight View.” If you have trouble focusing at night, this capability alone may trump everything else.

  • The Z 8 simulates the Z 9 in high-speed capture, advanced auto-focusing capabilities and superhigh-resolution video. If you like to shoot sports and wildlife in addition to night photography, those robust features would be a huge asset.

In short, we have not shot with the Z 8 yet so we can’t really say how it will compare with the other Z models. We do look forward to getting our hands on one and putting it through its paces, but seeing as none of us shoots with the other higher-resolution cameras, my guess is that our collective preference will remain the Z 6II. — Tim

2. Perseids from the Curb

Question:

Can you recommend someplace I could go to photograph the Perseid Meteor Shower where I’d have the possibility of an outstanding foreground and dark sky for the meteors? One caveat: I have a knee issue. — H.

PhotoPills confirms that Great Sand Dunes National Park could be a great Perseids option.

Answer:

It sounds like you need a good roadside location. You also definitely need someplace with a north/northeast view and no light pollution in that direction, nor a mountain range blocking the sky.

Great Sand Dunes National Park is awesome for those criteria. You can shoot roadside and have the dunes in front of the mountains with the sky above. I’d even be tempted to attempt a vertorama with a blue hour bottom and star field above.

Badlands National Park also has some spectacular pull-outs where you could do the same. The beaches of Olympic National Park fit the bill, but the ones with the best foregrounds require at least a little bit of a walk, and slippery stones may be troublesome if the tide is receding. At Crater Lake National Park, shooting from the lodge over Wizard Island could be amazing. — Matt

Note: For more information about shooting meteor showers, be sure to check out our e-book Great Balls of Fire.

3. Tracking Auroras

Question:

Can you share the aurora tracking app that you use? — Deborah C.

Vatnajokull National Park, Iceland. © 2023 Chris Nicholson. Nikon D5 with a Nikon 14-24mm f/2.8 lens. 4 seconds, f/4, ISO 6400.

Answer:

The answer is ... several! I’m on Android, and I use My Aurora Forecast. Lance, Tim and Matt are on iPhone, and they use Aurora Forecast (Lance, Tim), My Aurora Forecast & Alerts (Matt) and SpaceWeatherLive (Matt).

We recommend using more than one. Pooling info from different sources can give a more accurate picture of what might happen and where. Also, it can be nice to set up an automated alert—sometimes we can end up shooting auroras on a night we didn’t know they’d happen. — Chris

4. Finding a Filter System

Question:

I’d like to get a filter system that works with my lenses—primarily an 82mm and 95mm. But I also have a very concave lens (the Sigma 14-24mm f/2.8), so I’m thinking I need a 150mm system. — Rachna

Answer:

Welcome to the wonderful world of filters! This is a great way to extend long exposures during the day and night.

I’m a fan of square systems, as they offer the most versatility. Going down the path you suggest, I suggest you invest in these three things:

  1. NiSi 150mm Filter Holder for Sigma 14-24mm lens

  2. the adapter rings for 105mm, 95mm and 82mm filter threads

  3. Starter Kit that includes 6-stop, 10-stop and 3-stop graduated 150mm neutral density filters

This is pricey but gets you everything you need, albeit in a big kit. (Most people who invest in 150mm filters find them cumbersome, but that’s the way it goes.)

Alternatively you can use rear ND filters for the Sigma and then use 100mm filters for your other lenses. This would be more cost-efficient, as well as a smaller footprint on your lenses and bag. The caveat is that there are no rear graduated ND filters, so scenes that would normally call for them would need to be shot with multiple exposures and blended in post.

But if you do choose to go that way and use a 100mm square filter system, the NiSi V7 Advance Kit includes pretty much everything you would need except the 95mm adapter. However, the caveat with this system is that the circular polarizer will work only with lenses 82mm or smaller.

Another thought is that most mirrorless lenses are smaller than their DSLR counterparts, and they don’t have bulbous front elements. Therefore, switching to mirrorless also facilitates a more compact and cost-efficient filter system.

Finally, why do I keep recommending NiSi? There are lots of filter systems that are great. I happen to like NiSi because they are a good value. I’ve been using them for more than 5 years and couldn’t be happier. — Gabe

5. Eyeing the Irix 21mm

Question:

I have a Canon R6 mirrorless camera and I’m looking for a good, fast astro lens. I noticed you recommended the Irix 15mm f/2.4 lens. Is the Irix 21mm f/1.4 good for astro too? — Jim

Answer:

I’ve shot with the Irix 15mm for years and am quite fond of it. You need to stop down to f/3.2 to eliminate most of the coma. I have not shot with the 21mm yet but will be receiving one soon. Based on their other f/1.4 lenses, I’d expect that you’ll need to stop down to f/2.8 or thereabouts to minimize the coma.

The main thing for you and the R6 is that these lenses are DSLR-mount only. If you don’t mind using the adapter, then I’m sure either would be a great lens for you—the choice just depends more on your style of shooting. The 15mm focal length is quite wide, so you really need a foreground.

My first choice would be the Canon 15-35mm f/2.8, which wide open should get you coma similar to the stopped-down Irix lenses. But if that is not in your budget, I’d go with whichever of those Irix lenses fits your shooting style the best. — Lance

Chris Nicholson is a partner and director of content with National Parks at Night, and author of Photographing National Parks (Sidelight Books, 2015) and Photographing Lighthouses (Sidelight Books, 2023). Learn more about national parks as photography destinations, subscribe to Chris' free e-newsletter, and more at www.PhotographingNationalParks.com.

UPCOMING WORKSHOPS FROM NATIONAL PARKS AT NIGHT

Five Questions: Super Resolution, Ghosts, Intervalometers and More

If you have questions, we have either answers or opinions, and we’re not shy to share either.

This installment of our “Five Questions” series features inquiries about Adobe’s new Super Resolution, the work of Alexey Titarenko, Milky Way lenses for the Nikon Z 7, intervalometer recommendations, and the efficacy of carrying two Coast flashlights.

If you have any questions you would like to throw our way, please contact us anytime. Questions could be about gear, national parks and other photo locations, post-processing techniques, field etiquette, or anything else related to night photography. #SeizeTheNight!


1. Seeing Quadruple

Question:

Regarding your post about Adobe’s new Super Resolution feature, I was surprised to see the headline mention “quadruple” enlargements. I thought the new feature was “2X.” Did I read it wrong or misunderstand the feature announcement? — Robyn

Answer:

It’s just a math thing. You are correct that Super Resolution doubles the pixel count of an image in both the horizontal and vertical linear directions. For example, a 200 x 300 image would become 400 x 600.

That results in the total area of the image being quadrupled. In that same example, the resolution would go from 60,000 square pixels to 240,000 square pixels—i.e., quadruple, or four times the number of pixels. See the image above for a graphical representation. — Chris

2. Ghosts in the Composition

Question:

I am trying to mimic Alexey Titarenko’s work, especially the movement he puts in. I used native ISO, an appropriate aperture and a long shutter. Would you mind giving me help in this type of work? — David C.

Answer:

I assume you are talking about Alexey’s “City of Shadows” series. Interesting human movement happens in exposures from 1/15 to 15 seconds, because most people can’t hold truly still for more than 1 to 2 seconds.

In order to create the “ghosts and shadows” effect that Alexey is getting during daytime, you need to use a 3-, 6- or 10-stop neutral density filter to allow for a long enough exposure. Operating under overcast skies will help, as will lots of experimentation.

A lot depends on how much stillness you want to show in the chaos of movement. That is important. For example, for Alexey’s shot of the handrail, it was critical that the rail remain sharp amid the mass of bodies moving past. It works beautifully. However, many of his other photographs feature just a little movement, which allows him to capture a “soul” that is still.

On the other hand, reaching longish shutter speeds like that at night is easy, because you’re already working with minimal light. In fact, the challenge in dark conditions is actually adding light so you can see the human subjects in all that darkness. For more info on how to do that, see my blog post “Photographing Phantoms.” — Gabe

3. Z 7 Milky Way Glass

Question:

I have a Nikon Z 7 and would like to try Milky Way photography this summer. I have the Nikon Z 14-30mm f/4 S lens and believe the f/4 aperture will not be fast enough to prevent star streaking. Would the Nikon Z 20mm f/1.8 S or the Irix 15mm f/2.4 be an acceptable alternative? — Jerry

Answer:

You’re right that the f/4 lens will be very limiting for star-point images in general. They would require you to shoot at an ISO of 12,800, which I would not recommend with the Z 7 unless you’re planning to stack multiple frames in software such as Sequator or Starry Landscape Stacker. Since you have a Z 7, I suggest going with a native Z lens. Though I haven’t shot with most of them, word is that they’re all truly outstanding.

I have not shot with the Z 20mm f/1.8,  but I love that focal length for Milky Way. So I think that either that lens or the more-expensive Nikon Z 14-24mm f/2.8 would be your best bets.

The Irix lenses are excellent, though they require an adapter to use on a Z-mount camera. (Irix will no doubt release Z-mount lenses in the future, but we don’t know how near that future is.)

If you’re still stuck about which lens to buy, you could always rent to try before committing. We can recommend Borrow Lenses or Lens Rentals. — Lance

4. Intervalometer Recommendation

Question:

I just reviewed your 2017 article on wired versus wireless intervalometers. Are you still recommending the wired Vello Shutterboss II? — Hadley

Answer:

Yes, it’s still on the recommended list for wired intervalometers. Though it does share the one weak spot of all wired intervalometers, which is the connection point to the unit, which often wears down over time.

If you’re open to a wireless solution instead, my favorite intervalometer overall is the Phottix Aion. Not only does it not suffer from that weak spot, but it also allows for exposures of fractions of seconds, which is useful when shooting with NPF Rule shutter speeds.

To learn more about the Aion, see my post “A Better Intervalometer.”

Though I do champion my favorite, either of the above options will suffice. You really can decide based on your personal priorities and be happy and successful either way. — Matt

5. Are Two Coasts Better Than One?

Serpent—Borrego Springs. Nikon D4s with a Nikon 14-24mm f/2.8 lens set at 24mm, light painted at close range with a Coast HP7R flashlight. Three exposures at 15 seconds, f/4, ISO 6400.

Question:

I notice that you guys seem to all have both Coast HP7R and HP5R flashlights. I want to buy a more powerful small flashlight than I have now. Do you own both because the HP7R is too powerful for some applications? If you were to buy just one, which would it be? — Mark

Answer:

Yes, we all own both the HP7R and the HP5R because the difference in power is useful for different applications. The HP7R is a very bright flashlight (300 lumens), while the HP5R is less bright (185 lumens). Both have a second power setting that drops the output by 90 percent, so the combination essentially gives us four different lumen options.

How do we use this versatility? One example: If we’re shooting the Milky Way under a new moon (pitch black, no moonlight at all), then our apertures are very wide (f/2 or f/2.8) and we are using very sensitive ISOs such as 3200 or 6400. That makes 300 lumens overkill and more difficult to control, whereas 185 lumens can be very effective. You just don’t need a powerful flashlight for that kind of sensitive exposure.

An opposite example is when we’re shooting under the much brighter conditions of a full moon, when our apertures may be set to f/5.6 or f/8 and the ISOs to 100 or 200. These less-sensitive exposures require a stronger flashlight to paint the scene.

The different flashlights can also be more or less useful when considering the distance of the subject from where you’re light painting. A rock formation 100 yards away obviously requires a more powerful light than a flower 2 feet in front of you.

So yes, it’s nice to have both models to cover all the possible situations. But if you are looking to purchase just one, I would recommend one of these strategies:

  1. Purchase the more powerful HP7R and use some neutral density gels to knock down the power when needed. You can get a sample pack that contains all you might need for less than $10.  Remember, you can always make a bright flashlight dimmer, but you can’t make a dim flashlight brighter.

  2. Decide which conditions you favor for night photography. If you mostly shoot under a new moon, get the HP5R. If you find yourself doing a lot of work under brighter conditions (full moon, city scenes), purchase the HP7R.

Either way, both of these Coast flashlights are excellent night photography tools that are worth every dollar you spend on them. — Tim

Chris Nicholson is a partner and workshop leader with National Parks at Night, and author of Photographing National Parks (Sidelight Books, 2015). Learn more about national parks as photography destinations, subscribe to Chris' free e-newsletter, and more at www.PhotographingNationalParks.com.

UPCOMING WORKSHOPS FROM NATIONAL PARKS AT NIGHT

Resharp Your Lens: How to Calibrate Infinity Focus on the Irix 15mm and 11mm

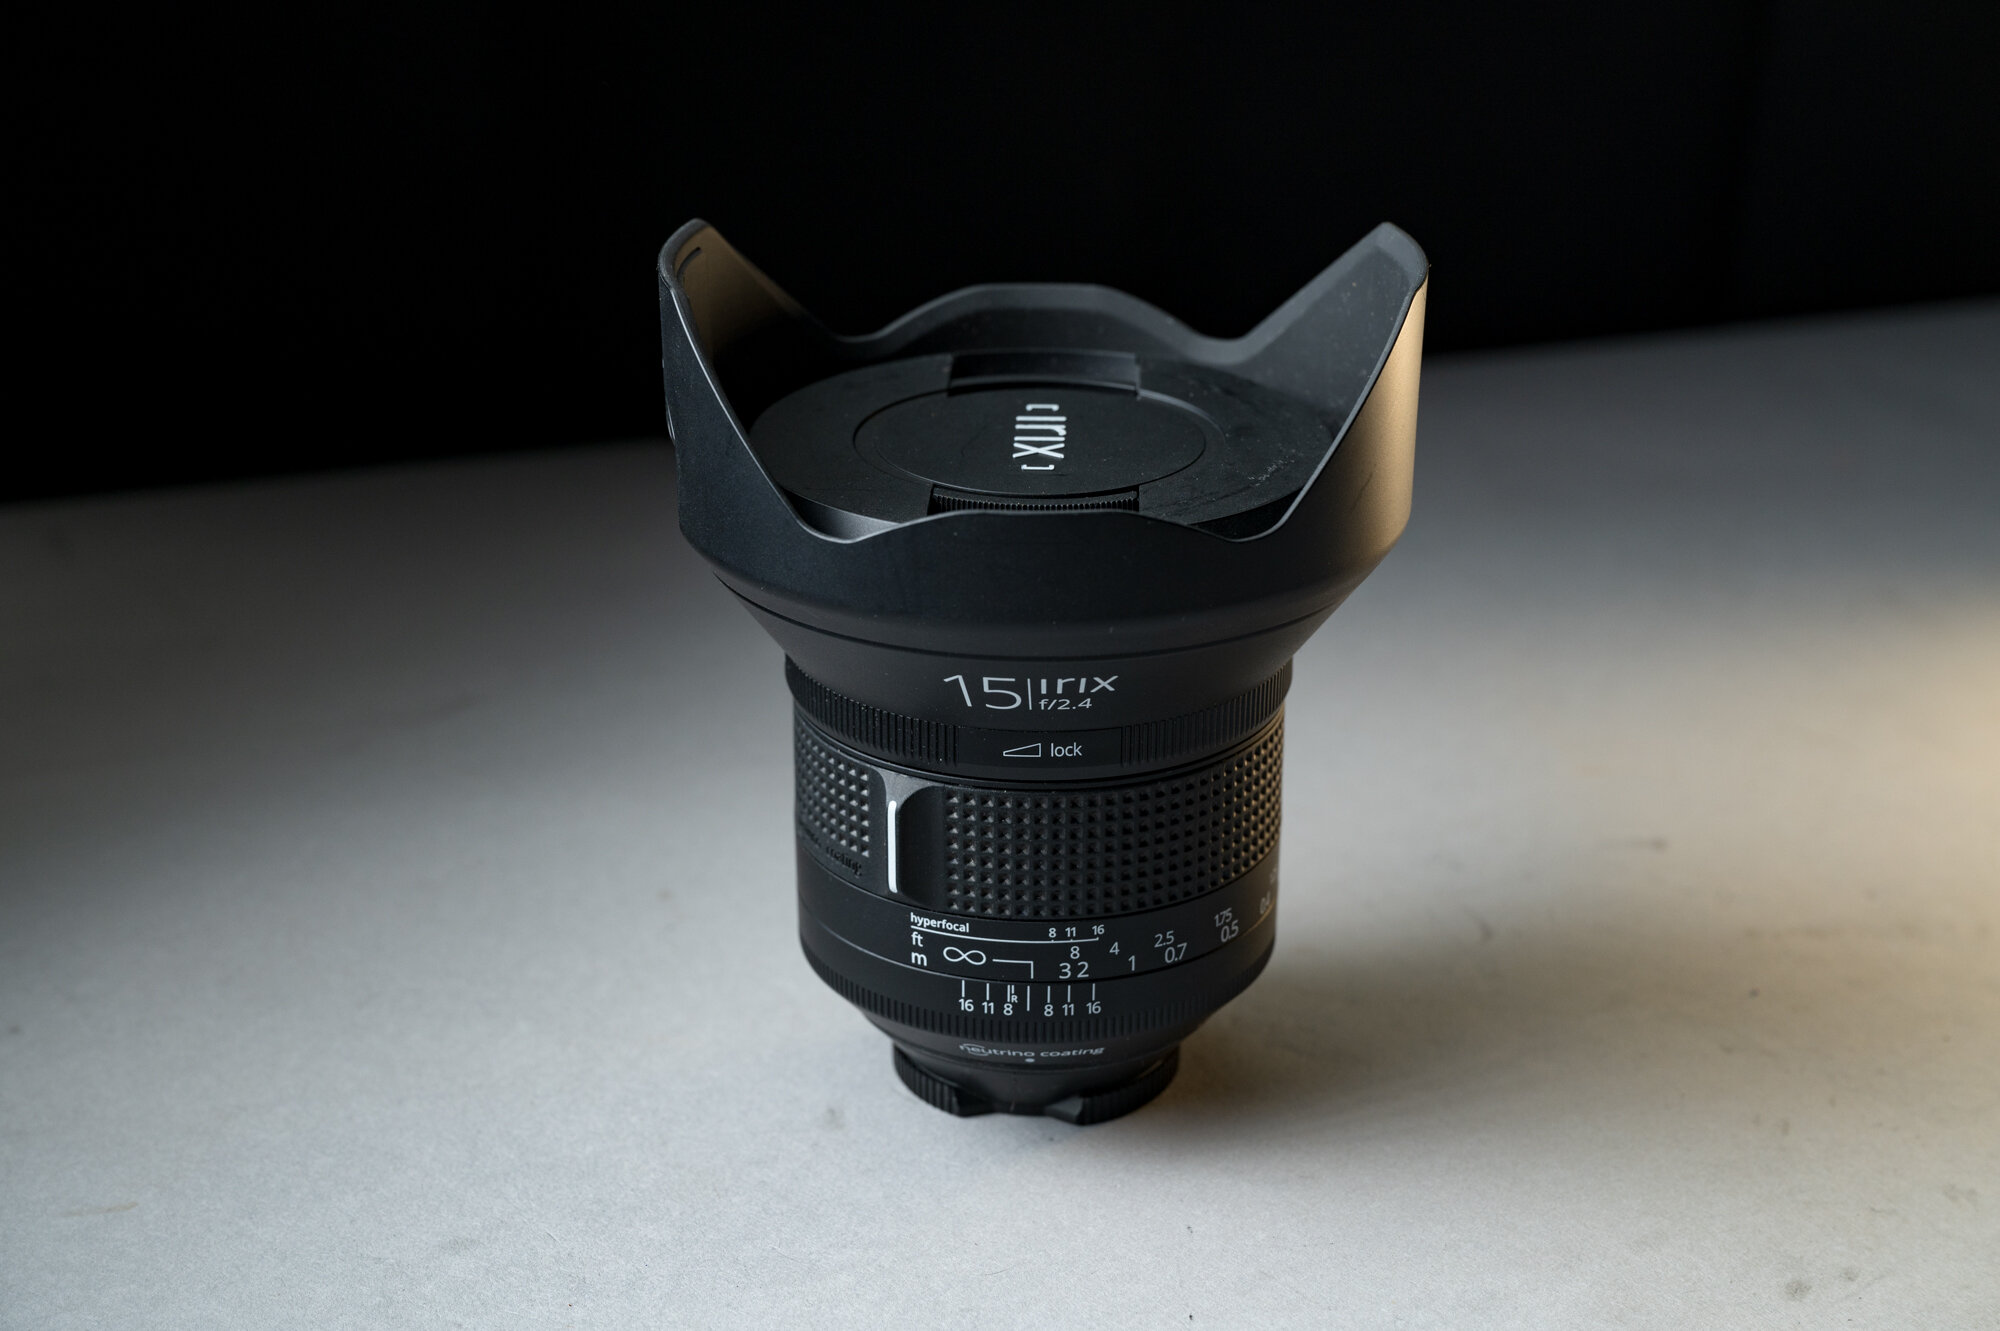
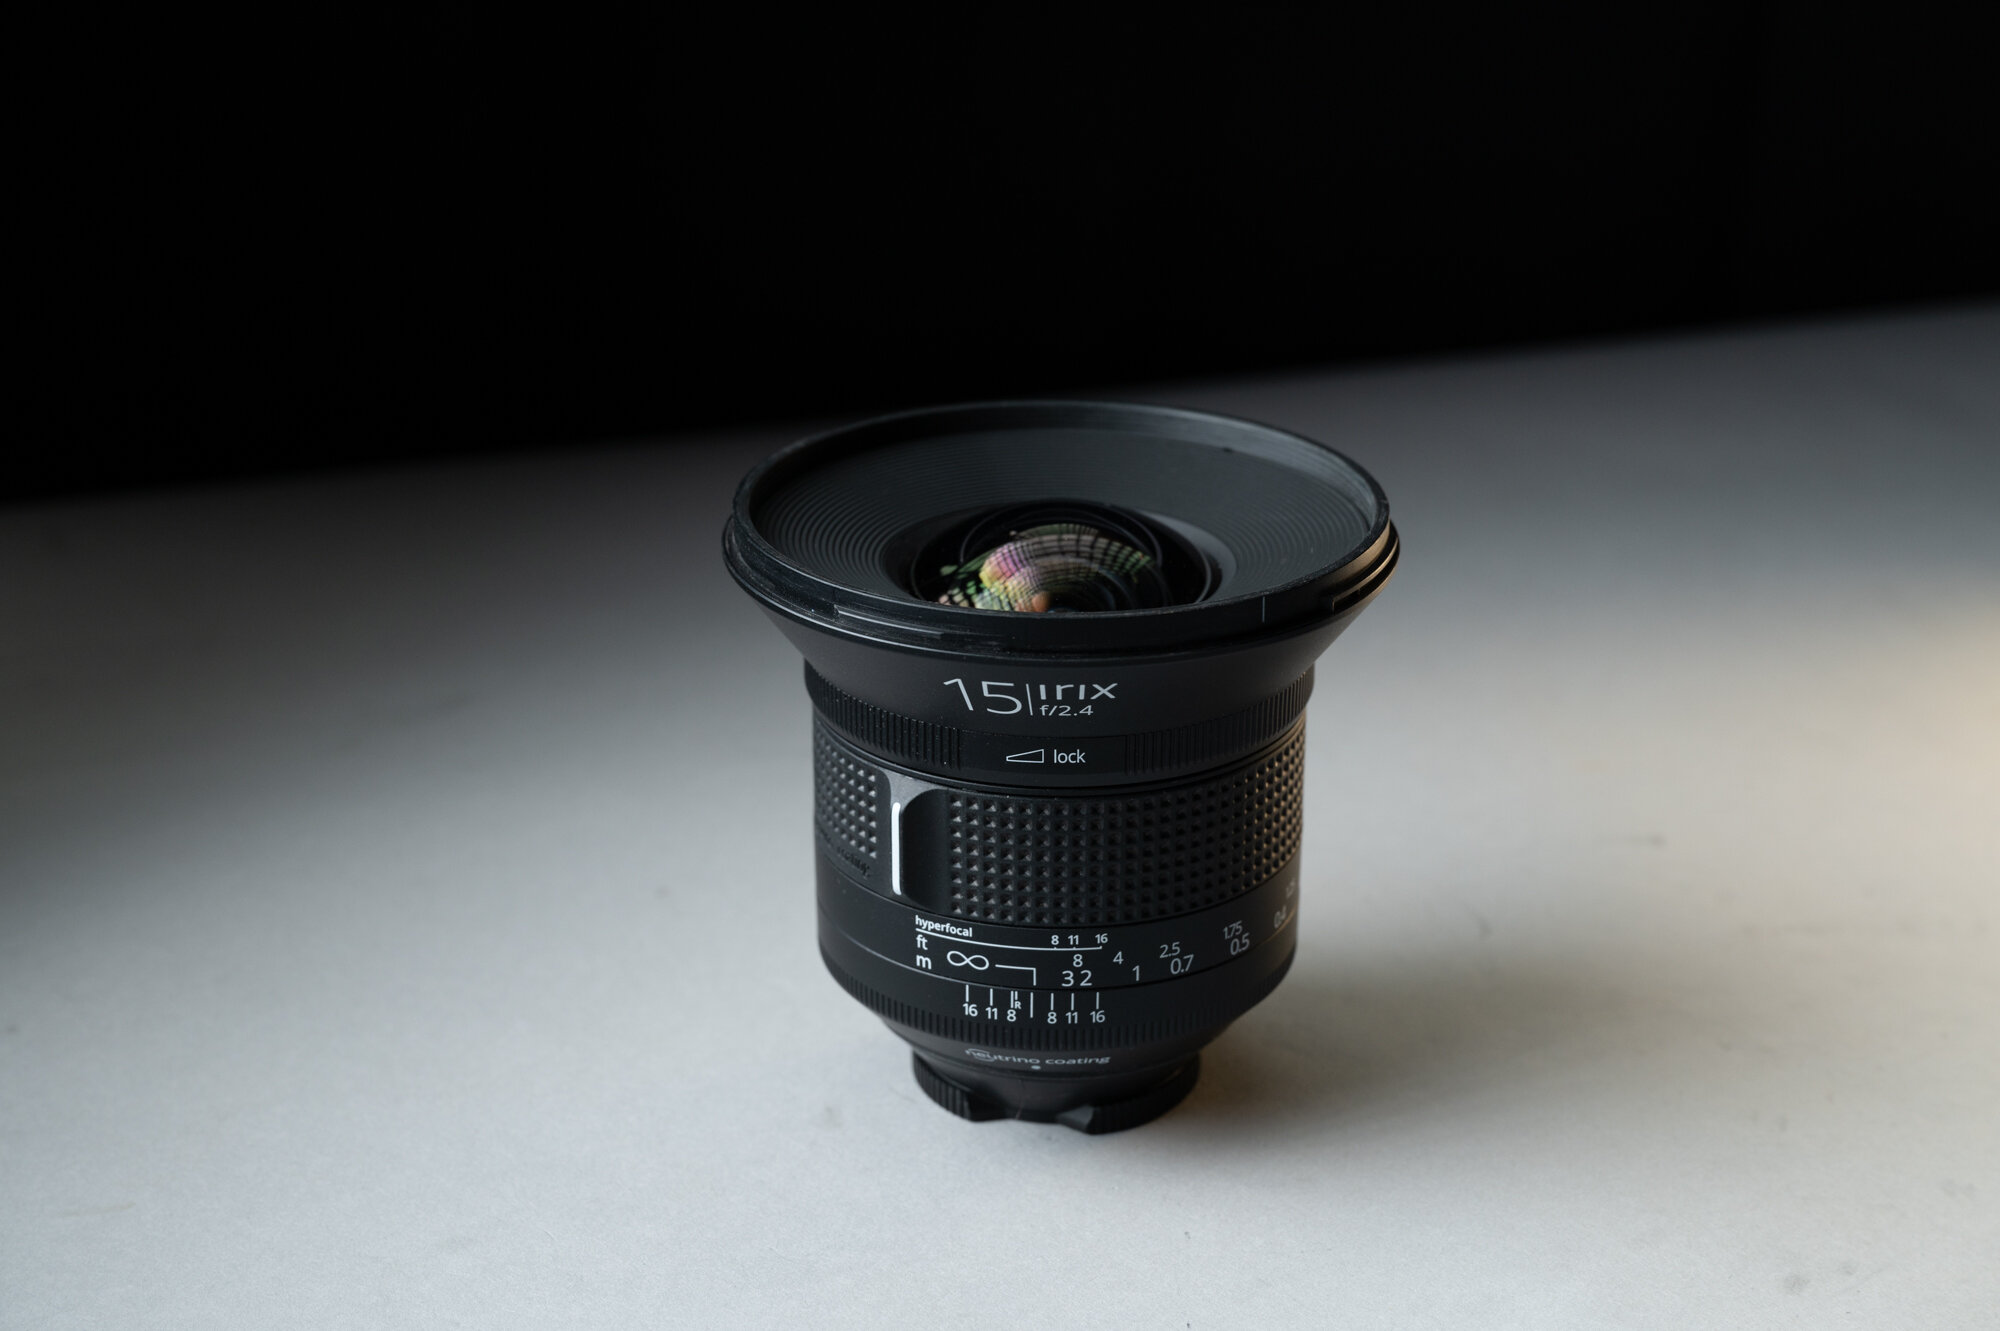
Irix 15mm and 11mm lenses are very popular among the National Parks at Night instructors and our workshop attendees. There are multiple good reasons for that, all of which have to do with sharpness, including:

  • The lenses have very little coma.

  • They’re sharp as heck.

  • The focus ring clicks into place at infinity, giving you tactile feedback for focus, which is so helpful in the dark.

Put all those together, and you pretty much have a guarantee that your stars will be sharp.

Irix has another feature that will allow you to stay sharp too: If you find that the infinity mark is off, you can calibrate it at home.

Why would you need to do this? Our experience is that the focus is perfect as received from the factory. But, as time passes and your lens gets jostled around during travels, it’s possible the focus can drift. It happens to the best of lenses. But with most brands you need to send such lenses to a repair technician, while Irix superwides enable you to self-fix this relatively quickly.

If you own an Irix 15mm f/2.4 wide angle lens or 11mm f/4.0 rectilinear wide angle lens, you can follow the instructions below to calibrate your own infinity focus.

Note: If you have really poor eyesight or your fingers aren’t nimble, you may consider sending it in to Irix instead.

The Irix Calibration Process

What you will need:

  • camera

  • tripod

  • torx T6 screwdriver with a magnetic tip

  • standard slotted 1/16-inch or 1.5mm screwdriver with a magnetic tip

  • a clean, dust-free, well-lit space with a white or very light surface

  • daylight

I used a computer repair kit I bought at a local home improvement store. If you don’t have a set like this, you can find one at B&H Photo or Amazon.

Step 1: Remove the lens hood.

You use the lens hood, right? You should, for protecting that slightly bulbous front element from bumps and scratches, if nothing else. Anyway, time to remove it, for just a few minutes.

Step 2: Lock to infinity.

As mentioned before, infinity focus is easy with an Irix. Just turn the focus ring until you feel it click into the infinity detent.

lock Itrix 15mm.jpg

Then turn the focus lock ring all the way to “lock.” I use two hands for this and I move slowly so that the focus ring doesn’t move while locking it down.

Step 3: Open the calibration window.

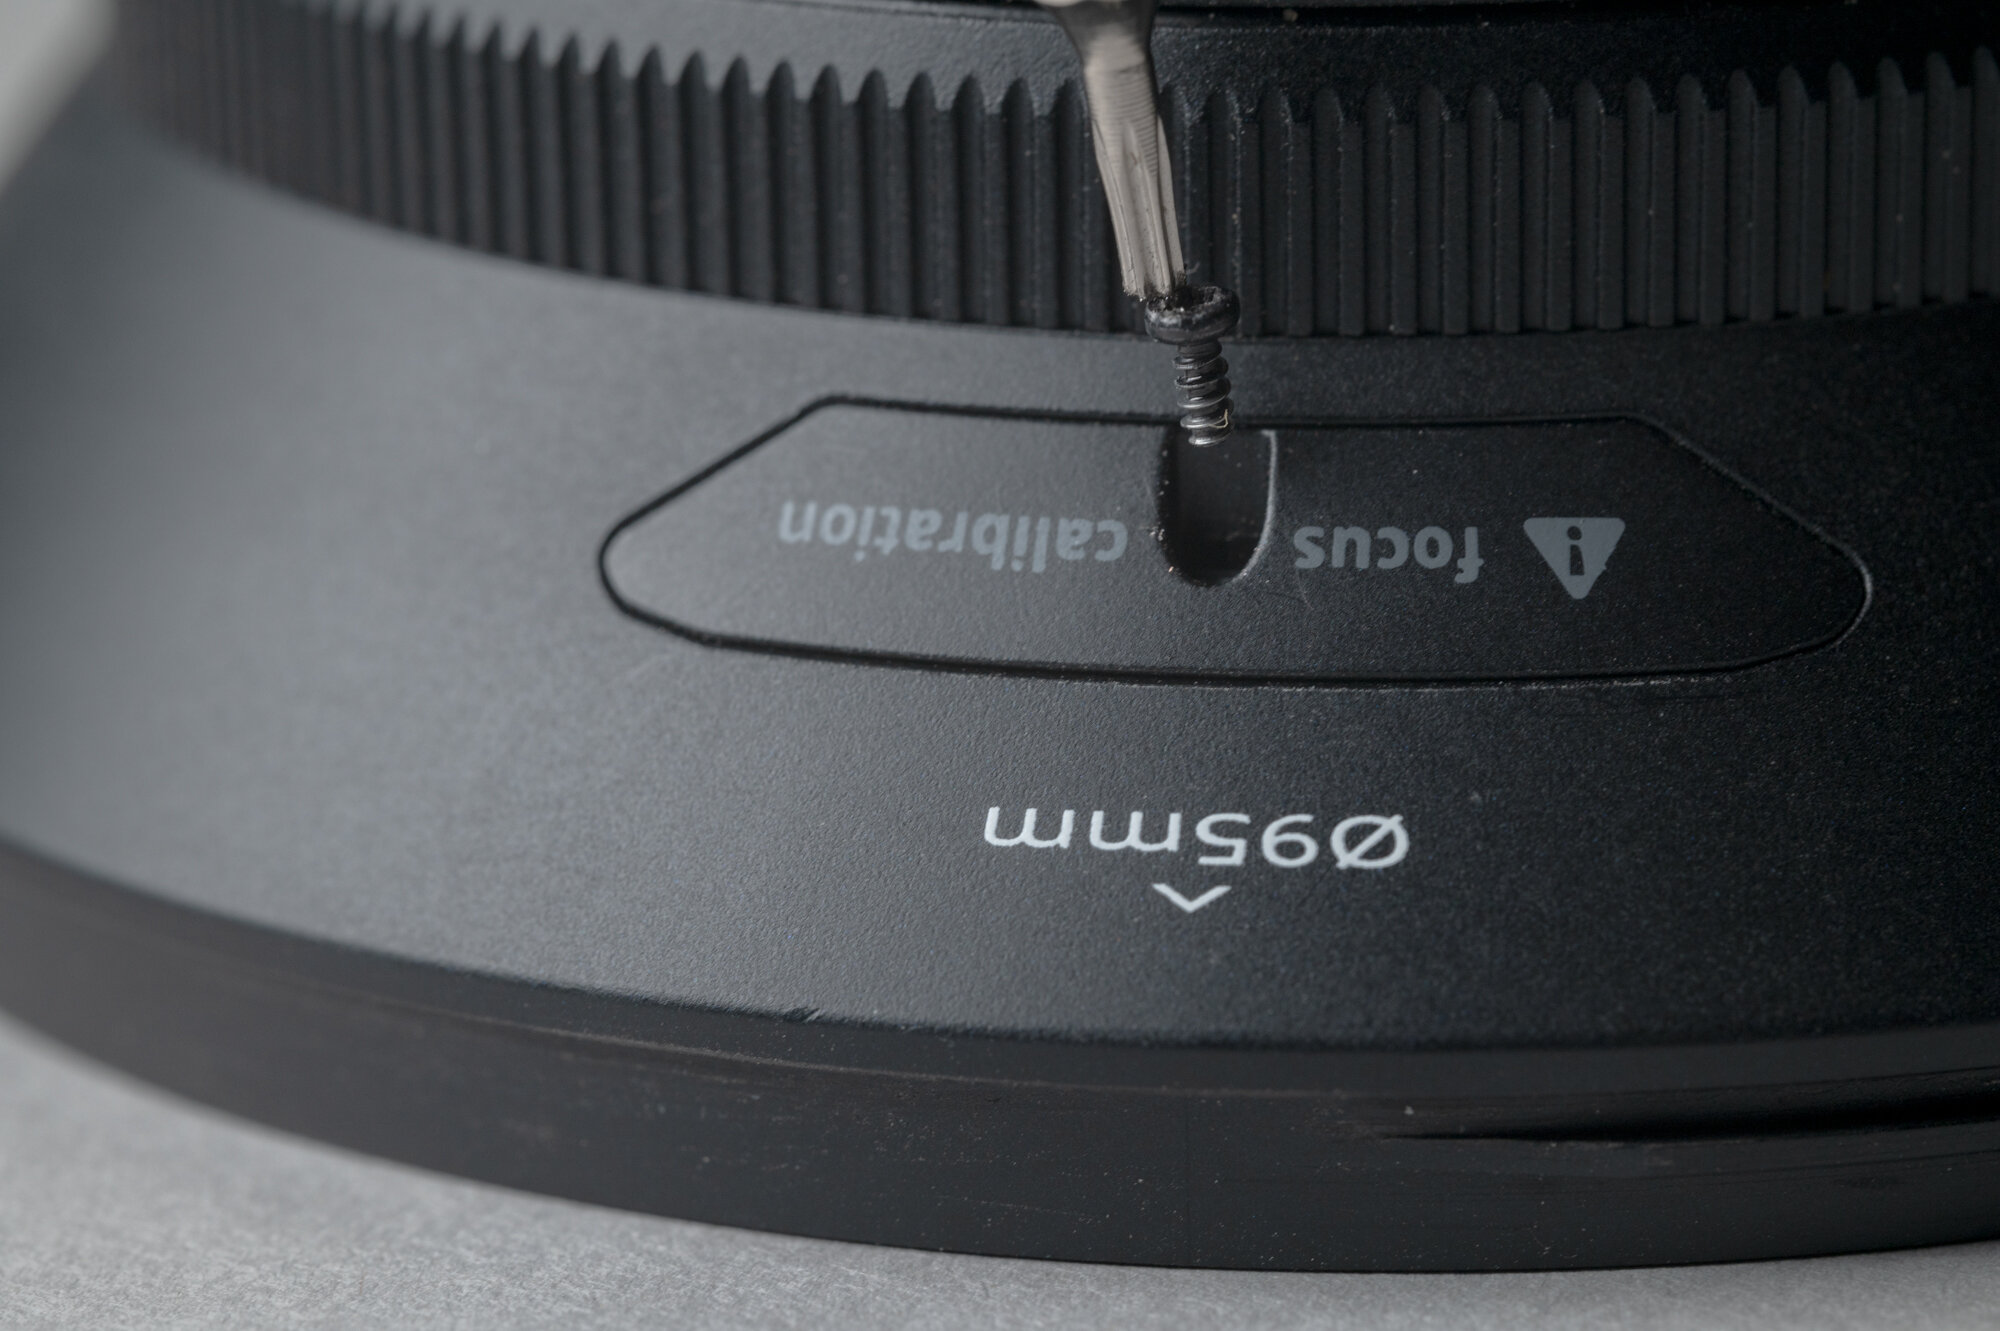
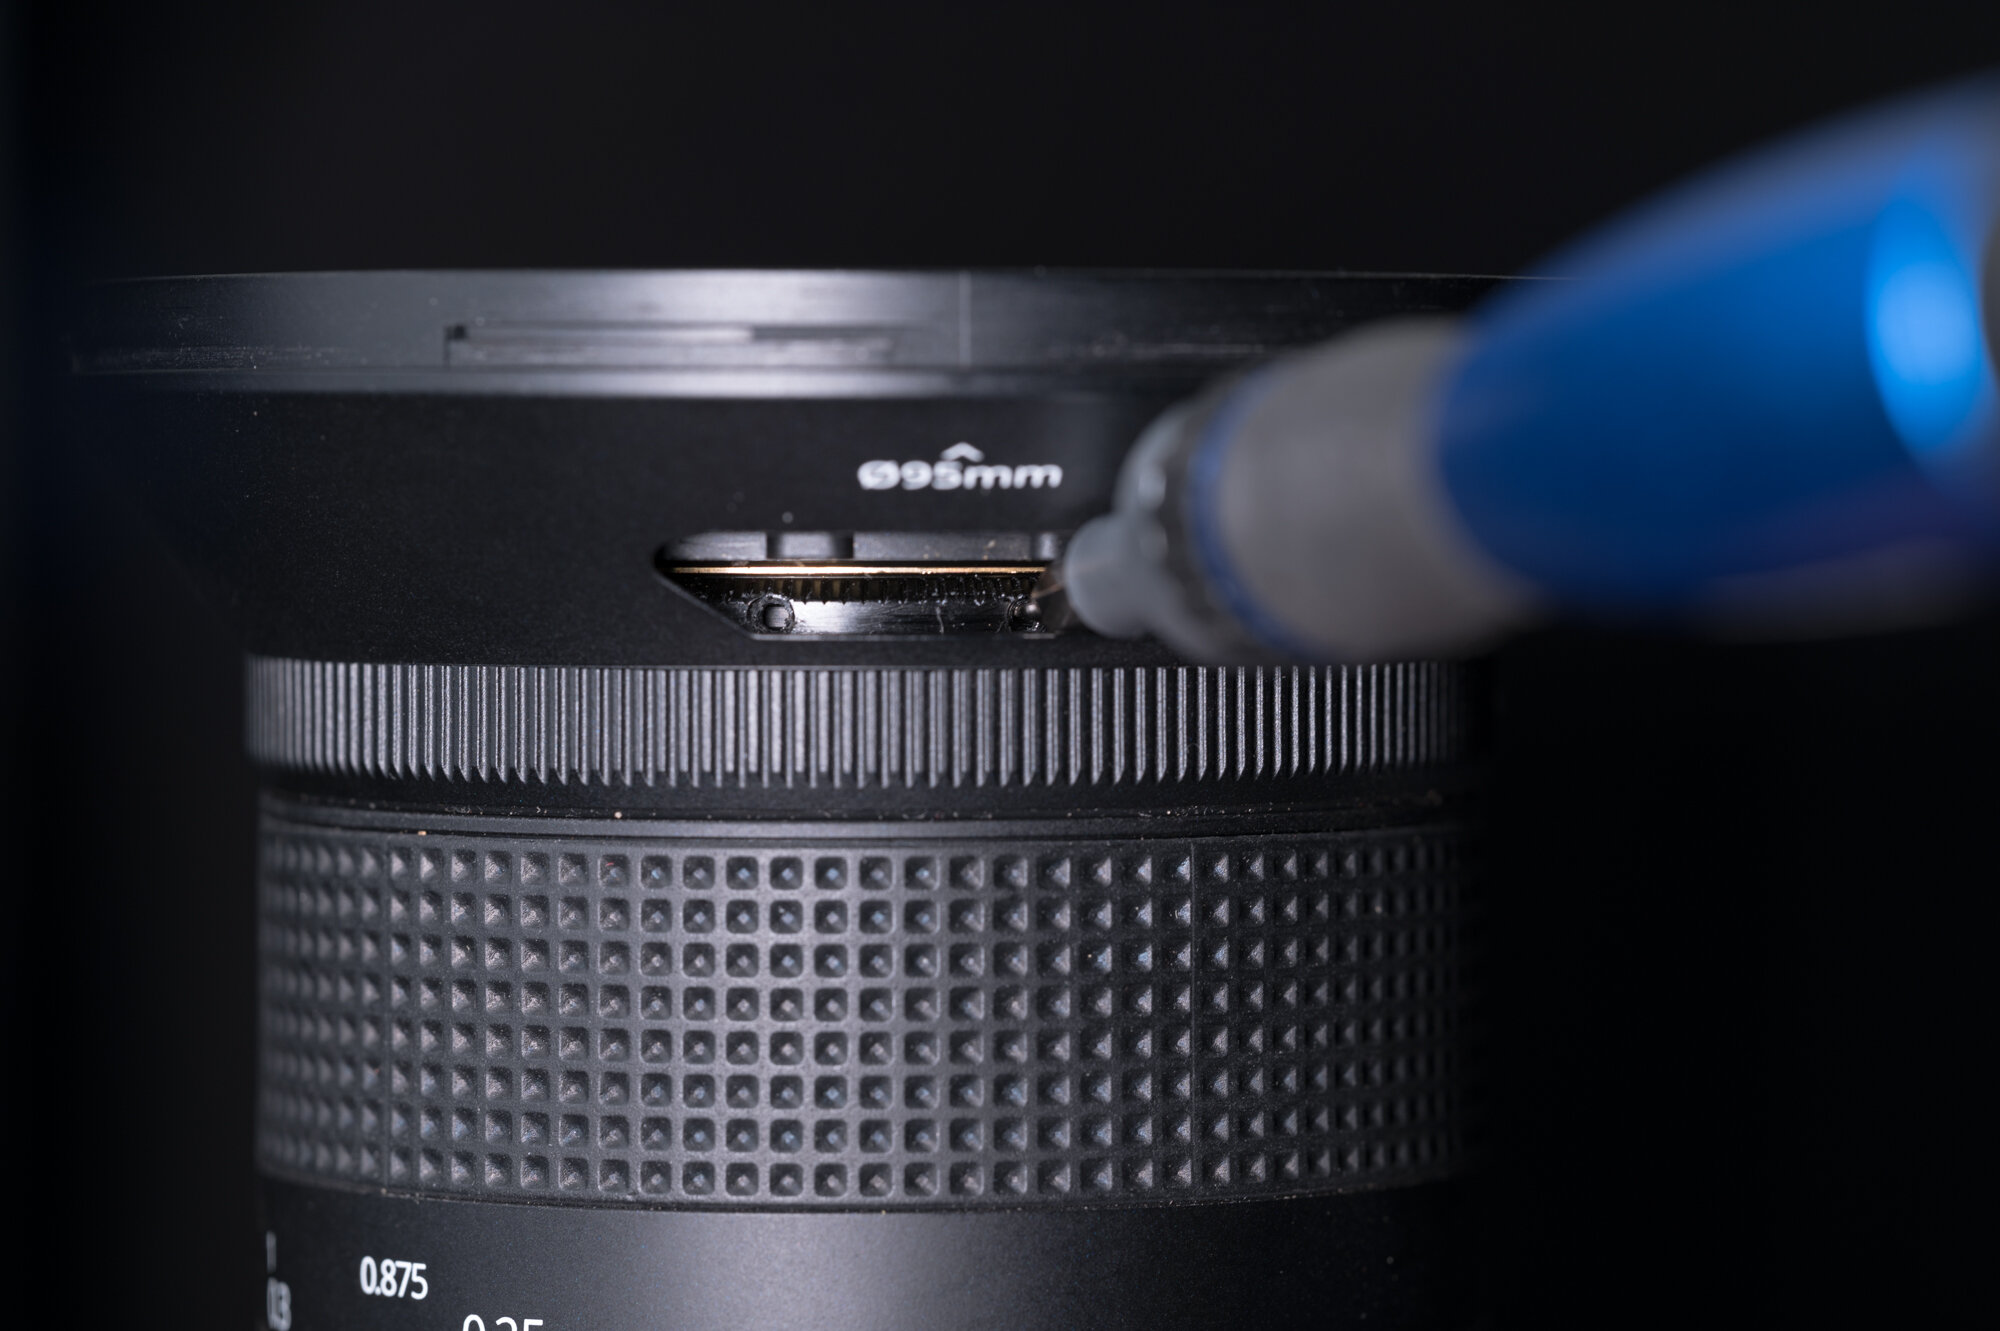
Use a Torx T6 screwdriver to open the calibration window by removing the screw entirely. Set the screw and cover aside in a safe place, such as a small plastic bin.

Carefully slide out the plastic cover labeled “focus calibration” (the head of the Torx screwdriver is convenient for lifting the cover away).

Step 4: Find the interior locking screw.

Look inside at the calibration ring, and find a slot screw. If you don’t see one, slightly turn the focus lock ring until you see the screw.

Note: You’re looking for the small slot screw, as opposed to the larger screws that keep the calibration ring in place. You absolutely do not want to unscrew the latter.

Step 5: Unlock the focus

Using a 1.5mm slotted screwdriver, fully remove the small locking screw from the calibration ring and set it aside in a safe place.

Note: This is where it’s vital you have a magnetic head on your screwdriver. You do not want to lose that screw inside the lens barrel.

Step 6: Set the lens.

Mount the lens on a camera and mount the camera vertically on a tripod. Make sure you have easy access to the calibration window.

Go outside in daylight and point the camera at a distant object (at least 36 feet away) with good contrast. Orient this object in the center of the frame and set your focus point to the exact center.

Set the aperture to the widest setting—i.e., f/2.4 for the 15mm or f/4 for the 11mm.

Step 7: Zoom in.

Activate your camera’s live view and zoom in to maximum magnification.

Step 8: Adjust the focus.

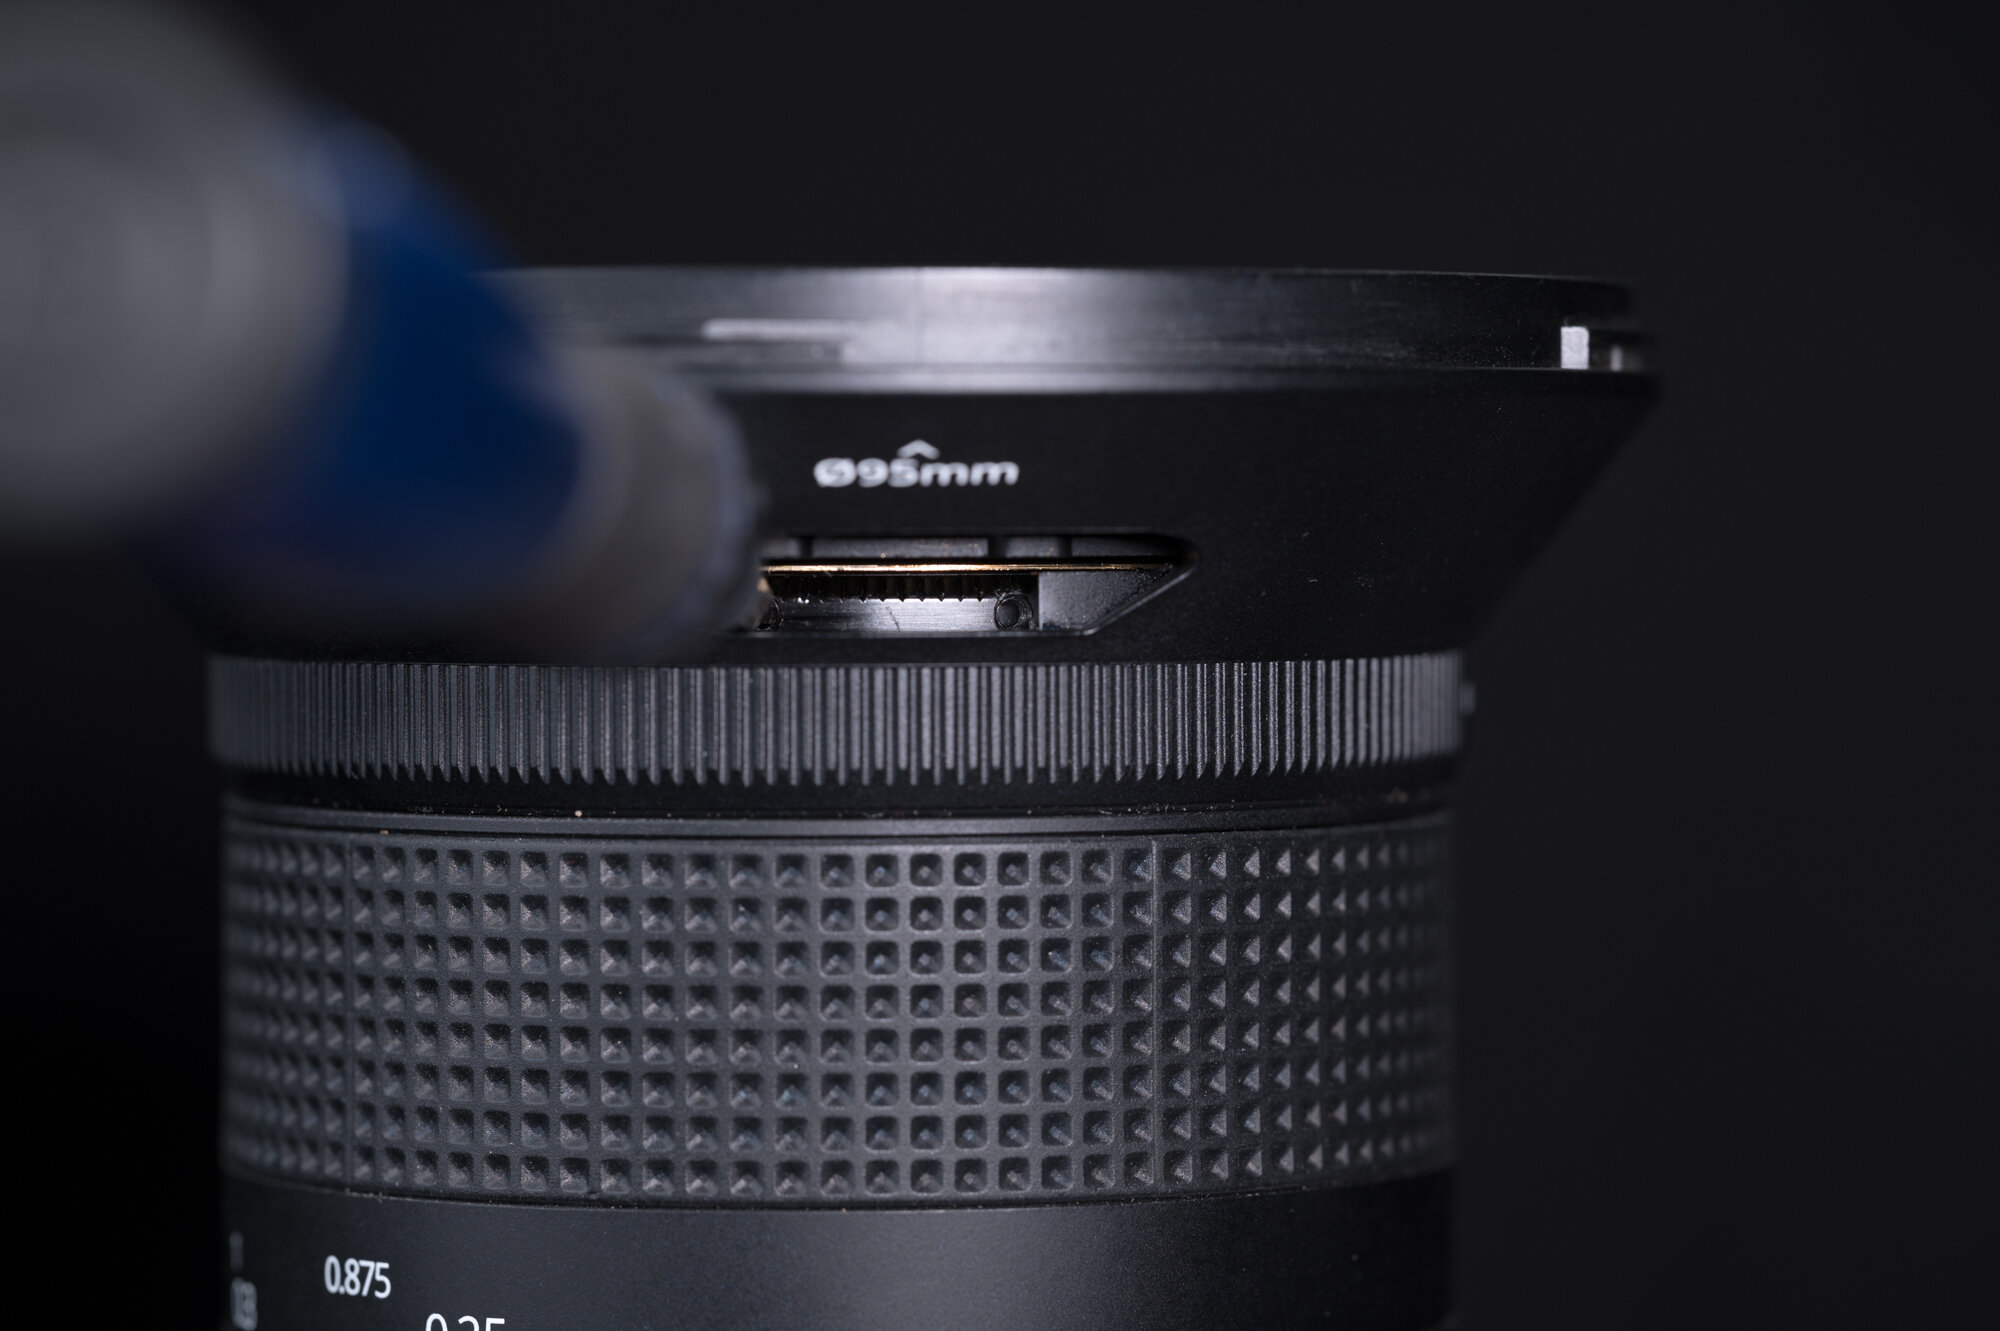
Insert the slotted screwdriver into one of the holes in the calibration ring, and then rotate the ring slowly back and forth. (As you adjust, you may need to choose a new hole.)

Keep rotating until the objects at infinity (36 feet away or further) become as sharp as possible on your rear LCD screen or when viewed in your EVF. It’s a very slow process. Take your time. If you have one, use a focusable loupe (such as the Hoodman HoodLoupe) to help you see the changing sharpness even better.

Step 9: Lock it Down.

Once focus is achieved, go back to your work area inside. Remove the lens from your camera.

Look for an open spot to thread the small locking screw back into the calibration ring. Depending on how much you adjusted the focus, that may not be the same hole you removed the screw from earlier.

Using the slotted screwdriver, carefully insert the screw and turn until firmly finger-tight. Do not over-tighten.

Step 10: Close things up.

Slide the plastic “focus calibration” cover back in, then secure it using the Torx screw and the T6 screwdriver.

Unlock the focus lock ring.

That’s it—you’re done! You now have a perfectly calibrated Irix lens for photographing amazing star images. I recommend heading out that night and shooting a few test images of the stars just to be sure.

For those who like to watch, here is Irix’s video version of this tutorial:

Matt Hill is a partner and workshop leader with National Parks at Night. See more about his photography, art, workshops and writing at MattHillArt.com. Follow Matt on Twitter Instagram Facebook.

UPCOMING WORKSHOPS FROM NATIONAL PARKS AT NIGHT