Toys and Tinsel: Our 2022 Holiday Gift Guide

Here we are again. Another year almost over, another season of thanks and joy upon us.

Along with the season of greetings comes the season of giving, and as we have every year since 2016, we’re here to help with ideas for the night photographer in your life.

We try to mix and matchβ€”some things photography, some things national parks; some things serious, some things fun; some things lofty, some things modest. Over 35 products carefully curated for you and yours. There should be something here for every night photographer on your list.

This is our gift to you: to help you find something special for someone special. Your gift to us? You’ve already given it. Thank you for being you, and for being here.

In addition to the blog post below, we’re also providing this gift guide as a free downloadable PDF e-book, so you can read it and reference it on any device, anytime, anywhere. Inside you’ll find products from major brands such as B&H Photo, BenQ, Bay Photo and Vallerret, along with great little finds from smaller companies and startups.

In addition to the product information, the e-book version includes a lot more photos, as well as special discount codes and offers.

Download your copy today by clicking here:

Note: If you decide to purchase any of the items in this gift guide, please consider using the links included, as many generate a small commission that helps us improve the National Parks at Night workshop program.


Acratech

Panoramic Head

Love shooting Milky Way panos? Acratech is here to help! Their Panoramic Head facilitates shooting single- or multi-row panos. It has large-numbered degree scales on both the base and the tilt axis so you can make precise movements between panels. Moreover, the head weighs less than 1 pound and supports over 25 pounds of a camera-lens combo.

Special offer: 10 percent off all Acratech Panoramic Head variants at B&H Photo with promo code β€œNPANGIFT22.” Valid through December 19, 2022.

Adonit

PD-3A2C Universal World Travel Adapter

We learned about the compact and lightweight PD-3A2C Universal World Travel Adapter from a workshop attendee, and now we always carry one. It’s an ideal all-in-one replacement for most of your individual chargers, featuring two USB-C and three USB-A ports, plus pass-through AC for your laptop. Pairs perfectly with modern multi-voltage power supplies in over 150 countries.

Apple

AirTag

Did the airlines lose your luggage on your last trip? Regrettably this became a common refrain among travelers this year. Several of us at National Parks have been using the Apple AirTags to keep track of our bags during recent flights, and we love them. Using a unique network of connected Bluetooth devices, AirTags can help you locate your luggage when the airlines can’t or won’t. Buy a four pack and use the extras for your keys, backpacks, etc.

B&H Photo

Gift Card

If you don’t know what to give the photographer in your life, then give the gift of choice from the world’s best camera store, B&H Photo. With a gift card they can pick any camera, lens, computer or whatever they desire, and will have you to hug and thank for it.

Bay Photo

Wall Display

A photograph isn’t truly complete until it’s been printed, and we love the prints from Bay Photo Lab. Get the photographer in your life their favorite image printed for their wall. Choose from a plethora of wall display print surfaces, including metal, canvas, acrylic, wood, paper and more.

Special offer: 20 percent off one order of select wall display prints from Bay Photo Lab with promo code β€œNPAN22.” Valid until December 13, 2022.

BenQ

SW321C

For a real Wow Factor in the home office or editing studio, not to mention a super-resolution display for viewing hard-won images, the BenQ SW321C can’t be beat. Its 32-inch size gives lots of real estate for examining and editing photos, and it comes complete with all the advantages of all BenQ photo monitors: 99 percent of the Adobe RGB color gamut, 10-bit support for 1.07 billion colors, crystal-clear rendering of image pixels and more.

Special offer: $100 off the BenQ SW321C at B&H Photo with promo code β€œNPANGIFT22.” Valid through December 19, 2022.

Big & Little Parks

Night Stickers

Sticker culture is alive and well, as is astro-tourism, and Big & Little Parks is celebrating the junction of the two with a variety of night-sky national park stickers. Decorate your water bottle, your laptop, your whatever with a beautiful sticker of Canyonlands, Death Valley, Joshua Tree or others.

Books

NPAN bookshelf

Does the photographer in your life relish great photography books? In addition to the few specific tomes and monographs mentioned in this guide, the National Parks at Night Bookshelf catalogs over 100 of our instructors’ favorite volumes. Explore titles related to instruction, travel, photography history, photography collections and more. You’re sure to find a book for anyone who loves the art.

Bug Bite Thing

Venom Extractor

Traveling to natural spaces is an amazing experience, but has a notable downside: potential bug bites and stings. To treat them, we’re loving this new product: the Bug Bite Thing! Brought to our attention by one of our regular workshop attendees, it’s become a staple in our bags. Bit by a mosquito? Stung by a bee? This lightweight, easily stowable gadget uses suction to remove the venom from the skin, reducing itchiness and quickening the healing process.

Calibrite

ColorChecker Passport Duo

For those who shoot both video and photography, night and day, Calibrite offers the new ColorChecker Passport Duo. This awesome protective clamshell houses four panels for photographers capturing on-site camera calibration profiles, white balance, proper exposure and color for video. For landscape photographers, these tools can ensure a consistent and neutral workflow that leaves room for more creativity and less frustration.

Coast Portland

G20 Inspection Beam

Night photographers need good flashlights, and not just high-powered ones for light painting. We also need gentler tools for looking into our bag and seeing or way in the dark without ruining our night vision or washing out a neighboring photographer’s long exposure. Enter Coast Portland’s G20 flashlight, which focuses a relatively dim and cool light that’s perfectly discreet.

Duduho

Galaxy Apron

For the night photographer who’s also an artist in the kitchen, what better way to keep clothes clean than an apron donned with the Milky Way? The unisex Galaxy Apron is made of high-quality waterproof fabric with adjustable neck and waist straps. It’s a necessity for making a dinner that’s out of this world.

DxO

PureRAW

Night photography is all about pushing the limits of our cameras, and one of the side effects is high ISO noise. While some post-processing techniques can reduce the effect, none eliminate it. But PureRAW is different. This software from DxO employs what they call β€œpre-processing” raw files to remove noise before working on photos in Lightroom, Photoshop or other editing solutions. This technology is nothing short of disruptiveβ€”it will change how night photographers approach noise, allowing for highly improved night images.

Everglades Seasoning

Dry Rub

We found this Everglades Seasoning right outside one of our favorite national parks: aptly, Everglades, during a workshop no less. The Cactus Dust flavor has found a regular spot on our homemade chicken wings, but all of them are worth a rub onto any chicken, steak or fish. Taste the unique flavors while dreaming of long winter nights in the swamps and marshes of Florida’s famous park.

Getaway

Cabin Adventures

Getaway maintains a network of natural-space cabins around the U.S., all within 2 hours of major cities, but far out into dark-sky areas. The Cabin Adventures cabins feature all you need to get by, plus outdoor amenities such as a fire pit. But the coolest feature of all? The to-the-ceiling plate glass bedroom windows that allow you to gaze at nature and the stars as you fall asleep.

Irix

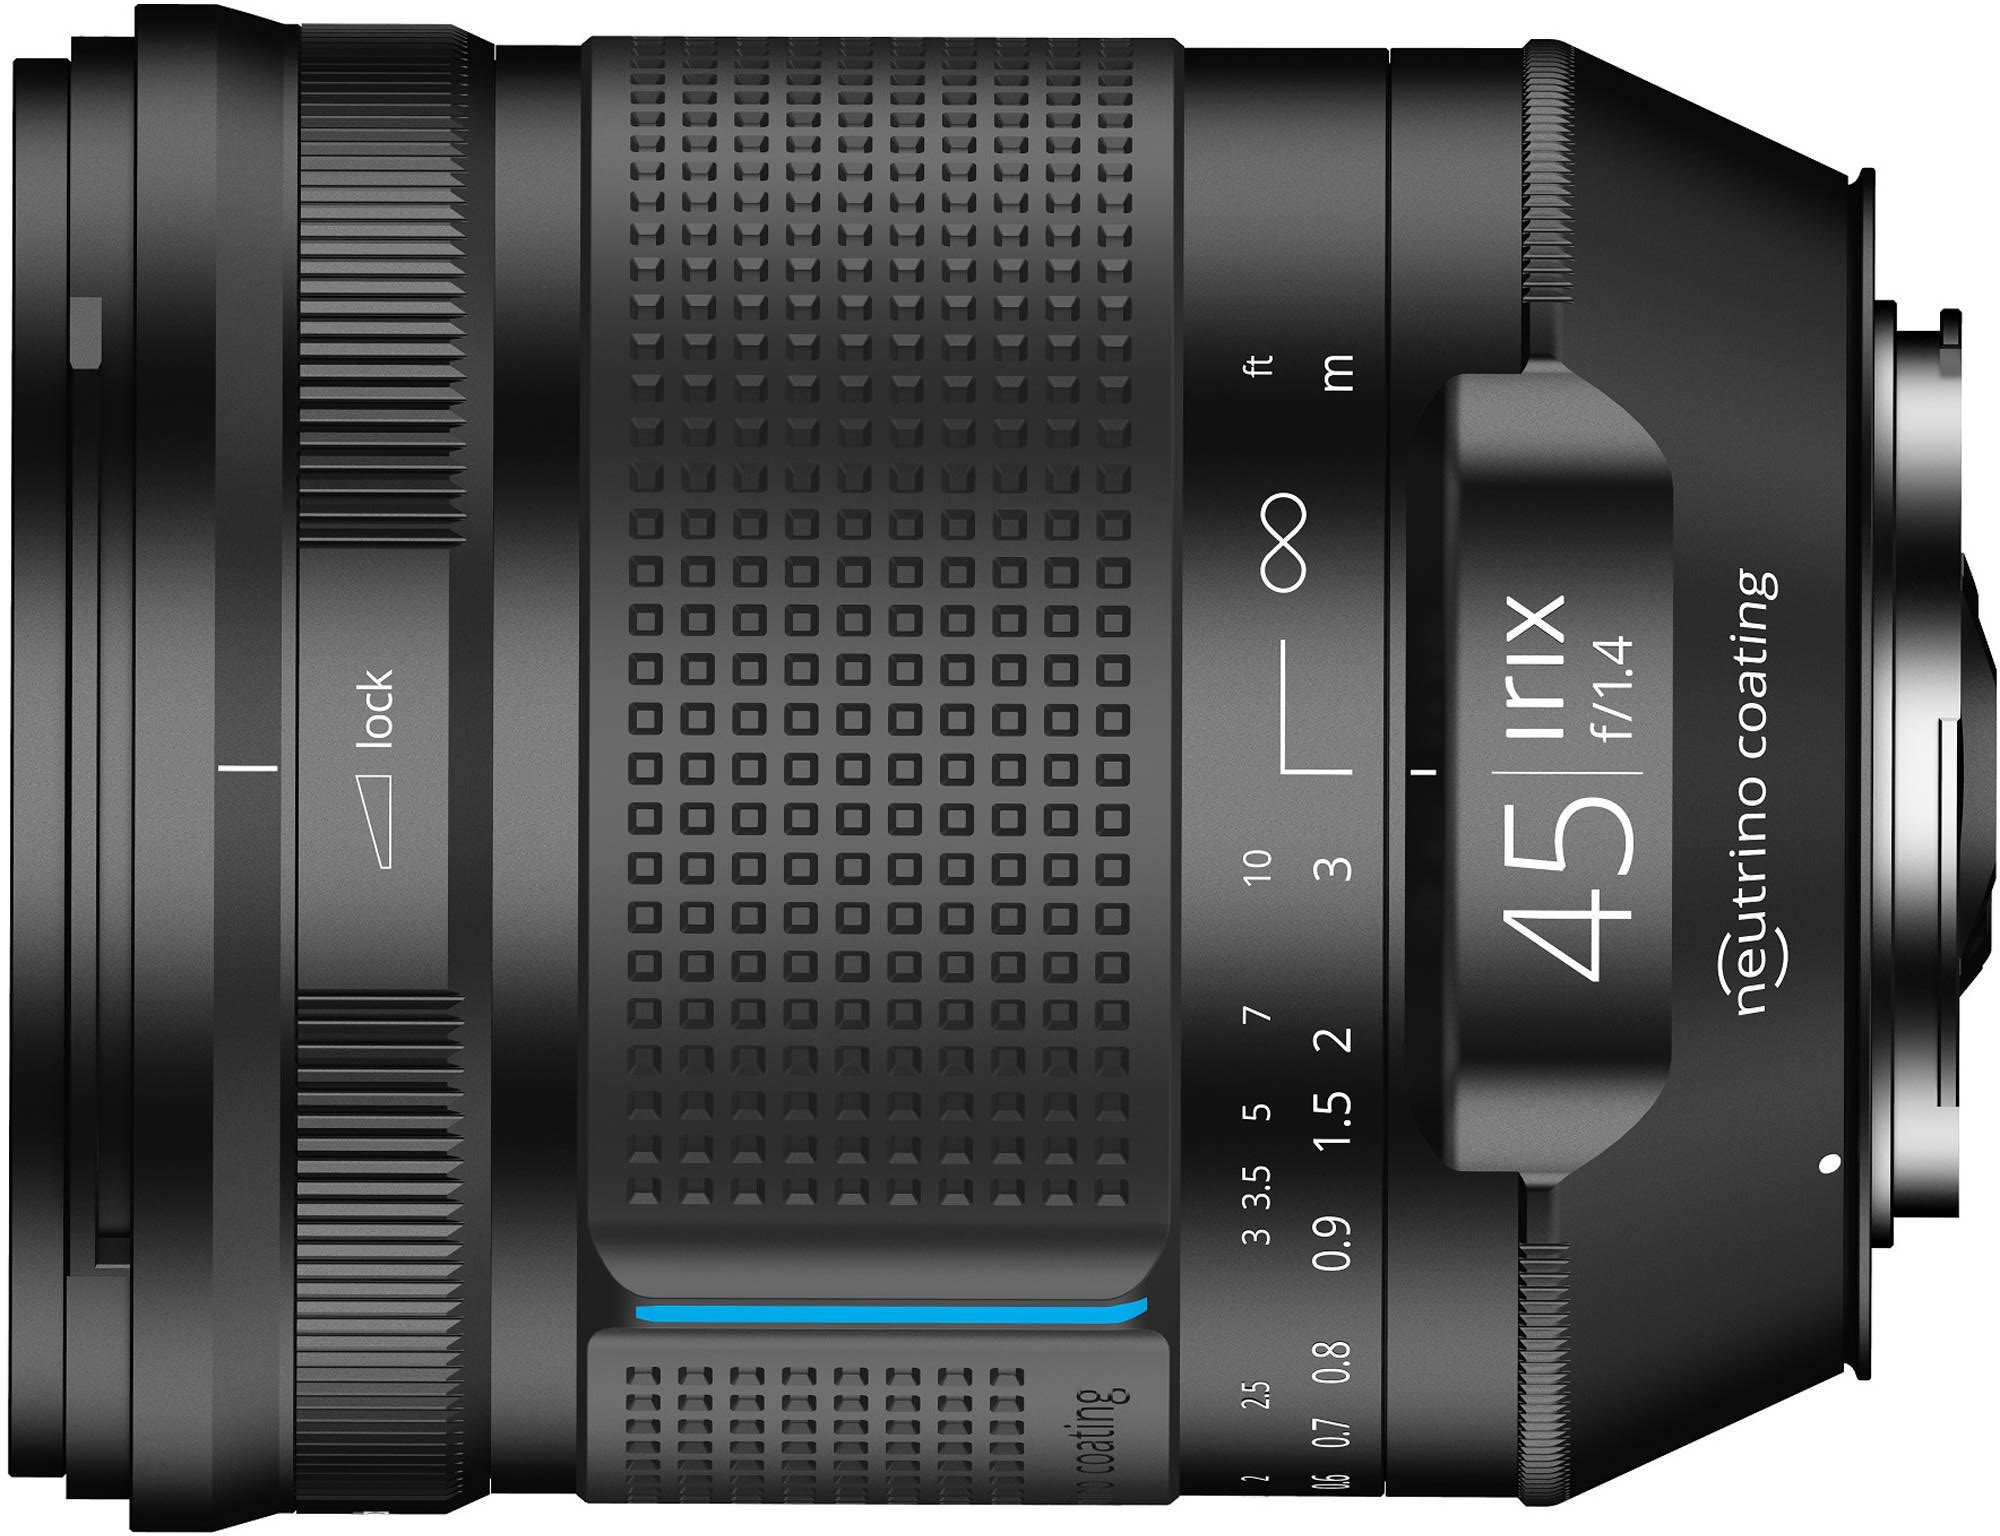
45mm f/1.4 Dragonfly

Irix keeps delivering the innovation we’ve come to expect. One of the more recent additions to their lineup of lenses is the supersharp 45mm f/1.4 Dragonfly. Its near-normal focal length is perfect for filling the background with the Milky Way, and the lens is almost coma-free even when shot wide open.

Special offer: $115 off the Irix 45mm f/1.4 Dragonfly at B&H Photo through November 28, 2022.

Ken Lee

Music Album

Ken Lee is an amazing night photographer based in California, and the author of two (and counting) night photography books. He also writes and records musicβ€”β€œtrippy otherworldly music,” in his wordsβ€” under the artist name Eleven Shadows and The Mercury Seven. His music has been featured on various MTV programs, the BBC, NPR, XM Radio and more. Eleven Shadows’ most recent release is The Seahorse in the Center of Your Mind, available for purchase and download. Perfect background music for night photography and editing.

LaCie

Rugged SSD PRO

For the hardcore approach to a sturdy travel hard drive, look at the Rugged SSD Pro. Holding from .5 to 4 TB, this Thunderbolt 3 External SSD offers data transfer speeds of up to 2800 MB/s. It features a durable exterior with 2 tons of crush resistance and resistance to dust and water. Serious speed, serious capacity, for the serious road-warrior photographer.

Special offer: $30 to $350 off the LaCie Rugged SSD Pro at B&H Photo through the end of 2022.

Ledlenser

P2R Work Flashlight

Ledlenser’s Work series of flashlights are uniquely suited for night photography due to their high CRI (color rendering index) and relatively warm white balance. Several of us have made the P2R Work our go-to light both for lighting and navigation due to its versatility and compact size. It is rechargeable, has three power settings, and conveniently comes on at a 15-lumen Low setting that is perfect for astro-landscape environments.

Light Painting Brushes

Holographic Sword

At 2 feet long, the Holographic Sword enables a light-writing photographer to create unlimited effects in the background or foreground. Blacked out on the side, and capable of showing all the colors of the rainbow from the front, the sword gives complete creative control to its wielder. Paired with the Universal Connector, it can be used with hundreds of different flashlights on the market.

Luxli

Fiddle Pocket LED 2-Light Kit

Since the day they were launched in 2017, we’ve been among the biggest fans and supporters of Luxli’s unparalleled line of LED panels, and we use them even more than we preach them. So we worked with B&H Photo to create a kit of the tools that we most often use together, dubbed the Fiddle Pocket LED 2-Light Kit. It includes two each of the Luxli Fiddle, magnetic honeycomb grid, Manfrotto Carbon Fiber Nanopole Stand and Oben BD-02 Mini Ball Head, and one magnetic diffuser hood. Everything you need to begin and master Low-level Landscape Lighting.

Special offer: 10 percent off the Fiddle Pocket LED 2-Light Kit at B&H Photo with promo code β€œNPANGIFT22.” Valid through December 19, 2022.

Manfrotto

ProCUBE Professional Twin Charger

Double-charge your batteries! Manfrotto’s ProCube will get a photographer out shooting again faster, charging two batteries simultaneously. An LCD shows how much each battery has been replenished, as well as a battery health check. The unit can also power up rechargeable AA batteries, and has a USB output for charging phones and tablets. Options available to recharge various models of Nikon, Canon and Sony batteries.

Special offer: 10 percent off the Manfrotto ProCube at B&H Photo with promo code β€œNPANGIFT22.” Valid through December 19, 2022.

Move-Shoot-Move

MAK 90 Telescope

For the photographer who wants to study or shoot celestial objects, Move-Shoot-Move’s MAK 90 telescope is a great beginner’s tool. Its 1250mm focal length with a compact body is achieved with catadioptric mirrors and allows for narrow field observation at a fraction of the cost, length and weight of refractor (glass-lens) telescopes.

National Park Service

America the Beautiful Pass

National parks are the backbone of what we do, and are among the very best places in the U.S. for night photography. For only $80 you can purchase the America the Beautiful annual park pass, which grants access to more than 2,000 recreation areas managed by five federal agencies. Moreover, the proceeds are used to improve and enhance visitor recreation services at these sites all across the country.

National Parks at Night

Night Photography Adventure Tours

Send the photographer in your life on the adventure of a lifetime, crafting images under the night skies of some amazing destinations. Tickets are available for several National Parks at Night adventures:

Or if none of those sound like the perfect gift, then how about Online Tutoring?

Books by Our Instructors

Looking for some national park and night photography inspiration and education that you can always have at your fingertips? Choose from one of four books written by members of the NPAN team!

  • Photographing National Parks by Chris Nicholson is a portable and concise look at each of our national parks and how to best capture them. Includes best locations, times and great info on each park to help you plan your next adventure.

  • Have someone new to the night? Gabriel Biderman and Tim Cooper’s book Night Photography: From Snapshots to Great Shots (now in its third printing) is an introduction to nocturnal photography, and it inspires you to get out there and seize the night!

  • Want an even deeper dive into the night? Lance Keimig’s book Night Photography and Light Painting: Finding Your Way in the Dark has long been the ultimate tome for those interested in immersing themselves in the genre. The latest edition has an amazing chapter on the history of light painting and does an excellent job of balancing theory, history and enthusiasm for taking your night visions to the next level.

  • Light painting is the most creative expression in night photography, and Tim Cooper’s ebook The Magic of Light Painting is a detailed exploration of all the illuminating possibilities that can happen when we practice the craft.

Nightscaper Photo Conference

Conference Ticket

What more could a night photographer want than to spend a few days under the beautifully dark night skies of Kanab, Utah, rubbing elbows with and shooting alongside like-minded individuals? A ticket to the Nightscaper Photo Conference is a ticket to coming together with some of the most passionate minds in the niche. Four days and nights together, learning and shooting among the stars. May 18-21, 2023.

Special offer: Limited number of early-bird tickets remain.

Noso Patches

Nylon Repair Patches

We love our national parks! And getting out and playing in them sometimes takes a toll on our nylon clothing. The folks over at Noso have created a solution: a line of waterproof, durable, lightweight and flexible no-sew Nylon Repair Patches. Simply peel off the backing, cover the damaged area and hit the patch with a blast from a hair dryer. Voila, the repair is done! Best of all they have a whole line of national park patches in addition to their standard and artist series versions.

Novoflex

TrioBalance 4-Section Carbon Fiber Compact Tripod

Nice and tall at 50.2 inches, the TrioBalance is an ideal travel tripod. The built-in leveling ball makes setup a breeze for panorama and tracking, and can even be used in place of a ball head. The kit includes mini legs, which can be used for tabletop photography, for macro or even for setting up against a wall when space is tight. Holding up to 22 pounds, it’s ready for nearly anything you carry.

Special offer: 5 percent off the Novoflex Triobalance at B&H Photo with promo code β€œNPANGIFT22.” Valid November 28 to December 19, 2022.

Outdoor Exposure

TK8 Photoshop Plugin

Most photographers have heard of a luminosity mask, and many know the power of it. But few wield that power because … well, it’s just a tad tedious. Until you start using the TK8 Photoshop Plugin, which automates much of the process. Instead of spending a lot of time isolating channels to make selections, just click a button, refine a little, and you’re on your way to those powerful edits.

Special offer: 25 percent off the TK8 Photoshop Plugin at Outdoor Exposure through November 28, 2022.

Paka

The Hoodie

Yep, those long nights can sometimes get cold, but we have so many options to keep us warm. Near the top of that pile is The Hoodie from Paka. Sourced from women artisans in Peru, this comfortable sweater is as warm as it is stylish. Soft, durable and flexible, it’s made from a weave of alpaca fibers, organic cotton and recycled nylon. Available in seven sizes and three colors.

Parks Project

Insulated Water Bottle

Parks Project has all sorts of cool stuff, but one thing we love is their All Our National Parks insulated water bottle. It has a slick, eye-catching design indicative of the company’s free-spirit sentimentality. Made of professional grade stainless steel, the bottle’s double-wall vacuum insulation keeps 32 ounces of liquid either hot or cold for up to 24 hours. The company donates a portion of their profit to projects in the parksβ€”to date, over $2.5 millionβ€”so your gift purchase gives in more ways than one.

PhotoPills

Scouting App

Give your photographer loved one the sun and the moon and the starsβ€”all exactly where they want them. PhotoPills enables locating any visible objects in the heavens and determining exactly where and when they’ll be in the sky in any location on the globe. It does more too, from helping determine star-point exposures to calculating hyperfocal distance to figuring overlap angles for panos and more.

Pure Zen Tea

Travel Tumbler

Tea is a refined, millennia-old beverage that will keep a photographer both warm and awake under the stars. But if one is the type who prefers loose leaf to bags, making a good cup on the road can be a challenge. The Pure Zen Tea Tumbler overcomes that challenge brilliantly. The screw-on steel infuser allows ample room for quality brewing, and the BPA-free double-wall glass combined with the neoprene sleeve will keep that tea hot for an hour.

Shimoda

Explore v2 35 Backpack Photo Starter Kit

The super-rugged Explore v2 35 backpack is laid out smartly for the traveling photographer and it boasts the most comfortable harness system we’ve encountered for heavy loads and long hikes. Its adjustable shoulder harness straps make it fit perfectly for folks of different heights, and the accessory straps do the same for different body types. This kit includes a Medium DSLR Core Unit Version 2 insert, but you can also choose among the many accessory options to match load-outs. Carry-on compatible for both U.S. and international flights.

Special offer: 5 percent off all Shimoda Explore V2 variants at B&H Photo with promo code β€œNPANGIFT22.” Valid November 28 to December 19, 2022.

Space Art Travel Bureau

Half the Park is After Dark Posters

Tyler Nordgren is an astronomer, night photographer and astronomy artist based in upstate New York. One of his claims to fame is the famous β€œHalf the Park is After Dark” series of promotions for the National Park Service. The fantastical posters from that series are available on Nordgren’s website. Options range far and wide, from posters for Acadia, Badlands, Carlsbad Caverns, Everglades and much, much more.

Syrp

Magic Carpet Carbon Slider

For those who want to level up their time-lapses of the night sky, a slider is one of the first items to add to the kit. Syrp weighs in with the Magic Carpet Carbon Slider. Its lightweight construction and design make it a pro-level option that’s easy to travel with, and its seamless joints allow for silky-smooth and stable movements.

Special offer: $170 off the Syrp Magic Carpet Carbon Slider at B&H Photo for a limited time.

Tether Tools

ONsite USB-C 30W Battery Pack

Stay powered up while traveling! Weighing in at 4.2 ounces and boasting full TSA compliance, the ONsite USB-C 30W Battery Pack is the perfect companion for the globetrotting photographer who needs to recharge phones, tablets, flashlights, etc., on long wanders.

Special offer: 20 percent off the ONsite USB-C 30w Battery Pack at B&H Photo through November 28, 2022.

Unemployed Philosophers Guild

Constellation Mug

This fun and nifty 10-ounce mug features a bunch of stars when cold, then reveals constellations when filled with a hot beverage. See Cassiopeia, Perseus, Sagittarius and more appear before your eyes while you drink a morning (or overnight?) coffee.

Vallerret

Merino Wool Zip Jersey

We’ve long loved Vallerret for keeping our hands warm on cold nights with their photography gloves. Now they’re keeping our cores warm too, in the form of their Merino Wool Zip Jersey. Warm, soft, flexible, odor-resistant and durable, it will keep a photographer out longer, making more art well into the night. Comes in one color: the perfect Midnight Black.

Wotobeus

Car Charger Adapter

If you travel with a hefty-battery laptop like the MacBook Pro, you sometimes need to charge on the goβ€”and that sometimes means in the car. Not all adapters can handle the high wattage needed, so we found one that can, via USB-C: the Wotobeus Car Charger Adapter. Works with other devices too, including many PC laptops, tablets and more.

YES Watch

WorldWatch V7

An elegant timepiece with a photographer’s needs at heart. The WorldWatch V7 keeps its wearer in sync with the daily, monthly and seasonal cycles of the sun and the moon, including solstices and equinoxes, sunsets and sunrises, moonrises and moonsets, moon phases and illumination percentages, and more. The case and bracelet are made from titanium and fitted with a sapphire crystal, and the watch is water resistant to a depth of 100 meters.

Special offer: 20 percent off the WorldWatch V7 at YES Watch with promo code β€œNOW.” Valid through the 2022 holiday season.


Note: Remember, this gift guide is also available as a free downloadable PDF, with lots more photos and a ton of discount codes. Download yours today by clicking the image above.

Chris Nicholson is a partner and workshop leader with National Parks at Night, and author of Photographing National Parks (Sidelight Books, 2015). Learn more about national parks as photography destinations, subscribe to Chris' free e-newsletter, and more at www.PhotographingNationalParks.com.

UPCOMING WORKSHOPS FROM NATIONAL PARKS AT NIGHT

How I Got the Shot: Lunar Eclipse in a Sparkling Star Field

Portrait of a lunar eclipse. Nikon D5 with a Nikon 300mm f/2.8 lens. 32 frames shot at 1 second, f/2.8, ISO 51,200, noise-stacked in Sequator and blended in Photoshop with a moon exposure shot at 1/2 second, f/2.8, ISO 3200.

Note: We’re running this blog post today because tonight’s skies will feature the world’s last total lunar eclipse until the spring of 2025. See the end of the post for more information.

The Story

Since she was little, my daughter Maggie has been interested in astronomy. She could name the planets (in order) when she was 3. On summer nights she would lay a blanket on the grass outside, hone in on stars with my laser pointer, and ask me to look up their names in a sky-view app. In 2017 we road-tripped to see the solar eclipse, which she promptly labeled β€œthe best thing I’ve ever done.” She was only 4, but I couldn’t disagree that the memory would remain on that list forever.

As Maggie has grown older (she’s 9 now) that interest has waned a little, somewhat supplanted by friends and music and drawing and painting and reading and swimming and making videos and any of the other hundred things that occupy her agile mind. Still, I’m never surprised when she wants to experience a celestial eventβ€”such as when she asked if we could go somewhere to see the total lunar eclipse last spring.

So we ventured to one of my favorite sections of the Blue Ridge Parkway, me toting my cameras, she toting the telescope that her grandmother and aunt had given her for Christmas.

Maggie watching the lunar eclipse through her telescope from the Blue Ridge Parkway last May.

The Location

The Blue Ridge Parkway stretches 469 miles between its northern and southern termini. That’s a long and varied destination for photography. For our experience I chose the area around Blowing Rock, North Carolina, because I know it has many valley-top overlooks, as well as the attractive landscapes of Price Lake, the Moses H. Cone estate, rolling fields, barns and so on.

Figure 1. PhotoPills’ Augmented Reality showed where the moon would be over Price Lake at the time of the eclipse.

I know the area well, as I’ve shot there many times (including with two National Parks at Night workshops). But PhotoPills scouting was still necessary because I needed to know where the moon would be during totality. Which of my favorite landscapes would be good for a moon photo at that particular time and date? I settled on Price Lake, as I could see that during totality the moon would be drifting over the tree line on the southeastern shore (Figure 1).

Alas, all good plans need a backup, especially when traveling with a kid. Maggie was bored waiting for the eclipse. We tried hunting for frogs, then hunting for spiders, then spotting fireflies. We watched the water flowing over the dam and listened for noises in the woods and guessed what made them. But these things didn’t hold her interest long enough. So, instead, we meandered up the parkway until the moon finally started to hide in Earth’s shadow, and then pulled into an overlook.

We set up her telescope, she promptly located the moon in the eyepiece, and the experience quickly became pretty freakin’ cool. She was enthralledβ€”enough so that I knew I had time for a photo.

But from the overlook, I had no foreground worth shooting. By necessity, this would be a moon portrait, not a moonscape. I unpacked the longest lens I own, a Nikon 300mm f/2.8β€”a lens not quite long enough to fill the frame with the moon, but long enough so the moon would be more than just a red dot in the sky.

The Exposure

The trouble with telephoto lenses at night is that unless you’re using a hefty tracker, shooting star points is nearly impossible with one exposure. With a 300mm lens, a quick check of the Spot Stars calculator in PhotoPills revealed that I could use a shutter speed of only 1/2 to 1 second before my stars would begin to trail (Figure 2). That would require an ISO of 51,200, and that would produce way more noise than would be acceptable.

Figure 2. PhotoPills told me that to freeze the stars shooting with a Nikon D5 and a 300mm lens, I would need a shutter speed between about 1/2 second (in Accurate mode, right) and 1 second (in Default mode, left).

It also introduced a problem with the moon exposure: At 1/2 to 1 second at ISO 51,200, the moon would blow out.

So those were the two obstacles I needed to work around, and I chose two solutions:

  1. Because freezing the stars required such a high ISO, I would need to noise-stack multiple frames. This would make the final image appear as if I shot it at a lower, cleaner ISO.

  2. Because the first solution would result in the moon both blowing out and moving considerably during the exposures, I would need to shoot a separate frame of just the moon and then layer that on top of the noise-stacked frame in Photoshop.

It was time to calculate my moon exposure. The moon moves quicklyβ€”a distance roughly equal to its diameter about every 2.5 minutes. That’s why shooting even a 20-second astro-landscape exposure can result in the moon beginning to β€œstretch out” and look oblong. With a wide-angle lens, I rarely shoot more than 10 or 15 seconds when the moon is in the frame. Using a telephoto meant I needed to shoot even faster.

I also wanted a lower ISO for the moon so it wouldn’t look too noisy against the clean, noise-stacked stars. I shot a few tests and decided that 1/2 second at ISO 3200 resulted in a moon that would be sharp enough to look good.

The Shoot

Now all I needed to do (that night, anyway) was capture the raw materials.

One remaining concern I had was vibrations causing a soft image. Vibrations are a constant concern when working with a telephoto lens, as well as when working at night. To minimize vibration, I took the following steps:

  1. I mounted my setup on a sturdy tripod (the Gitzo 3541LS) with a sturdy, top-of-the line ball head (the Really Right Stuff BH55), and made sure everything was locked down tight. (My setup would have been even more solid if I’d used a gimbal head, but I don’t own one.)

  2. I connected a wireless shutter release (the Nikon ML-L3). This meant I wouldn’t have to touch the camera to open the shutter, and because no cable was connected, I also wouldn’t accidentally introduce vibration by touching the remote.

  3. I enabled Mirror Lockup on my Nikon D5. This feature separates the mechanics of raising the mirror from the mechanics of opening the shutter, so that the minor vibrations of the former have time to subside before the camera starts recording the image.

  4. I enabled a 2-second Shutter Delay in the camera. This feature creates a delay between when the shutter opens and when the image begins to record, again to mitigate vibration that could be caused by moving parts.

  5. I waited for any perceptible breeze to subside.

  6. I shot multiple frames, because when you do that, one frame will always be sharper than the rest.

Figure 3. The moon foreground. Nikon D5 with a Nikon 300mm f/2.8 lens. 1/2 second, f/2.8, ISO 3200.

Once I was satisfied that I had a good moon foreground to work with (Figure 3β€”yes, the moon is a foreground in this photo), I changed the exposure to record lots of star points. I pressed the button on the remote, locked it down, and let the camera fire off 32 frames.

(Why 32? I’ll get into this more in a future blog post that focuses on noise stacking. For now, just know that combining 32 frames in stacking software provides approximately a 5-stop improvement in apparent noise. Because I was shooting at ISO 51,200, my final result would therefore look like I shot it at about ISO 1600β€”i.e., 5 stops lower. I knew I would be happy with the quality of that result.)

One final note about the shoot: Because the process took a little while, the moon moved considerably. Therefore, I needed to constantly readjust the framing to keep the moon in the center. Otherwise it would have flown clear out of my composition in about 10 minutes.

The Post-Production

Once home the next day, I dumped all the images into Lightroom and got to work.

The foreground frame was easyβ€”I just chose the one with the sharpest-looking moon. I applied some basic adjustments to get the moon to look its best (the stars weren’t important in this frame), and that was that. Done.

The next step was to noise-stack the stars. If you have a Mac, the tool for this is Starry Landscape Stacker; I have a PC, so the right tool is Sequator.

Figure 4.

I asked Lightroom to reveal the location of the first star file in Explorer (Figure 4). From that folder I selected all 32 star files, and then I dragged them into the Sequator interface. I walked through all the processing options (I’ll be writing a how-to for Sequator soonβ€”keep an eye on this blogβ€”but if you use a Mac, see our post on Starry Landscape Stacker), and then let the software do its thing. (I didn’t worry about masking the moon in the stack, because I knew I’d be layering over the moon for the final version of the photo anyway.)

The result was a TIFF saved into the same folder as my raw files. I needed to load that TIFF into Lightroom. I did this by navigating to the folder, right-clicking and selecting Synchronize Folder (Figure 5), then following the prompts.

Figure 5.

With the TIFF loaded into my Lightroom catalog, I applied some basic edits to make the sky look good. The result was exactly what I’d hope forβ€”a noise-free field of sharp, bright, sparkling stars.

The only problem was that blown out moon, which I was now ready to layer over. In the Lightroom grid, I selected the moon raw file and the star TIFF by Control-clicking on both. Then from the menu I chose Photo > Edit > Open as Layers in Photoshop.

With both images layered in Photoshop, I needed to mask out the dull sky from the moon foreground to reveal the sparkling, noise-free sky behind it. I figured the Object Selection tool would pick out that moon beautifully, so I chose the tool from the toolbar, clicked and drew a square selection around the moon, and the algorithm did the rest. I had a perfectly selected moon (Figure 6).

Figure 6.

Figure 7.

At the bottom of the Layers panel, I clicked on the Add Layer Mask button. This created a mask from my moon selection (Figure 7), revealing the sharp, noise-free stars from the background layer. However, a little cleanup remained.

The first issue was that during the shoot I’d had to continually reframe to keep the moon centered, and because the moon kept moving during the series of exposures, it was in a slightly different spot from frame to frame. Therefore, the moon wasn’t lined up perfectly with itself in the layered image (Figure 8), so I had to adjust its placement. I activated the Move tool and then used the cursor keys to nudge the moon into the right place (Figure 9).

Figure 8.

Figure 9.

The second issue was that the masking process had left a dark halo around the moon. Easy fixβ€”just needed to massage the edge of the mask to cover up that halo. I selected the mask, then from the menu chose Filter > Other > Minimum (Figure 10). Knowing what radius value is correct is just a matter of looking at the live effect (with the Preview option checked), but it’s usually a very low number. In this case, 2 looked perfect (Figure 11), so I clicked OK.

(Note that depending on what processing artifact had created the halo, using Minimum may have made the problem worse. If it had, then Filter > Other > Maximum would have worked instead.)

Figure 10.

Figure 11.

The final issue was that the sharp moon was just a little smaller than the moon in the background, due to both exposure blooming and the halo edit. No problemβ€”I just had to make the foreground moon a little bigger to hide the edges of the background moon.

I pressed Control-T to activate the Free Transform tool, but because I was zoomed in, I couldn’t see the bounding box and its handles. So to make the adjustment, I used the options bar (Figure 12). I made sure that the Maintain Aspect Ratio button was selected, and then clicked to put my cursor in the Set Horizontal Scale field. Again, I was just eyeballing the effect, watching what happens to the image as I made microadjustments. Using the cursor keys, I pressed up once to increase the scale to 101 percent, then again to 102 percent. It looked perfect (Figure 13), so I stopped there.

Figure 12.

Figure 13.

I saved and closed the image, made a final crop in Lightroom, and bumped up the Texture slider a bit to make the stars pop.

Was it worth all that effort just to get some more stars? Heck yeah! Use the slider in Figure 14 to see a straight-out-of-camera shot versus the fully processed final image. See how β€œthree-dimensional” and detailed the final image looks?

Figure 14.

Wrapping Up

Maggie thought it was pretty cool that I could take pictures of the moon (win for Daddy!), and she asked if she could try too. I let her fire off a few frames, and then we packed the gear into the car.

Figure 15. Lunar eclipse over Price Lake, Blue Ridge Parkway. Nikon D5 with a Nikon 300mm f/2.8 lens. 3 blended frames shot at 30 seconds (foreground), 15 seconds (stars) and 1/4 second (moon), f/2.8, ISO 6400.

The moon was still in shadow, so with Maggie’s permission we went back to Price Lake to create the astro-landscape photo of the eclipse that I had scouted earlier. That photo (Figure 15) was easier, as I didn’t need to shoot 32 frames to rid the image of high ISO noise. Just three exposuresβ€”one each for foreground, moon and skyβ€”and we were done.

The timing of this post is intentional. Tonight the moon will fall into total eclipse againβ€”for the second time this year, but for the last time until March 2025. If you’d like to create a photo like this, tonight is your last chance for 2.5 years.

Tonight’s lunar eclipse will begin at 3:02 a.m. EST, and totality will happen from 5:16 to 6:41 a.m. So it will take a commitment to photograph.

If you want to shoot this eclipse, of course other techniques are also options. For more ideas, see our blog posts:

For more information about tonight’s big event, see the Space.com article β€œHow to watch the Blood Moon lunar eclipse on Nov. 8 online, the last until 2025.”

Tomorrow and in the days ahead, we’d love to see your lunar eclipse photos. Share in the comments below, or on our Facebook page, or on Instagram (tag us @nationalparksatnight #nationalparksatnight #seizethenight).

Chris Nicholson is a partner and workshop leader with National Parks at Night, and author of Photographing National Parks (Sidelight Books, 2015). Learn more about national parks as photography destinations, subscribe to Chris' free e-newsletter, and more at www.PhotographingNationalParks.com, and follow him on Instagram (@PhotographingNationalParks.com.

UPCOMING WORKSHOPS FROM NATIONAL PARKS AT NIGHT

How to Access and Photograph Abandoned Places

Do you have a fascination with abandoned places?

I do.

In fact, I coined a word for this 30-year obsession: β€œruinism.” It means the beauty of decay, and it can apply to person, place or thing. It has been an overarching theme that I have tried to incorporate into my photography, both day and night.

Part of this has been exploring abandoned placesβ€”buildings, lots, junkyardsβ€”that have fallen by the wayside of the human race’s march across the landscape.

I’ve learned a thing or two over the years about getting into and out of these industrial skeletons, and I have been handcuffed only once due to trespassing. For this Halloween special, allow me to share the allure of abandoned places, how to do your research and get permission, and tips on how to best photograph and share your images with the world.

Sloss Furnaces, Alabama. Nikon D750 and Irix 15mm f/2.4 lens. Multiple stacked frames shot at 15 seconds, f/2.8, ISO 100.

Why Ruinism?

In this age of social sharing, the world has become much smaller than it was 10 to 20 years ago. There are very few whispers of secret abandoned places. Some locations have lasted for thousands of years while others are barely standing, helped by the vines and ivy that have replaced the walls.

My favorite class in school was ancient history, so when I had an opportunity to live in Greece for 6 months in the 1990s, it was a dream come true. In fact, that is where the term ruinism was born. I was visiting all the ancient cities: Rome, Delphi, Thebes, Mycenae, Troy, Constantinople. The modern world had grown around and incorporated the remnants of some of these age-old civilizations, while others had been completely forgotten by time.

When I walked through the streets of Pompeii, I imagined what it had looked like before Vesuvius erupted in A.D. 79β€”partly out of intellectual curiosity, and partly for creative purposes. When photographing these abandoned locations, I always try to tap into the history and capture the spirit. Long exposures, ghosts and light painting are wonderful tools to aid in this storytelling.

Getting Access

Besides the legal β€œpay for access” places, let me share a few examples of how to get in. The overriding theme is:

  • Do your research.

  • Understand the history and importance of this place.

  • Share your respect and passion for memorializing the location before it disappears.

  • Find the organization or person that owns/maintains it.

  • Never steal any artifactsβ€”take only pictures!

Example 1: The Abandoned Village of KayakΓΆy, Turkey

While staying in the beautiful port city of Fethiye, I was told of the history and modern ruins of KayakΓΆy. I spent the day wandering around a town where the people had been forced to leave their homes, churches and shops due to protocols written up by the Treaty of Lausanne in 1923.

On the day I was there, no one else was present except for some sheep herders and their flock. The sheep wandered into roofless homes at will. Time had taken back this town. It felt like I had finally experienced ruinism to the highest degree.

Gateway to KayakΓΆy. Pentax K1000 with TriX film. Exposure unrecorded.

Church of KayakΓΆy. Pentax K1000 with TriX film. Exposure unrecorded.

The key to accessing KayakΓΆy: The village was in a remote area but open to all who were interested and had the money and a means to get there. If you were to visit today, there is an entrance fee of $1, and restoration limits some access to the church and many of the buildings.

Example 2: The Abandoned Apartment

Abandoned places can be huge like KayakΓΆy or they can be the apartment next door.

I was living in PΓ‘tras, Greece, in 1995 when this mystery revealed itself. A 5.1 earthquake in 1993 had seriously damaged the town and the neighbors just up and left. There were plenty of cracks in the walls for us to peep in and most doors weren’t locked in this small community. So I entered with my friend and we used long exposures on film to give voice to the ghosts that remained.

Abandoned Apartment, PΓ‘tras. Pentax K1000. Pentax K1000 with TriX film. Exposure unrecorded.

The key to accessing the abandoned apartment: We reached out to the neighbors to learn more, and we ended up being responsible for looking after the place and putting a lock on it. When something like this happens, be smart, safe and respectful. Anything we moved, we put back in place. Like most abandoned buildings, there is a time limit to its existence, unless it is deemed of historic importance.

Example 3: The Abandoned Casino

A real dream-come-true location is the ConstanΘ›a Casino in Romania. Built in 1910 aside the crashing waves of the Black Sea in the art nouveau style, the casino closed its doors to the world in 1990. However, the symbol of this ancient grandeur was adopted by the city and they struggled for many years to find a way to preserve this masterpiece.

ConstanΘ›a Casino. Nikon Z 6 with a Nikon 24-120 f/4 lens. 1/500, f/11, ISO 200.

ConstanΘ›a Casino. Nikon Z 6 and Nikon 14-24mm f/2.8 lens. 1/30, f/10, ISO 400

The key to accessing the ConstanΘ›a Casino: Fortunately I have a friend in Romania who loves ruins and history as much as I. We led an Opulence and Decay workshop with National Parks at Night and Atlas Obscura in 2019, which included access to this location. My contact worked very closely with the town that was restoring the casino. We had to prove our love for preserving this building and of course pay a fee that went to helping stabilize it for future generations. It was an amazing experience and epic workshop. (If you want us to revive this workshop, let us know in the comments!)

Winging It

I understand that access can be the biggest of all hurdles. Sometimes you just stumble upon an abandoned farmhouse in the middle of nowhere. There aren’t any β€œNo Trespassing” signs or neighbours for miles away. What do you do?

If you enter this property, you will be seen as a trespasser by the law. So it’s best to think of this as the β€œinitial scout” and take pictures safely from a legal and respectful distance.

Then, find any neighbors who may be nearby, or go into town and show these pictures and ask who might own the property. If you are seen as a photographer and documenter first, instead of urban explorer or vandal, good things will happen.

Silver City, California. Nikon D700 with a Zeiss Milvus 21mm f/2.8 ZF.2 lens, lit with a Coast flashlight. 4 minutes, f/5.6, ISO 400.

For example: I was on a road trip with Troy Paiva and Joe Reifer and we used Google Maps to identify what looked like an old, abandoned mine. We drove there only to find a gate and a β€œNo Trespassing” sign. We debated what to do.

During that 5 to 10 minutes, a weathered Jeep with a Willie Nelson character came flying down the road with a barking dog not far behind. He asked us β€œwhat the hell” we were doing at the entrance to his property. We explained that we were photographers with a fascination for the past. Troy had a copy of his book and showed it to the man, and that was the key. Having a website, prints or a book that can show your passion for abandoned places can often help break down those barriers.

The end result was that within 5 minutes we were all best friends with Irish (which turned out to be his name), getting a private tour of his silver mine followed by 2 nights of access.

I understand there is a certain excitement in exploring the unknown that is greatly heightened when you don’t have permission. I also know that some places will never grant permission to any visitor because they are deemed too unsafe. If you decide to break into those places, you’d better understand the dangers involved and realize that no insurance will cover you when you trespass. We neither recommend nor condone this course of action.

Doing it the Right Way

A perfect example of doing it the right way has been my experience and relationship with the Bannerman Castle Trust.

I first saw the ruins of Bannerman while riding the Metro-North Railroad up to Rhinecliff, New York, in 2001. You always want to get a β€œwater view” window seat on the train as the tracks hug the Hudson River all the way to Montreal. I was mesmerised by water and landscapes that rushed byβ€”Storm King Mountain, the bridge walkway over the river, and many mansions.

But wait, what is that? A castle-island resting in the middle of the river?

Luckily the previous owner had used a side of the castle as a β€œbillboard,” and I had my first clue: Bannerman Island Arsenal.

Bannerman Arsenal. Nikon D750 and Nikon 24-70mm f/2.8 lens. 1/250, f/11, ISO 200.

I had no reception on the train but wrote down the name and pinned the location on Google Maps. I later found a little information about the history, but being an island, the only access was via kayaks.

A few years later, the Bannerman Trust established a website and daytime tours of the castle from May to October. On the boat ride over, I shared my passion for ruinism and my excitement about Bannerman with a member of the trust. That laid the groundwork for later leading overnight photography workshops.

It took a few months to hash out the details, but we both wanted to see the idea succeed. The trust was interested in promoting the location, getting a unique interpretation and getting (of course) additional funding for the restoration.

Since then Matt Hill and I have led 14 Bannerman overnight workshops. I’m leading two more trips next August. (If you are interested, join the waitlist.)

Bannerman. Sony a7S with a Sony 10-18mm f/4 lens. 12 minutes, f/4, ISO 1000.

Bannerman. Nikon Z 6 with a Nikon 14-24mm f2.8 lens. 45 stacked frames shot at 100 seconds, f/5.6, ISO 400.

I’ve seen the once roofless residence become a completely intact museum that shares the history of Bannerman and Pollepel Island. Over time, walls have crumbled and braces have been installed to stabilize what is left.

This has obviously been a best-case scenario, where both Matt and I have become honorary members of the Bannerman Castle Trust. I have also established the same relationships with historic iron furnaces: Sloss in Birmingham and Carrie in Pittsburgh.

In Conclusion

The allure and proper access will hopefully lead you down a path of successfully photographing abandoned places. My main tip on how to best get into and photograph these special spots is to really understand them and try to tell their story.

A few more tips:

  • When sharing locations that are fragile, consider tagging them less (or not at all) on social media and keeping them sacred and preserved places that others can happily stumble upon. Don’t share GPS coordinates of spots that could end up getting overrun and trampled.

  • The world as a whole is trying to preserve its past. There are plenty of organizations you can join that will grant you safe and legal access to many forgotten places.

  • The U.S. National Park Service preserves many wonderful abandoned locations that offer legal and safe access. You can see a list of some of them here.

Night photography can aid your creativity by illuminating the spirit of these places with creative long exposures under the night sky. Light painting can also reveal the story you want to tell as seen by this eerie shot taken by Tim Cooper in Grafton Ghost Town right outside Zion National Park:

Grafton, Utah. Nikon D700 with a Nikon 24mm f/2.8 lens, lit with a Coast HP5R flashlight. 1 minute, f/9, ISO 200.

We’d love to see your favorite night photos of abandoned places, and to hear the stories behind them. Share in the comments below, or on our Facebook page, or on Instagram (tag us @nationalparksatnight #nationalparksatnight #seizethenight).

We hope your journey to abandoned places is a safe, smart and creative one!

Gabriel Biderman is a partner and workshop leader with National Parks at Night. He is a Brooklyn-based fine art and travel photographer, and author of Night Photography: From Snapshots to Great Shots (Peachpit, 2014). During the daytime hours you'll often find Gabe at one of many photo events around the world working for B&H Photo’s road marketing team. See his portfolio and workshop lineup at www.ruinism.com.

UPCOMING WORKSHOPS FROM NATIONAL PARKS AT NIGHT

Super Season 8: Announcing our 2023-24 Night Photography Workshops and Tours

It’s All in the Numbers

Here we are again, another year later, announcing a chock-full itinerary of new workshops. Let’s take a look at some numbers:

8 …

This is Season 8 of National Parks at Night workshops. We can’t fathom how to adequately express how grateful we are to all of you who make this possible. Thank you.

25 …

The number of workshops and tours in our Season 8 itinerary. That comprises 16 based at destinations in the U.S. and 9 based overseas.

12 …

The number of units of the National Park Service we’ll be workshopping in, including:

  • the newest national park (New River Gorge)

  • one of only two U.S. national parks that’s not in a state (Virgin Islands)

  • a national park our alumni voted for us to return to (Olympic)

  • a national historic landmark that’s allowing us exclusive night access to its Industrial Age grounds (Sloss Furnaces)

  • a national seashore that’s home to some of the most photogenic lighthouses in the country (Cape Cod)

  • a national park gem of Utah that will go dark under an annular solar eclipse (Capitol Reef)

  • and more!

6 …

The number of countries we’ll be visiting for adventuring and photographing day and nightβ€”the most ever for an itinerary in our 8 years so far.

100 …

Once July rolls around and we sail away from Monhegan Island, the number of workshops and tours that National Parks at Night will have run since our first year. That’s right, we’re hitting triple digits! And we fully intend to throw a party!

A Few Notes

Before we get into the specifics of the workshops, we’d like to share a few ideas.

How are Some Already Sold Out?

As a special thank you to those who attend our workshops, who sign up for our waitlist and who subscribe to our email list, every year we announce our itinerary to those three groups before β€œgoing public.”

This year, as usual, our community has committed very strongly to many of the workshops. (Our gratitude is infinite.) Because of that, nine of our new workshops and tours sold out during the past week. Additionally, five other events were announced last year and sold out some time ago.

Still, as of press time, nine of our Season 8 workshops and tours still have seats left, plus Faroe Islands this fall), so it’s easy to join us in amazing places such as Joshua Tree National Park, Cape Cod, the Lofoten Islands, Iceland and more!

If you really want to go to one of those other places with us …

We Can’t say it Enough: Use the Waitlist

Openings happen for almost every workshop, and those spots always get offered to the waitlist first. If you see something you really want to attend and there are no tickets now, we urge you to sign up for the waitlist today.

The Workshops

Below you can read a little bit about each of the workshops we’ll be running in our eight season. Click on the photos or the links to read even more.

If you’d like to see a lineup of all the workshops we have scheduled for 2022-23, including updates on how many tickets are available in each, see our Season 8 Workshops page:


Passport Series

These are our signature event workshops, which we hold in national parks. We teach every day, either in the classroom or on field trips, and we shoot every night in beautiful and inspiring places.

In 2023 we’ll be visiting some amazing and unique parks, both popular and a few of more obscure but incredibly beautiful gems.

Great Basin National Park

Bristlecone pines, mysterious subterranean passages and some of the darkest skies in the United States.

Great Basin lies just off the loneliest road in America. You don’t arrive here by mistake. Want to walk among the 4,000-year-old bristlecone trees that are just a few hundred feet from a spectacular glacier, or around alpine lakes reflecting the snowy mountaintops and the Milky Way? Great Basin reveals its true beauty among its many trails, and we’ll be hiking to experience it.

Great Basin National Park β€” June 18-24, 2023

New River Gorge National Park

America’s newest national park is ripe with opportunities for photography and outdoor adventures.

Our nation's newest national park, New River Gorge is an adventurer’s paradise. We’ll spend our days whitewater rafting, zip-lining through the treetops, and exploring the area’s natural, railroad and mining history. Then, of course, we'll be shooting in the dark! Timed at the peak of fall foliage, and the tail end of rafting season, this will be a very full week of both day and nighttime activities.

New River Gorge National Park β€” October 22-27, 2023

Olympic National Park

Majestic mountains, magical rainforests, magnificent coastline. Experience the wonder that is Olympic National Park.

The winner of the National Parks at Night alumni "return to this park" vote! For 6 nights, photograph on the rugged mountains, in the vibrant rainforests and along the pristine coastline of Washington state’s Olympic National Park, one of the most beautiful and diverse national parks in the U.S.

Olympic National Park β€” September 16-22, 2023

Saguaro National Park

Sonoran nights, desert blossoms and the symbol of the American west.

Deep in the Arizona desert stands a forest of cactus that can reach heights of 60 feet. The distinctive saguaros, silently spreading across the landscape, reach for the stars and the heavens beyond. Barrel, prickly pear and teddybear cholla cactuses also adorn the arid foreground, while foxes and coyotes dart in and out of the moonlight shadows. We'll photograph it all (and more) on 5 spring nights in the Sonoran Desert.

Saguaro National Park β€” April 4-9, 2023

Virgin Islands National Park

An unparalleled opportunity to explore the beaches, coves, mountains and dark skies of this unique national park in the U.S. Virgin Islands.

A workshop on island time, journeying through and photographing Virgin Islands National Park. Pristine shores, tropical forests, and countless historic and prehistoric archeological sites sit under the night skies of the western Atlantic Ocean.

Virgin Islands National Park β€” November 27-December 3, 2023

Adventure Series

The U.S. has other amazing places to shoot at night outside of national parks, and we like visiting those too. National monuments, national forests, scenic byways, urban ruins and more.

Coming up, the Adventures will include a lighthouses workshop along a famous stretch of Atlantic shore, an ocean island, some amazing desert landscapes, and a couple of inspiring celestial events.

Bannerman Island

Spend an overnight photographing a historic castle in the middle of the Hudson River.

Just 1.5 hours north of New York City rests one of the most impressive ruins in New York state: Bannerman Castle. Built at the turn of the 20th century, it served as an armory, warehouse and mystery to those passing along the Hudson River. This is a rare opportunity to spend the night on an inspirational island and shoot until the dawn breaks the evening sky.

Bannerman Island β€” August 4 and 5, 2023

Cape Cod Lighthouses

Half a dozen lighthouses, five summer nights, countless New England villages, one amazing national seashore.

The arm of Cape Cod stretches out and up into the Atlantic Ocean, providing a landscape beautiful to view but hazardous to ships for centuries. The lighthouses stand sentinel, guarding these classic New England shores, ready to be photographed under the summer Milky Way.

Cape Cod Lighthouses β€” August 10-15, 2023

Capitol Reef & the Solar Eclipse

Capture the dark side of the moon with a ring of fire over one of the most stunning landscapes in the U.S.

Capitol Reef is the least-known of Utah’s β€œMighty 5” national parks, yet is stunningly beautiful and aesthetically diverse. And it lies in the path of the 2023 annular solar eclipse! We’ll be there for an opportunity to photograph the eclipse, plus we'll have an entire night photography workshop during a new moon in this International Dark Sky Park.

Capitol Reef Solar Eclipse β€” October 13-18, 2023

Great Sand Dunes & the Perseids

North America's tallest inland sand dunes and Colorado's dark skies are ideal for experiencing the stunning Perseid Meteor Shower.

Do you dream of creating the holy grail of meteor shower imagesβ€”a meteor shower radiant composite? Then this is the workshop for you to focus on planning, shooting and editing your own radiant images. Since 2023 should be an amazing year for the Perseids, you’ll likely capture meteors on multiple nights over the largest sand dunes in North America.

Great Sand Dunes & the Perseids β€” August 10-15, 2023

Monhegan Island

The fishing vessels. The hilltop lighthouse. The clapboard cottages. The spectacular dark skies. All 10 miles from shore on the quaint Monhegan Island.

National Parks at Night returns to Monhegan for a full five-night workshop on one of our favorite Islands. Monhegan is a place that people go back to over and over again. It’s hard to stay away for long. We’ll explore this peaceful oasis entirely on foot, covering subjects such as the local lighthouse, the village, the waterfront cliffs and a nearly century-old shipwreck.

Monhegan Island β€” July 3-8, 2023

Panorama Intensive: Bryce Canyon

Master night sky panoramas among the hoodoos of the legendary Bryce Canyon.

Utah’s Bryce Canyon National Park is pano-licious! We’ll be basing ourselves in this breathtaking landscape, noted for its geologic wonders and wide views, all to focus on learning to create nighttime panoramas. Single-row, multi-row and Milky Way will feel second-nature by the end of 5 nights on the rim and on the floor of the amazing Bryce amphitheater.

Panorama Intensive: Bryce Canyon β€” May 23-28, 2023

Sloss Furnaces

Step back in time and photograph one of the industrial marvels of the Industrial Ageβ€”at night!

The focus of this night photography workshop will be a deep dive into light painting, composition, and black and white photography. Sloss Furnaces National Historic Landmark is an incredible collection of 20th century metal machinery located on the eastern edge of downtown Birmingham, Alabama. We will use moonlight and light painting to breathe fire back into the furnaces.

Sloss Furnaces β€” November 16-19, 2023

Voyager Series

As much as the U.S. is beautiful and dynamic, so is the rest of the world. We’re always on the lookout for beautiful landscapes and fascinating cultures to immerse ourselves in, especially in the dark. Over the next two years (we plan these ones a little further out), we’ll be heading to overseas destinations that range from one of the most enigmatic islands in the oceans to a recent mainstay for landscape photographers.

East Greenland Schooner

See icebergs, auroras and arctic wildlife up close on this truly adventurous, sea-based tour.

Experience the extraordinary scenery and Inuit culture of Greenland’s captivating coastline. This trip along the striking and sparsely populated east coast of Greenland will begin and end in the village of Kulusuk, but everything in between will truly be an exploration. Glacier hikes, stand-up paddleboarding, sea kayaking, and of course photographyβ€”you’ll have the opportunity to do all of these and more on one of our grandest adventures yet.

East Greenland Schooner β€” September 4-13, 2023

Easter Island

Enigmatic Easter Island. At night. Need we say more?

Few places on earth are as mysterious or compelling as Easter Island. The giant stone figures known as moai oversee this remote island 2,200 miles off the coast of Chile. Most of Rapa Nui, as it’s known to the locals, is a national park. Not only is it hard to get to Easter Island, it is notoriously difficult to access the park after the sun goes down. But we will be taking a lucky group of fellow night photographers on this rare opportunity of spending an unforgettable week with the moai.

Easter Island β€” February 12-19 and 21-28, 2023

Iceland North Coast

Come to the more remote coast of the more remote island, to photograph the sea, the culture and the wild landscapes of northern Iceland.

Each area of Iceland has its own unique character and features. In the north, the massive waterfalls are mostly wide rather than tall, contrasting the tall, narrow ones in the south. The north tends to be colder, and snowier. It’s definitely less crowded. This trip comes at the end of winter, with longer days, and hopefully with a good chance of seeing the aurora above the Arctic Henge.

Iceland North Coast β€” April 7-17, 2023

Iceland: Snaefellsnes

A pointy peninsula featuring a black church and a perfectly pointy mountain, with a bonus retreat on a special island.

This delightful part of Iceland is located between the capital of Reykjavik and the Westfjords. It’s home to SnΓ¦fellsjΓΆkull National Park, a twin-peaked volcano and a small glacier. We’ll spend 1 night in Reykjavik, 3 nights on the peninsula, and 2 on Flatey Island, reached by ferry, and then on to the Westfjords, where we’ll spend our last nightβ€”unless you stick around for our glamping add-on.

Iceland: Snaefellsnes β€” August 25-September 1, 2024

Iceland South Coast

The South Coast of Iceland was the first area to be β€˜discovered.’ And for good reason. It’s extraordinary.

This is the classic Iceland itinerary, in winter. Following the ring road south from Reykjavik, and eastward along the coast, we’ll photograph the famous waterfalls, horses, basalt towers, lava fields, glacial lagoon and ice beach, and we’ll take a private tour into the ice caves under Iceland’s largest glacier. Oh, and we’ll be aurora hunting every night. Even if you have been there before, there is always something new and unexpected in the volcanic wonderland known as Iceland.

Iceland South Coast β€” March 11-20, 2023

Iceland: Westfjords

Puffins, herring factories and blueberries, oh my!

The northwest corner of Iceland is a dazzling and deeply indented coastline featuring about 30 fjords, each with different surprises awaiting discovery. We’ll visit the best place in Iceland to see puffins, spend 3 nights in a hotel that once housed herring workers, photograph waterfalls, swim in a geothermal swimming pool and wander some of the most magnificent landscapes you’ll ever see.

Iceland: Westfjords β€” September 7-14, 2024

Ireland: County Mayo

Explore the best of the west of Ireland on this 8-night tour of County Mayo.

This tour is based in Westport, the charming county town of Mayo, in the middle of Ireland's west coast. From there we’ll make daily excursions to far-flung places such as Achill Island in the north and the edge of Connemara in County Galway to the south. Ruined abbeys, the castles of Mayo’s legendary Pirate Queen Grace O’Malley, and deserted-village timescapes all await.

Ireland: County Mayo β€” June 2-10, 2023

Lofoten Islands

The Lofoten Islands, a majestic mountain archipelago of dramatic landscapes, unspoiled beaches and winter wonderland.

This will be a winter tour focused on photographing the rugged snow-covered mountain islands, dramatic beaches, northern lights, pristine fisherman's huts and untouched beauty of this remote and breathtaking region of the world. March is a perfect time to visit Lofotenβ€”the milder winter temperatures make the overall experience ideal for catching the auroras over a snow-globe winterscape.

Lofoten Islands β€” March 17-25, 2023

Skills Series

All of the aforementioned workshops and tours focus a lot on exploration. Our Skills Series events focus on learning something specificβ€”still in an inspiring place, but we focus on a precise skill set. Next year in this category we’ll be hosting workshops on shooting with post-production in mind, learning post-production and how to use the best scouting app in the business, PhotoPills.

PhotoPills Bootcamp: Joshua Tree

Star trails. A crescent moonset over the desert. The Milky Way arching across a forest of Joshua trees. Find them all with PhotoPills and create epic photography.

With PhotoPills, your ideas have no bounds. During 5 days and nights of learning, scouting and shooting in California’s Joshua Tree National Park, we’ll explore the ins and outs of one of the most powerful tools a photographer can keep in their pocket. Learn to plan for and capture the Milky Way, sunsets, moonsets, star points, star trails and more in this desert jewel of the park system.

PhotoPills Bootcamp: Joshua Tree β€” October 10-15, 2023

Post-Processing Intensive: Asheville

Master photography post-production with a week in this artist’s enclave city nestled in North Carolina’s beautiful Blue Ridge Mountains.

You’ve spent a lot of time building your camera skills and honing your photographic vision. Now it’s time to take it to the next level. Over 6 days in the heart of the North Carolina mountains, we'll teach all the skills needed to use modern technology to finish our photos, and even to create images that were impossible only a few short years ago.

Post-Processing Intensive: Asheville β€” June 19-24, 2023

Shoot for the Edit: Sedona

Photographing and processing in a beautiful place: among the most brilliant sandstone formations in the West.

When it comes to night photography, capturing the right information in the field is crucial. Set among the beautiful red rock buttes of Sedona, Arizona, this workshop is designed to teach you how to not only capture all of the necessary exposures in the field but also the art of processing those images to produce your final piece of night art.

Shoot for the Edit: Sedona β€” September 10-15, 2023


So … Where Will You Go?

There ya go. We’ve laid out the numbers, we’ve laid out the places. All that’s left to do is decide where you’d like to go with us next year and beyond. Dream big. Travel big. Shoot in the dark.

We’d love to see you at a workshop. If not there, then at the Nightscaper Conference or the Night Photo Summit. Or at a trade show, or at a camera club. Or online, sharing ideas on our blog, or stories on Facebook, or photos in Instagram.

Thank you all for being part of our community of intrepid explorers and lifelong learners, and for continuing to partner with us on these amazing nocturnal adventures. We appreciate every one of you.

Now onward … to another year of seizing the night.

Chris Nicholson is a partner and workshop leader with National Parks at Night, and author of Photographing National Parks (Sidelight Books, 2015). Learn more about national parks as photography destinations, subscribe to Chris' free e-newsletter, and more at www.PhotographingNationalParks.com, and follow him on Instagram (@PhotographingNationalParks.com.

UPCOMING WORKSHOPS & Events FROM NATIONAL PARKS AT NIGHT

The Night Photographer's Guide to Star Stacking (Part I)

Note: This is the first in a three-part series about creating star trails with the stacking technique. Part I, below, covers how to shoot the raw materials. Come back soon for Part II, in which Tim goes over the required post-production, followed by Part III, in which he shows how to clean up the artifacts of the technique (such as plane trails).

To learn more about night photography techniques that involve photographing with processing in mind, attend our Shoot for the Edit: Colorado workshop in September 2022!


Night photographers are fortunate to have many ways to interpret a subject. The night sky can be captured with a stunning Milky Way core, or as a deep sea of stars that register as thousands of points of light. We can illuminate the foreground to give the sky a sense of place, use filters to give the stars a fantasy look or use longer exposure times to render the stars as trails across the sky.

Star trail photos are fun to shoot, and they bend reality by dilating time in a way that humans can’t otherwise perceive. Yet, shooting star trails is rife with potential obstacles, from camera limitations to stray light and more.
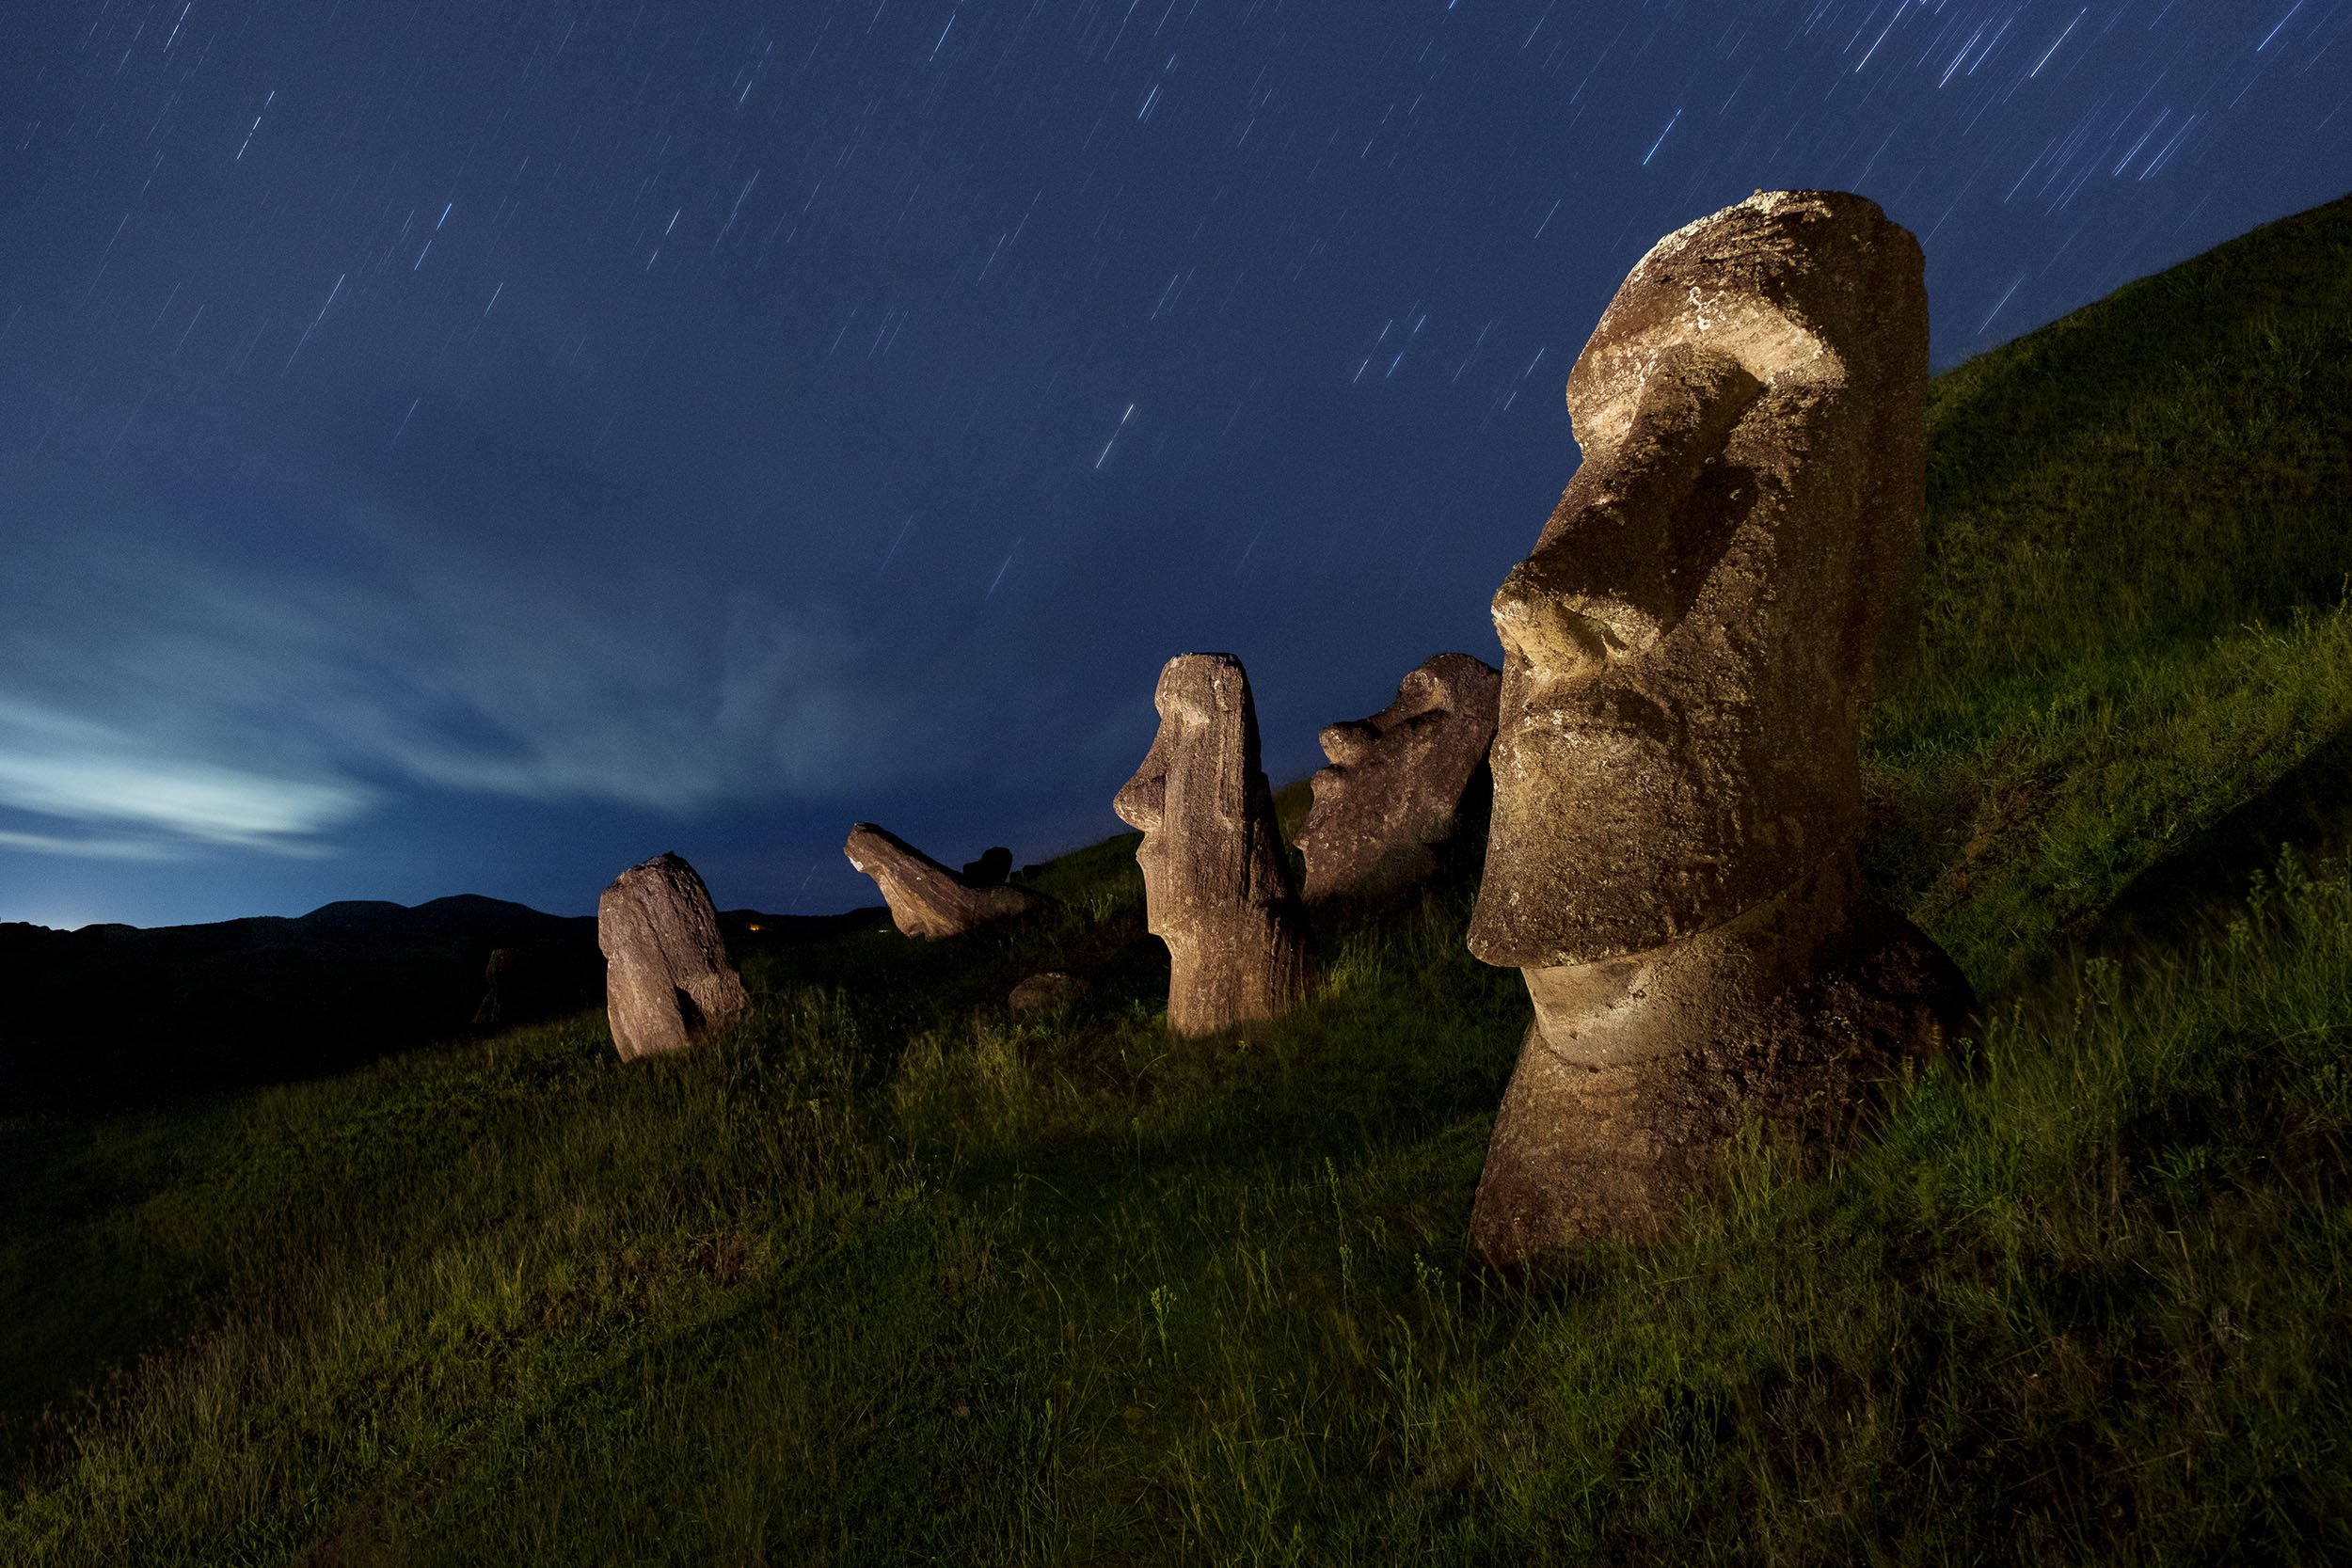
In a series of blog posts that starts today, I’ll show you how to create star trails by using a special technique that works around those potential problems: star stacking. In this first post I’ll discuss how to shoot for star stacking, in the next post I’ll cover how to process the images, and then in a third post I’ll teach how to rid your stacks of plane trails and other artifacts of the process.

Woodstock, New York. Nikon D850 with a Nikon 14-24mm f/2.8 lens. 3 frames shot at 25 seconds, f/4, ISO 100, stacked in Photoshop.

Why to Stack

There are two primary methods of creating star trails: capturing one long exposure or capturing many short exposures and stacking them together in Photoshop or other similar programs. The latter involves more post-production work, so why would we choose that? Let’s take a look at the pros and cons of each method:

One Long Exposure

Advantages:

  • No need for post-processing to create the star trails. All the trails are in the one image.

  • No fussing with a complicated intervalometer. Simply plug in a cable release, set your camera to Bulb, press and lock your cable release, and mark your watch. Turn off the cable release when the time is up. Easy.

Disadvantages:

  • You’ll need to use Long Exposure Noise Reduction (LENR). This is the feature that we turn on when shooting very long exposures (i.e., more than a few minutes). The problem is that this setting renders most cameras unusable for twice the exposure time. Setting your camera to shoot an hourlong exposure renders your camera unusable for anything else for 2 hours!

  • You may not always be able to shoot long exposures when there is a lot of moonlight or artificial illumination, because all that light can blow out your exposure.

  • With one long exposure you risk having your image ruined by any number of lighting mishaps. Someone could walk through your scene with a flashlight. Cars could illuminate parts of the landscape you preferred to be dark. The list goes on and on.

Multiple Shorter Exposures

Advantages:

  • No need for LENR. (In fact, you can’t even use it, because turning on the feature would create gaps in your star trails in the final stacked image.)

  • It’s easier to remove unwanted lights from any individual frame, or to mask in just one clean foreground.

  • It can be easier to incorporate light painting into your image without the worry of ruining your entire shot. In fact, you could even shoot different takes on your light painting and mask in your favorite.

Disadvantages:

  • Slightly harder to set up the exposures. You’ll need to use either your camera’s built-in intervalometer or purchase a separate corded or cordless intervalometer.

  • It requires more time in front of the computer.

Yellowstone National Park. Nikon Z 6 with a Nikon 14-24mm f/2.8 lens. 8 frames shot at 5 minutes, f/4, ISO 400, stacked in Photoshop.

The decision to shoot one long exposure or shoot many shorter exposures and stack them together during post-processing is often a matter of circumstances rather than a simple preference. You simply can’t make superlong exposures when there is a lot of moonlight. Also, if a lot of other people are around, you’d be wise to break up the total exposure time into smaller segments just to safeguard against accidents.

All in all, shooting shorter exposures and stacking them is now the more common way of creating star trails.

Shooting Star Stacks Step by Step

Capturing the night sky can be complex, with many different considerations to create the final image, and shooting a star stack certainly doesn’t make it simpler. Here’s a basic outline of necessary steps:

  1. Set White Balance.

  2. Set ISO.

  3. Determine and set aperture and shutter speed.

  4. Turn off noise reduction.

  5. Compose.

  6. Focus.

  7. Run a high ISO test.

  8. Calculate the final exposures.

  9. Program your intervalometer.

  10. Shoot.

Camera Settings

With any type of photographyβ€”day or nightβ€”we need to adjust our camera’s settings to suit the situation. Figure 1 shows a good general place to start for your nighttime test shots:

Figure 1.

High ISO Test Shots

Once your camera is set, you have a composition and you’ve focused your stars (see Chris Nicholson’s great post β€œ8 Ways to Focus in the Dark”), it’s time to make some test exposures. The test exposures will help you fine-tune your composition and ensure your stars are sharp. We run these tests at high ISOs so that we can run them fasterβ€”we don’t want to waste time running tests that are 5 minutes each!

It’s easiest to start with a shutter speed that will render the stars as dots rather than dashes. This will help you determine if the stars are actually sharp. (It will also render a usable star point or Milky Way shot, so you’ll have that in the bag too!)

Calculating the proper shutter speed is best done using the night photographer’s best friend, PhotoPills. Open the Spot Stars pill (Figure 2). First, near the top right, choose the camera you’re using. (You can set the default in Settings, which is a great shortcut if you use PhotoPills a lot.) Then input your focal length and aperture.

Figure 2.

Figure 3.

PhotoPills will make its calculations and supply you with an ideal shutter speed according to the NPF Rule. This will be the maximum time you can open your shutter and still keep your stars as dots rather than dashes. For example, with my Nikon Z 6II and a 14mm lens, the NPF Rule tells me that I shouldn’t shoot any longer than 18.48 seconds (Figure 3). For the purpose of these test shots, I would round up to 20 seconds. (But if I was shooting for the Milky Way, I would round down to 15 seconds.)

At this point, you can fire a test shot. Zoom in on your LCD to ensure your stars are sharp.

Once your test exposures have determined that you have good focus, you no longer have to adhere to the NPF ruleβ€”after all, our eventual goal is to get those stars to trail. If test shots reveal sharp stars but an underexposed image, then increase your shutter speed since, again, trailing stars are your goal anyway.

Calculating Shutter Speed

Our aim is to star-stack, but we need to know how long in total we want to shoot. It’s best to start by figuring what one long exposure would be, and then work back to break it up into individual exposures.

Let’s assume the camera is now set to 30 seconds, f/2.8, ISO 6400. Let’s turn those points into some trails. To do that we’ll need to increase the shutter speed, and to compensate we’ll lower the ISO.

The Six-Stop Rule (Figure 4) is an easy way to make these changes. This rule states that for a given exposure, the amount of time in seconds at ISO 6400 equals that amount of time in minutes at ISO 100. (The difference between ISO 6400 and 100 is six stops, thus the name of the rule.) In our example exposure from above, 30 seconds at ISO 6400 translates into 30 minutes at ISO 100.

Figure 4.

Of course, maybe we don’t want to keep the shutter open for 30 minutes. That’s OK. The Six-Stop Rule has given us our base long exposure, and we can work our way up from there. Again sticking with our same example exposure from above, other usable equivalent exposures can be seen in Figure 5.

So if you wanted one long exposure to capture star trails you could use 30 minutes at ISO 100. If you wanted a longer exposure, you could stop down your aperture one stop and keep your shutter open for an hour. But for this tutorial on star stacking, we want more, shorter exposures.

Figure 5.

Calculating Shutter Speed for Stacking

You’ll use the same test shot data to calculate exposures for stacking.

Our initial test exposure of was 30 seconds, f/2.8, ISO 6400. This means we could shoot any of the following combinations and get the same overall brightness:

  • 30 minutes at ISO 100

  • 15 minutes at ISO 200

  • 8 minutes at ISO 400

  • 4 minutes at ISO 800

  • 2 minutes at ISO 1600

  • 1 minute at ISO 3200

The shorter of those combinations by themselves would not produce very long star trails. But when we shoot a lot of frames and stack them together later, these combinations will create trails as long as we want them to be. For example, to make an hourlong trail, you could:

  • shoot 15 4-minute exposures at ISO 800

  • shoot 30 2-minute exposures at ISO 1600

  • shoot 60 1-minute exposure at ISO 3200

You’re really free to choose whatever combination works best to achieve your vision.

Just keep one thing in mind: Because you can’t use LENR with this technique, you’ll want to keep your shutter speed short enough to avoid long exposure noise. This limit is different for different cameras in different conditions, so it’s a good idea to test your camera to learn how it behaves. But as a benchmark, a 2-minute shutter speed is safe for many cameras in most situations. If you don’t know for sure that your shutter can stay open longer without resulting in long exposure noise, then just stick with that 2-minute limit and you should be OK.

Death Valley National Park. Nikon Z 6 with a Nikon Z 14-24mm f/2.8 lens. 53 frames shot at 30 seconds, f/2.8, ISO 160, stacked in Photoshop.

Shooting the Raw Materials

We’re finally ready to make pictures!

When shooting the series of shorter exposures, you’ll want to shoot them consecutively with as little time in between each shot as possible. To achieve this you’ll take two steps:

  1. Turn off Long Exposure Noise Reduction. Again, LENR takes time after each exposure, which would create gaps in your stacked trails.

  2. Program your intervalometer. (Matt Hill has an excellent video on setting up an intervalometer.) If your camera has a built-in intervalometer and you’re comfortable using it, then of course you may do that. But we find that external intervalometers are usually a little easier to use, and they don’t have the shutter-speed limitations that the internal ones do. A key is to set the interval between your frames to as short as possible in order to minimize those gaps. For most intervalometers, the minimum interval is 1 second, which is short enough to get the job done.

In terms of how many frames to shoot, that depends on how long you want your trails to be. If you want an hour and you’re shooting 5-minute exposures, then you’ll need 12 frames. In that case, you can program your intervalometer to fire 12 times. Or you can set your intervalometer’s number of shots to infinity, and just stop it manually when you feel like you have enough to work with.

Once the intervalometer is set, click the start button, sit back and enjoy the night sky.

And while you’re at it, be sure not to touch your tripod! If your tripod moves even a smidge, your frames won’t align in Photoshop later. That can be fixed, but it’s best not to cause the problem to begin with.

Sedona. Nikon D4s with a Nikon 14-24mm f/2.8 lens. 8 frames shot at 8 minutes, f/4, ISO 200, stacked in Photoshop.

Putting it All Together in Post-Production

Once your images are made, you’ll want to get to the computer to stack them into star trails. That’s the next step in your process, and it’s the next blog post we’ll publish. Stay tuned for Part II, coming soon.

Want to learn more about shooting for star tracking and then editing those images into trails? Join us for our Shoot for the Edit workshop in Colorado next month!

Tim Cooper is a partner and workshop leader with National Parks at Night. Learn more techniques from his book The Magic of Light Painting, available from Peachpit.

UPCOMING WORKSHOPS FROM NATIONAL PARKS AT NIGHT