star stacking

The Night Photographer's Guide to Star Stacking (Part II)

Note: This is the second in a three-part series about creating star trails with the stacking technique. Part I covered how to shoot the raw materials. In Part II, below, Tim goes over the required post-production. Later he’ll follow up with Part III, in which he’ll show how to clean up the artifacts of the technique (such as plane trails).


Previously I wrote about the in-field steps for creating star trails from multiple exposures. Now we’re ready for the next step, which is how to process those images into one final star trail photograph. And, as a bonus, I’ll include a light-painted foreground shot into the mix!

While there is a variety of software that can process raw files, Photoshop is still the industry standard for compositing images. In this post I’ll use Lightroom and Photoshop to complete our star stack.

The Lightroom Steps

Once your images are downloaded, all the frames for your stack should be together, because you shot them sequentially. For this example, my images are in a Lightroom folder called Inyo Mine (Figure 1).

Figure 1.

At this point you could bring the frames into Photoshop to stack them, but I recommend doing as much editing to the images as possible before sending them over. This could be as little as altering the exposure or as extensive as masking and removing plane trails from each image. I prefer to make adjustments beforehand to maximize the advantages of the raw workflow—once the frames are in Photoshop, they’ll be rasterized and any subsequent image adjustments could possibly hinder image quality in a way that wouldn’t happen earlier in the process.

However, you should note one caveat: We have seen that the more edits you make before stacking, the higher the chance that the final image will suffer from moiré. Now, you might never see moiré, but some photographers do, and some see it more often. The incidence of moiré can vary from one camera model to the next—for example, we tend to see it more with higher-resolution cameras.

The problem with moiré is that it can’t be edited out, so it needs to be avoided. As you’re getting into stacking for star trails, if you notice that you encounter moiré in your final images often, then it might just be more efficient to do your basic image edits after stacking rather than before. (More on this in a little bit.)

Either way, the edit we see that most often causes moiré in a stack is Lens Corrections—in fact, it’s common. So that’s the one adjustment you might want to make a habit of waiting until later to make.

However much editing you decide to do, you should ensure that global adjustments are the same on all of the images. Select all of the frames by clicking on the first, holding the Shift key, then clicking on the last (Figure 2).

Figure 2.

For this example I adjusted the White Balance, increased the Exposure and Whites, and added a touch of Dehaze on the first star trail image. We want these all of our global adjustments to be applied to all of the star trail frames, otherwise the stars will look different at various spots in the final trails. To apply the edits to all the frames, with all of the star trail images selected, click the Sync button (Figure 3), click Select All, then click Syncrhonize. (You’ll notice that I did not include the light-painted image with this sync, as I want to edit that separately.)

Figure 3.

Now that the global adjustments are synchronized across all of the star trail frames, you can make any edits that may be needed on individual files, such as removing plane trails, masking etc. At this point I made some adjustments to the light-painted foreground (Figure 4).

Figure 4.

Once all of your editing has been done, return to the Library module and again select all of the images you wish to stack (Figure 5). Notice that in this case I have selected all of the star-trail frames as well as the light painting frame.

Figure 5.

Choose Photo > Edit In > Open as Layers in Photoshop (Figure 6). This command does a lot of work for you in the background. It takes each of your raw files, make copies and converts them to TIFF, then sends them to Photoshop, each as an individual layer in one document. Depending on your Lightroom settings, this may produce a PSD or TIFF file. Either is fine.

Figure 6.

The Photoshop Steps

Once the frames begin opening in Photoshop you’ll see them appear as different layers in the Layers panel. The bottommost layer will show as “Load Layers” (Figure 7); this indicates that Photoshop is still opening and placing new files into the document. Be patient with this step. It could take a while depending on how many frames you are using.

Figure 7.

Once the images have been loaded you’ll see the Layers panel filled with your individual frames (Figure 8).

Figure 8.

Click on the top layer, hold the Shift key, then click on the bottom layer (you may have to scroll down a bit). This selects all of the layers so that our next step will apply to all layers in the file.

Now it’s time to change the blending mode, which is how we’ll combine the stars that appear in the different layers. The blending mode is set with a dropdown menu located near the top of the Layers panel (Figure 9).

Figure 9.

We want to change the blending mode to Lighten. With all of the layers still selected, click on the arrow for the blending mode dropdown menu, then from the options, select Lighten (Figure 10). Witness the magic. All of your stars have now combined to create trails.

Figure 10.

How did this work? Imagine the individual layers as individual photo prints stacked on a table. No matter how large the stack, you would see only the topmost print. It’s the same with layers.

However, changing the blending mode on all of the layers to Lighten tells Photoshop that the brightest part of each layer should show through all the way to the top. This means that wherever there is a star in the sky, it will show through.

Figure 11 shows an enlarged portion of the sky, and I have turned off the visibility of all the layers except one (circled in red). This was done by clicking the eyeball off for all the other layers, thus turning off their visibility.

Figure 11.

In just that one layer, you can see that the star trail is quite short. But when I activate another two layers, the trail lengthens (Figure 12).

Figure 12.

This is because the stars on these layers are brighter than the darker sky in the same spots on the other layers. Remember that with the Lighten blending mode, the brightest areas of each layer show through. So when all of the layers are visible (eyeballs turned on) and their blending mode is set to Lighten, you will see all of the star trails from each layer (Figure 13).

Figure 13.

Moiré

Note that this is the point where you might see moiré. It can be caused by the processing algorithm creating just slightly different pixels from one layer to the next. Zoom in to the sky and look for moiré, which will appear as a pattern of bands of somewhat lighter and darker pixels, such as in Figure 14. If you see that, you cannot edit it out. Your best bet is to close file (don’t bother saving), go back to Lightroom, undo some edits, and then re-create your layered Photoshop file.

Figure 14.

In that case, here’s how to troubleshoot:

  1. As mentioned earlier, the adjustment that we most often see causing moiré in a stack is Lens Corrections. If Enable Profile Corrections is on, turn it off, create the stack again, and see if that fixes the problem.

  2. If not, then it’s back to Lightroom. Zero out your most aggressive edits (Shadows at 100?!) and try again.

  3. If you’re still getting moiré, zero out all of your edits, create your stack, and then edit your final image in Lightroom.

We have seen only one case ever where these steps didn’t solve an issue with moiré.

If you are working with only star trail layers, with no light painting layers, then you could be finished at this point. Feel free to jump ahead to “Saving the File” at the end of this post.

Masking Around a Different Foreground

It’s been a while since I mentioned it, but remember the other image I opened as a layer, the one with the light painting? Because the lighting in that one layer is brighter than the dark foreground in all the other layers, all that light painting shows through—again because of the Lighten blending mode. More magic!

However, that light painting layer is causing one problem. That exposure was not made sequentially with the others. I shot the light painting frame before I started shooting the star trail frames. It has stars in it too, and because the blending mode for that layer is also set to Lighten, those stars are showing in the stack.

Figure 15 shows the image with the light painting layer turned on. You can see all of the stars (circled in red) from the exposure I made while light painting. This exposure was shorter, so the stars appear as dots rather than small trails.

Figure 15.

I do want the light-painted foreground from this layer, but I don’t want those star points to appear in the sky and break up my star trail pattern. The solution? Mask out the sky from that layer.

Masking

Selecting and masking in Photoshop is a deep subject and we could spend a summer of Sundays plumbing its depths. To keep this simple, we’ll use a powerful (and somewhat new) selection tool called Select Sky.

The goal is to keep the sky of the light-painted layer from showing in the stacked final image, while still letting the foreground show. This means we want a selection of the foreground for our mask. But in this case (and in many cases), it’s easier to select the sky and then invert that selection so that we have the foreground selected instead.

I begin by clicking on the light painting layer (Figure 16). Clicking on this layer tells Photoshop that when I start using selection tools, the selections will be based on the information from this layer. Then I choose Select > Sky.

Figure 16.

Then I choose Select > Inverse to change the selection to the foreground (Figure 17).

Figure 17.

The selection of the foreground is now active (shown by the marching ants in Figure 18).

Figure 18.

To turn this selection into a mask, all we have to do is click on the Add a Mask icon (Figure 19).

Figure 19.

The newly created mask on the light painting layer (circled in Figure 20) allows the foreground to show (as indicated by the white area of the mask thumbnail) but blocks the sky from showing (indicated by the black area).

Figure 20.

Saving the File

Once you’re done, you’ll want to save the file and send it back to the Lightroom catalog. To do so, select File > Save, then File > Close. Once back in Lightroom, you can continue fine-tuning the edits with a more familiar set of controls.

However, there’s a potential hitch when it comes to saving. Image files with lots of layers can be quite large. The more frames you stacked, the larger the final file will be. The problem is that PSD files cannot be larger than 2 GB, and TIFF files cannot be larger than 4 GB. If your layered image is larger than those limits, Photoshop will complain, and you’ll need to make a decision. You may:

  1. Flatten the layers (select Layer > Flatten Image), which will dramatically reduce the size of the file. This means Photoshop can save the file as a PSD or TIFF, which has the added benefit of taking up less space on your hard drive. However, your layers will be gone forever, so if you want to make layer-level changes in the future, then you’ll need to go through the whole process again.

  2. Save the file as a PSB, which is Photoshop’s large-document format. Simply select File > Save As, and choose “Large Document Format (*PSB)” as the file type. This will allow you to keep all your layers, but will of course use more room on your hard drive.

More Potential Steps

Creating star trails by stacking images has a lot of advantages, but it can also create some artifacts, such as plane trails, or stray light from flashlights or from cars driving by. Working with those artifacts is the next step in your process, and I’ll cover that in the next and final blog post in this series. Stay tuned for Part III, coming soon.

Tim Cooper is a partner and workshop leader with National Parks at Night. Learn more techniques from his book The Magic of Light Painting, available from Peachpit.

UPCOMING WORKSHOPS FROM NATIONAL PARKS AT NIGHT

The Night Photographer's Guide to Star Stacking (Part I)

Note: This is the first in a three-part series about creating star trails with the stacking technique. Part I, below, covers how to shoot the raw materials. Come back soon for Part II, in which Tim goes over the required post-production, followed by Part III, in which he shows how to clean up the artifacts of the technique (such as plane trails).

To learn more about night photography techniques that involve photographing with processing in mind, attend our Shoot for the Edit: Colorado workshop in September 2022!


Night photographers are fortunate to have many ways to interpret a subject. The night sky can be captured with a stunning Milky Way core, or as a deep sea of stars that register as thousands of points of light. We can illuminate the foreground to give the sky a sense of place, use filters to give the stars a fantasy look or use longer exposure times to render the stars as trails across the sky.

Star trail photos are fun to shoot, and they bend reality by dilating time in a way that humans can’t otherwise perceive. Yet, shooting star trails is rife with potential obstacles, from camera limitations to stray light and more.

In a series of blog posts that starts today, I’ll show you how to create star trails by using a special technique that works around those potential problems: star stacking. In this first post I’ll discuss how to shoot for star stacking, in the next post I’ll cover how to process the images, and then in a third post I’ll teach how to rid your stacks of plane trails and other artifacts of the process.

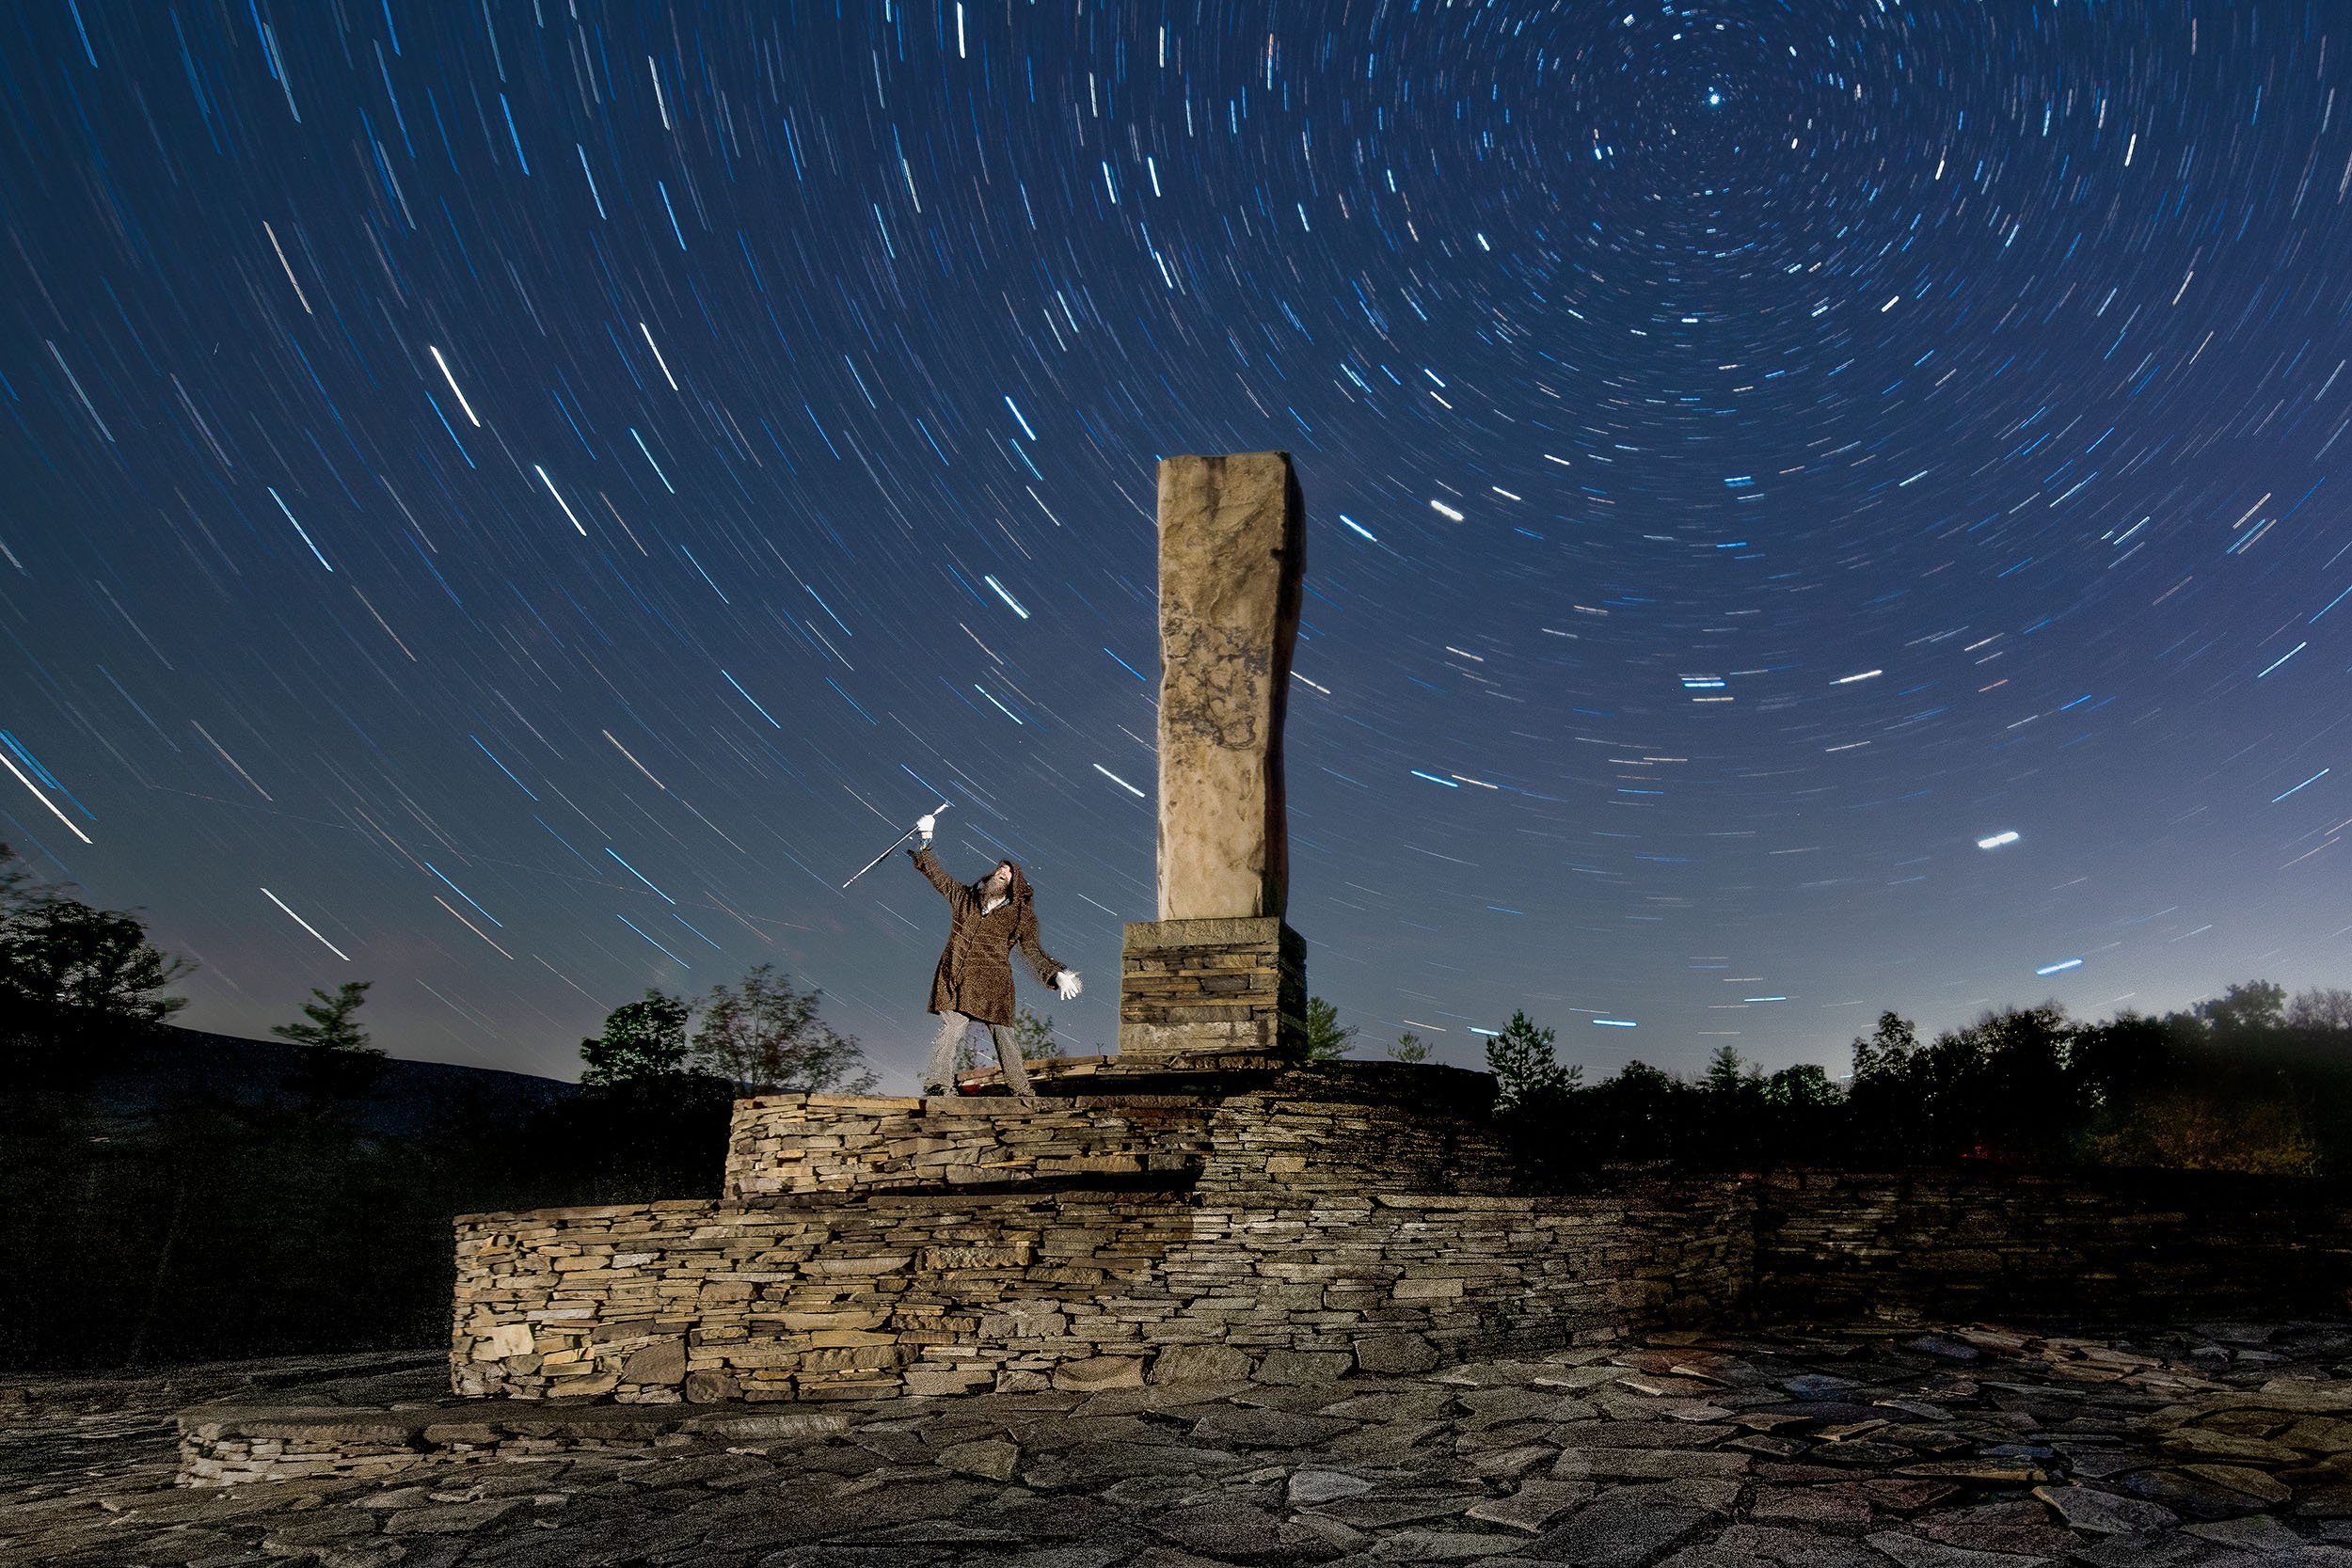
Woodstock, New York. Nikon D850 with a Nikon 14-24mm f/2.8 lens. 3 frames shot at 25 seconds, f/4, ISO 100, stacked in Photoshop.

Why to Stack

There are two primary methods of creating star trails: capturing one long exposure or capturing many short exposures and stacking them together in Photoshop or other similar programs. The latter involves more post-production work, so why would we choose that? Let’s take a look at the pros and cons of each method:

One Long Exposure

Advantages:

  • No need for post-processing to create the star trails. All the trails are in the one image.

  • No fussing with a complicated intervalometer. Simply plug in a cable release, set your camera to Bulb, press and lock your cable release, and mark your watch. Turn off the cable release when the time is up. Easy.

Disadvantages:

  • You’ll need to use Long Exposure Noise Reduction (LENR). This is the feature that we turn on when shooting very long exposures (i.e., more than a few minutes). The problem is that this setting renders most cameras unusable for twice the exposure time. Setting your camera to shoot an hourlong exposure renders your camera unusable for anything else for 2 hours!

  • You may not always be able to shoot long exposures when there is a lot of moonlight or artificial illumination, because all that light can blow out your exposure.

  • With one long exposure you risk having your image ruined by any number of lighting mishaps. Someone could walk through your scene with a flashlight. Cars could illuminate parts of the landscape you preferred to be dark. The list goes on and on.

Multiple Shorter Exposures

Advantages:

  • No need for LENR. (In fact, you can’t even use it, because turning on the feature would create gaps in your star trails in the final stacked image.)

  • It’s easier to remove unwanted lights from any individual frame, or to mask in just one clean foreground.

  • It can be easier to incorporate light painting into your image without the worry of ruining your entire shot. In fact, you could even shoot different takes on your light painting and mask in your favorite.

Disadvantages:

  • Slightly harder to set up the exposures. You’ll need to use either your camera’s built-in intervalometer or purchase a separate corded or cordless intervalometer.

  • It requires more time in front of the computer.

Yellowstone National Park. Nikon Z 6 with a Nikon 14-24mm f/2.8 lens. 8 frames shot at 5 minutes, f/4, ISO 400, stacked in Photoshop.

The decision to shoot one long exposure or shoot many shorter exposures and stack them together during post-processing is often a matter of circumstances rather than a simple preference. You simply can’t make superlong exposures when there is a lot of moonlight. Also, if a lot of other people are around, you’d be wise to break up the total exposure time into smaller segments just to safeguard against accidents.

All in all, shooting shorter exposures and stacking them is now the more common way of creating star trails.

Shooting Star Stacks Step by Step

Capturing the night sky can be complex, with many different considerations to create the final image, and shooting a star stack certainly doesn’t make it simpler. Here’s a basic outline of necessary steps:

  1. Set White Balance.

  2. Set ISO.

  3. Determine and set aperture and shutter speed.

  4. Turn off noise reduction.

  5. Compose.

  6. Focus.

  7. Run a high ISO test.

  8. Calculate the final exposures.

  9. Program your intervalometer.

  10. Shoot.

Camera Settings

With any type of photography—day or night—we need to adjust our camera’s settings to suit the situation. Figure 1 shows a good general place to start for your nighttime test shots:

Figure 1.

High ISO Test Shots

Once your camera is set, you have a composition and you’ve focused your stars (see Chris Nicholson’s great post “8 Ways to Focus in the Dark”), it’s time to make some test exposures. The test exposures will help you fine-tune your composition and ensure your stars are sharp. We run these tests at high ISOs so that we can run them faster—we don’t want to waste time running tests that are 5 minutes each!

It’s easiest to start with a shutter speed that will render the stars as dots rather than dashes. This will help you determine if the stars are actually sharp. (It will also render a usable star point or Milky Way shot, so you’ll have that in the bag too!)

Calculating the proper shutter speed is best done using the night photographer’s best friend, PhotoPills. Open the Spot Stars pill (Figure 2). First, near the top right, choose the camera you’re using. (You can set the default in Settings, which is a great shortcut if you use PhotoPills a lot.) Then input your focal length and aperture.

Figure 2.

Figure 3.

PhotoPills will make its calculations and supply you with an ideal shutter speed according to the NPF Rule. This will be the maximum time you can open your shutter and still keep your stars as dots rather than dashes. For example, with my Nikon Z 6II and a 14mm lens, the NPF Rule tells me that I shouldn’t shoot any longer than 18.48 seconds (Figure 3). For the purpose of these test shots, I would round up to 20 seconds. (But if I was shooting for the Milky Way, I would round down to 15 seconds.)

At this point, you can fire a test shot. Zoom in on your LCD to ensure your stars are sharp.

Once your test exposures have determined that you have good focus, you no longer have to adhere to the NPF rule—after all, our eventual goal is to get those stars to trail. If test shots reveal sharp stars but an underexposed image, then increase your shutter speed since, again, trailing stars are your goal anyway.

Calculating Shutter Speed

Our aim is to star-stack, but we need to know how long in total we want to shoot. It’s best to start by figuring what one long exposure would be, and then work back to break it up into individual exposures.

Let’s assume the camera is now set to 30 seconds, f/2.8, ISO 6400. Let’s turn those points into some trails. To do that we’ll need to increase the shutter speed, and to compensate we’ll lower the ISO.

The Six-Stop Rule (Figure 4) is an easy way to make these changes. This rule states that for a given exposure, the amount of time in seconds at ISO 6400 equals that amount of time in minutes at ISO 100. (The difference between ISO 6400 and 100 is six stops, thus the name of the rule.) In our example exposure from above, 30 seconds at ISO 6400 translates into 30 minutes at ISO 100.

Figure 4.

Of course, maybe we don’t want to keep the shutter open for 30 minutes. That’s OK. The Six-Stop Rule has given us our base long exposure, and we can work our way up from there. Again sticking with our same example exposure from above, other usable equivalent exposures can be seen in Figure 5.

So if you wanted one long exposure to capture star trails you could use 30 minutes at ISO 100. If you wanted a longer exposure, you could stop down your aperture one stop and keep your shutter open for an hour. But for this tutorial on star stacking, we want more, shorter exposures.

Figure 5.

Calculating Shutter Speed for Stacking

You’ll use the same test shot data to calculate exposures for stacking.

Our initial test exposure of was 30 seconds, f/2.8, ISO 6400. This means we could shoot any of the following combinations and get the same overall brightness:

  • 30 minutes at ISO 100

  • 15 minutes at ISO 200

  • 8 minutes at ISO 400

  • 4 minutes at ISO 800

  • 2 minutes at ISO 1600

  • 1 minute at ISO 3200

The shorter of those combinations by themselves would not produce very long star trails. But when we shoot a lot of frames and stack them together later, these combinations will create trails as long as we want them to be. For example, to make an hourlong trail, you could:

  • shoot 15 4-minute exposures at ISO 800

  • shoot 30 2-minute exposures at ISO 1600

  • shoot 60 1-minute exposure at ISO 3200

You’re really free to choose whatever combination works best to achieve your vision.

Just keep one thing in mind: Because you can’t use LENR with this technique, you’ll want to keep your shutter speed short enough to avoid long exposure noise. This limit is different for different cameras in different conditions, so it’s a good idea to test your camera to learn how it behaves. But as a benchmark, a 2-minute shutter speed is safe for many cameras in most situations. If you don’t know for sure that your shutter can stay open longer without resulting in long exposure noise, then just stick with that 2-minute limit and you should be OK.

Death Valley National Park. Nikon Z 6 with a Nikon Z 14-24mm f/2.8 lens. 53 frames shot at 30 seconds, f/2.8, ISO 160, stacked in Photoshop.

Shooting the Raw Materials

We’re finally ready to make pictures!

When shooting the series of shorter exposures, you’ll want to shoot them consecutively with as little time in between each shot as possible. To achieve this you’ll take two steps:

  1. Turn off Long Exposure Noise Reduction. Again, LENR takes time after each exposure, which would create gaps in your stacked trails.

  2. Program your intervalometer. (Matt Hill has an excellent video on setting up an intervalometer.) If your camera has a built-in intervalometer and you’re comfortable using it, then of course you may do that. But we find that external intervalometers are usually a little easier to use, and they don’t have the shutter-speed limitations that the internal ones do. A key is to set the interval between your frames to as short as possible in order to minimize those gaps. For most intervalometers, the minimum interval is 1 second, which is short enough to get the job done.

In terms of how many frames to shoot, that depends on how long you want your trails to be. If you want an hour and you’re shooting 5-minute exposures, then you’ll need 12 frames. In that case, you can program your intervalometer to fire 12 times. Or you can set your intervalometer’s number of shots to infinity, and just stop it manually when you feel like you have enough to work with.

Once the intervalometer is set, click the start button, sit back and enjoy the night sky.

And while you’re at it, be sure not to touch your tripod! If your tripod moves even a smidge, your frames won’t align in Photoshop later. That can be fixed, but it’s best not to cause the problem to begin with.

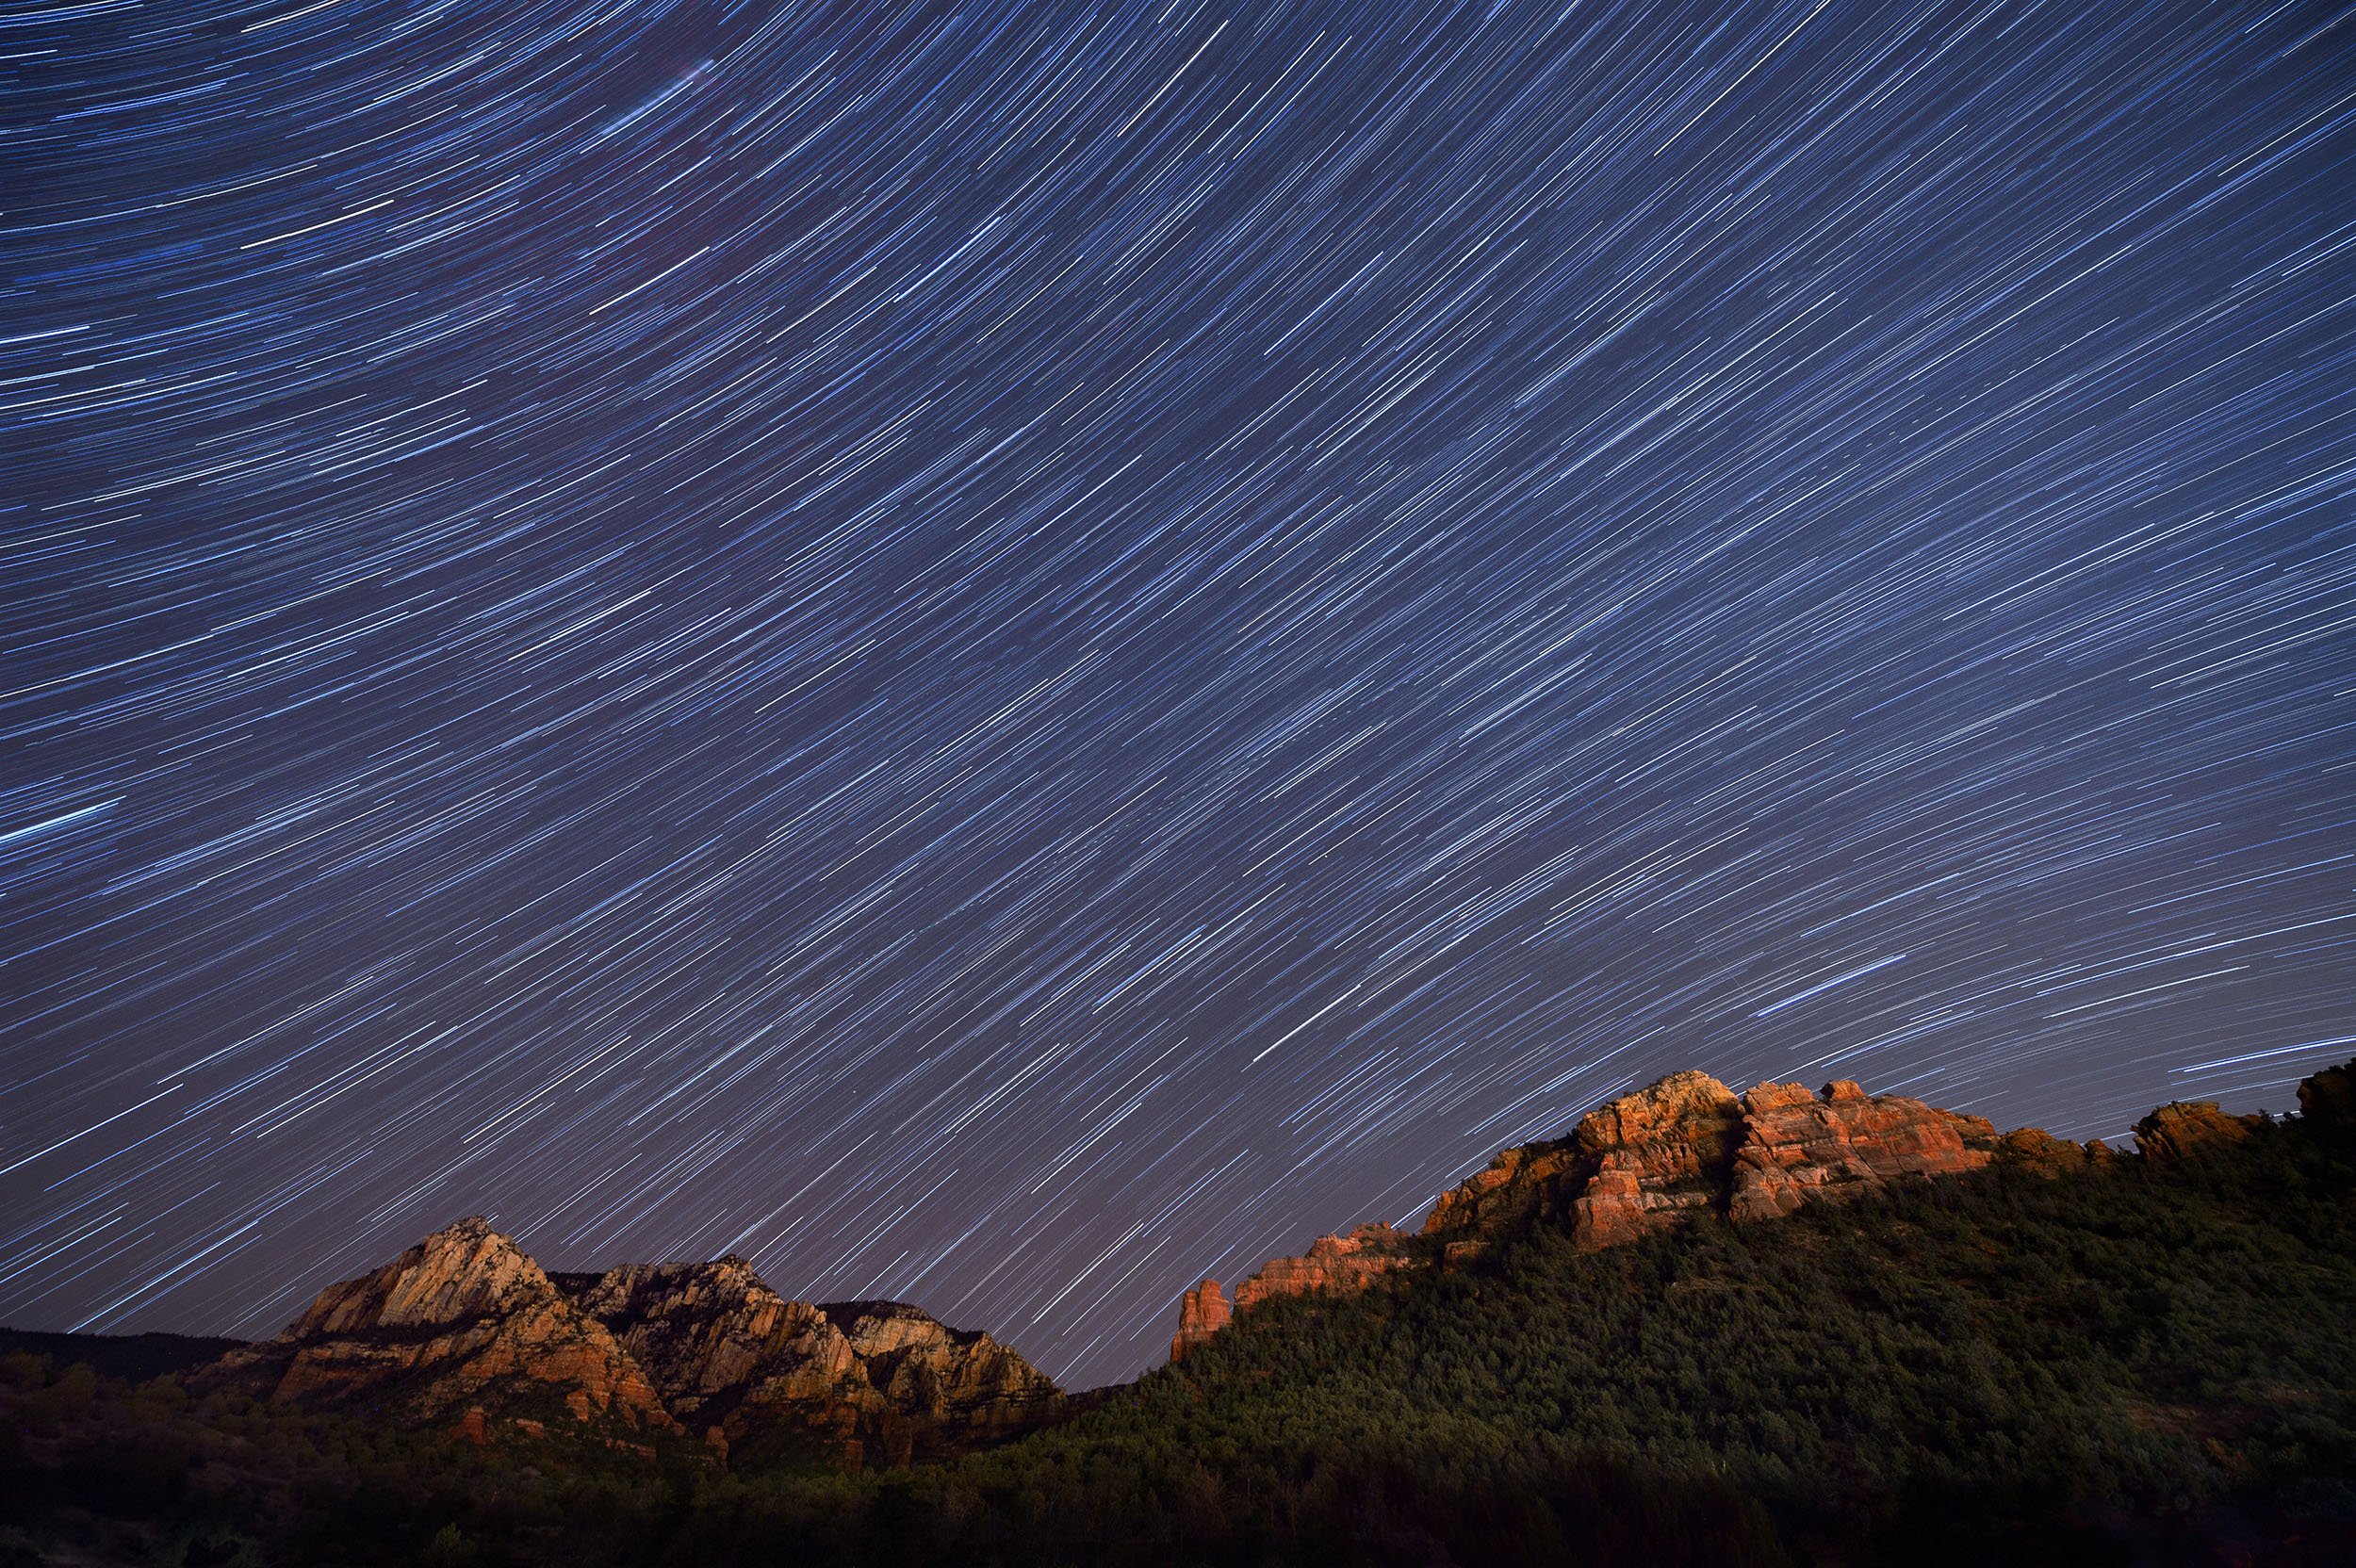
Sedona. Nikon D4s with a Nikon 14-24mm f/2.8 lens. 8 frames shot at 8 minutes, f/4, ISO 200, stacked in Photoshop.

Putting it All Together in Post-Production

Once your images are made, you’ll want to get to the computer to stack them into star trails. That’s the next step in your process, and it’s the next blog post we’ll publish. Stay tuned for Part II, coming soon.

Want to learn more about shooting for star tracking and then editing those images into trails? Join us for our Shoot for the Edit workshop in Colorado next month!

Tim Cooper is a partner and workshop leader with National Parks at Night. Learn more techniques from his book The Magic of Light Painting, available from Peachpit.

UPCOMING WORKSHOPS FROM NATIONAL PARKS AT NIGHT

How I Got the Shot: Puente Nuevo, Ronda at Night

Puente Nuevo, Ronda at Night. Nikon Z 6II with a Nikon Z 24-70mm f/2.8 S lens at 40mm. Foreground: shot with a 10-stop neutral-density filter at 20 seconds, f/11, ISO 100. Sky: 460 stacked frames shot at 3 seconds, f/8, ISO 800.

The Location

Dream location—conquered!

The rich history of Ronda, Spain, dates to the Neolithic Age. The Phoenicians, Romans, Muslims, Christians and the Spanish have claimed this remote outpost as their home. The Spanish Inquisition, Napoleon War and Spanish Civil War all had major impacts on the town. Ronda is proudly known as the birthplace of the modern style of bullfighting and has influenced and attracted such artists as Orson Wells and Ernest Hemingway to call it home.

Beyond this colorful past, what attracted me to Ronda were the images of this cliff-clinging town and the historic bridges that unite the old and new settlements over the 400-foot-deep gorge known as El Tajo. The most famous of the three bridges is the Puente Nuevo, or New Bridge, that was completed in 1793. (Imagine how old the older bridges are!) It could be one of the most dramatic bridges in the world and definitely one of the most photographed sites in Spain.

Figure 1. Puente Nuevo, or New Bridge, is in the mountaintop city of Ronda, Spain. (Satellite imagery courtesy of Google Earth.)

I had an image of this in my notes as a place to visit if I ever went to Spain again. Truth be told, that image has been in mind for a long, long time. I had been dreaming about Ronda and the New Bridge since I was a child.

One of my favorite children’s books growing up was Ferdinand the Bull, the story of a gentle bull who refused to fight. Ferdinand was from the Andalusia region of southern Spain, and there is a scene in the book where they send Ferdinand off to fight in Madrid. The illustration backdrop is Puente Nuevo!

Figure 2. The image I remember so well from Munro Leaf’s The Story of Ferdinand, illustrated by Robert Lawson.

The Shoot

In researching the town and looking at pictures of Puente Nuevo, I found very few pictures of the bridge at night, and none with stars. This is because the bridge is lit by sodium vapor floodlights that make it difficult to see anything in the pitch-black night sky.

The typical prime time to take photographs of Puente Nuevo is when the sun sets directly opposite the bridge, basking it with golden light, or during civil twilight when the sky is still a bright rich blue that perfectly complements the golden floodlights (Figure 3). But I’m always one for a challenge, so I set off to capture it at night.

Figure 3. Twilight at Puente Nuevo. Nikon Z 6II with a Nikon Z 24-70mm and a 10-stop neutral density filter. f/2.8 S lens at 40mm. 20 seconds, f/11, ISO 400.

My strategy was this: Combine a twilight blend with a star stack. This is a fairly common technique, but it would definitely prove to be difficult given the high contrast between the lit bridge and the surrounding darker rocks and sky.

So I hiked down the gorge to a vantage point I liked and shot the bridge during twilight. This foreground shot perfectly balanced the bridge and its lights (which had just come on) with the rocks and waterfall that were lit by the ambient light of twilight. I shot a few more frames and chatted with rock climbers and other folks coming down the path as I waited more than an hour for the stars to come out.

An additional challenge was the inky black sky of the moonless night. Having even a little moonlight would have helped the visual transition from a bright bridge to a more illuminated sky.

Yet another challenge was the lack of stars in the frame. With my naked eye I could see one star in my composition. I could have shot wider to include a bigger part of the sky that was unaffected by light pollution, but then the waterfall would have been too small and lost in the image. I chose a tighter 40mm focal length to get the viewer into the landscape, and I left one-fifth of the composition for the sky.

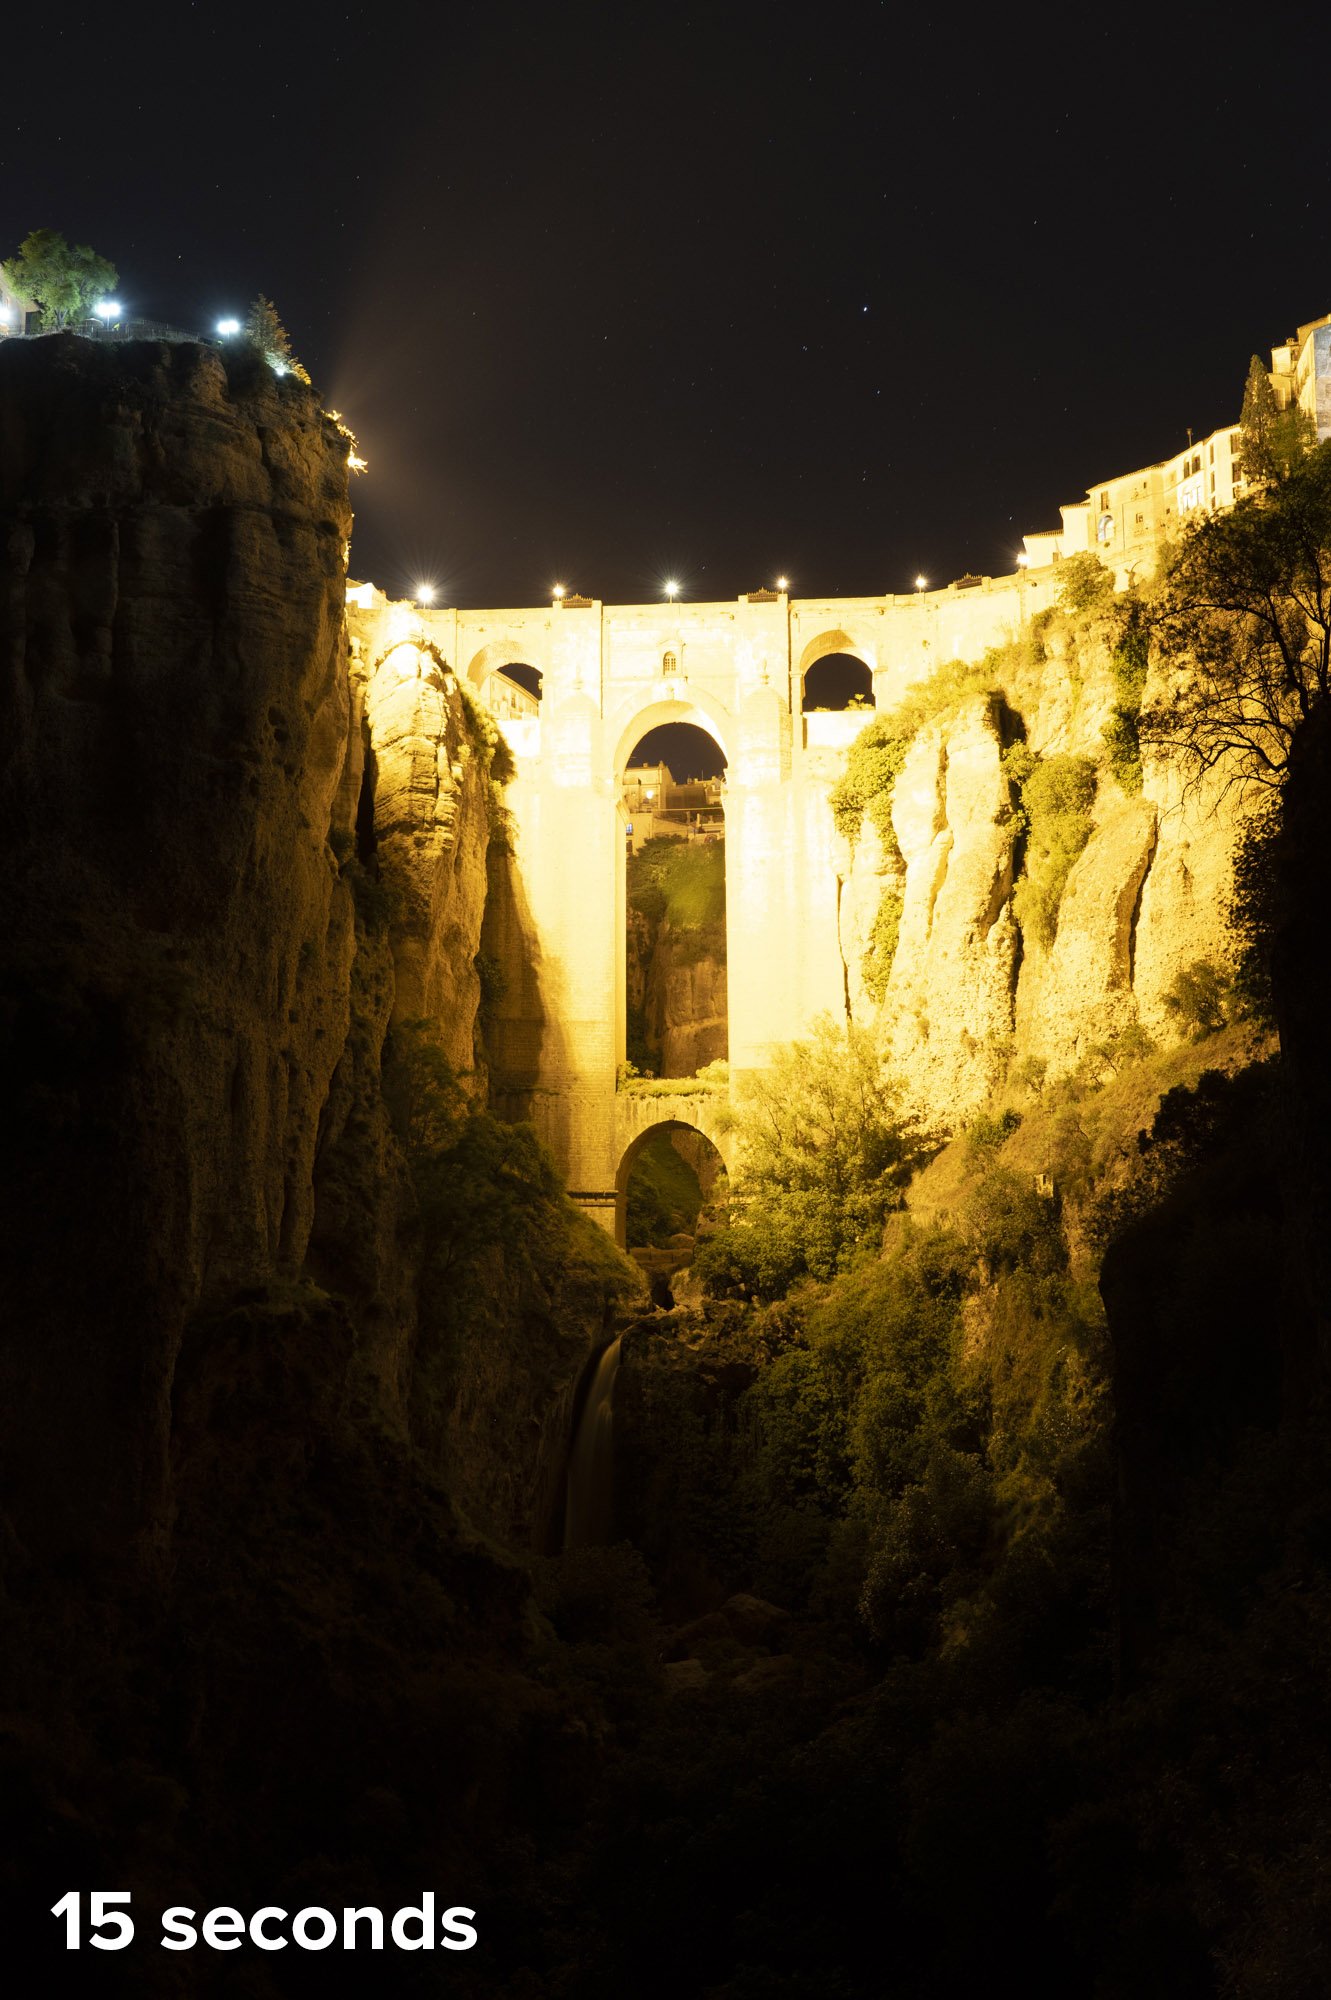
I could have opened my aperture to f/2.8 or gone to a high ISO to help my camera record more of the fainter stars, but that would have resulted in more of the streetlight spilling into the sky. Instead I chose an aperture of f/8 to control the direct light from the lamps and an ISO of 800 so the stars would retain some of their color and not blow out (Figure 4).

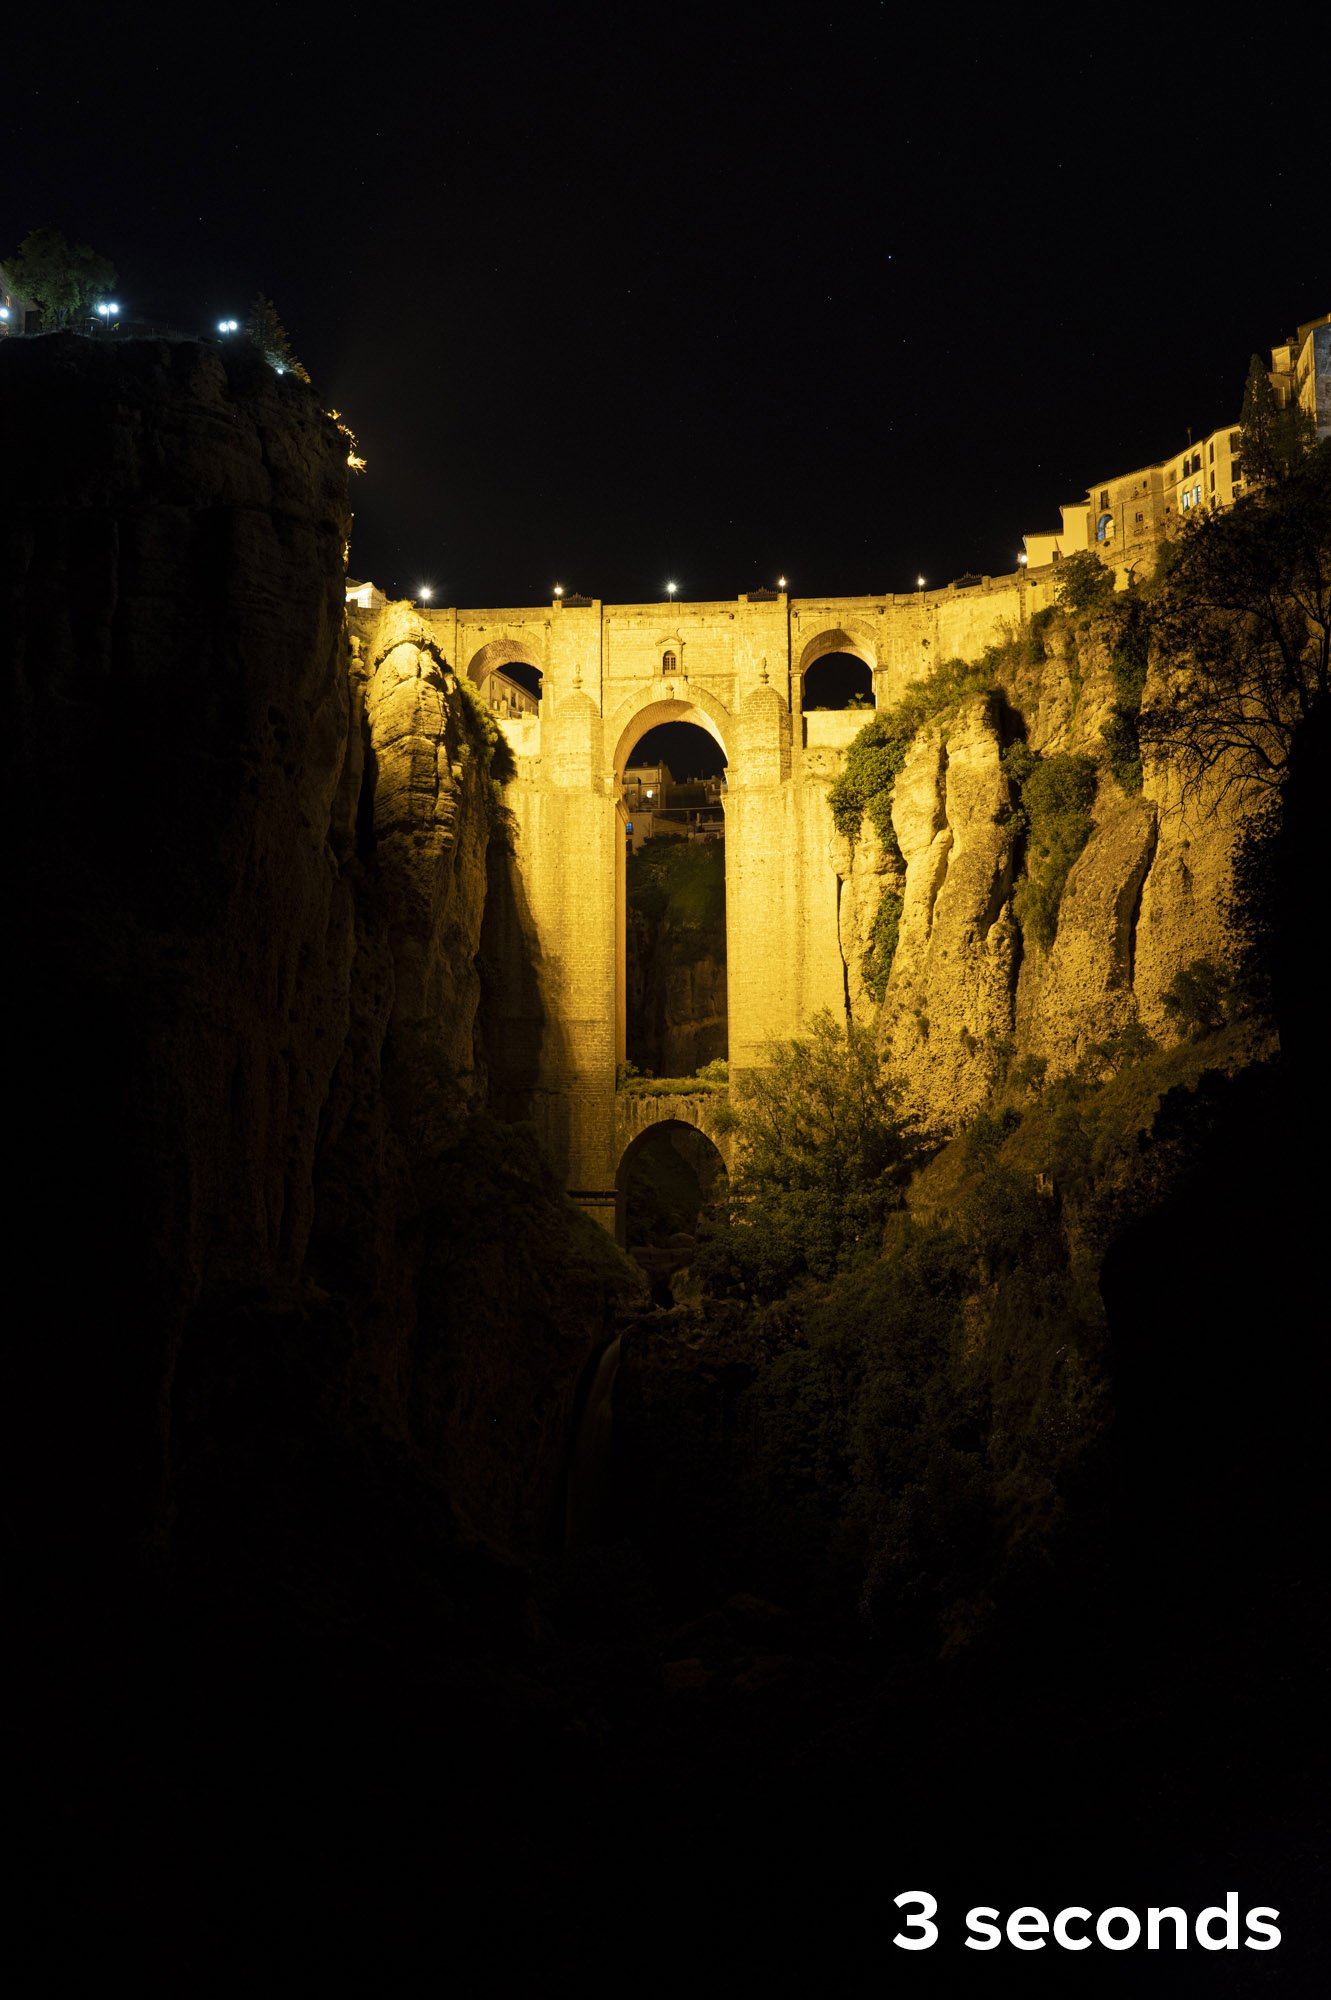
Figure 4. My first test shot was at 15 seconds, f/8, ISO 800. Note the spill of the streetlights into the night sky. I wanted to limit that so that blending in Photoshop would be easier. A 3-second shutter speed was the right balance, as it kept the bridge lights from not bleeding into the sky and still recorded more stars than my eyes could see.

It definitely felt weird to think of star-stacking a series of 3-second exposures. I would need a lot of frames to create a lengthy trail. But I felt this exposure gave me the best balance to blend everything together to create the final photograph that I was envisioning.

I was facing east, the only angle possible for this shot, so I knew the stars would trail downward toward the left. I planned for at least 1 hour of exposure, because I knew that would yield nice long star trails. I was shooting with my Nikon Z 6II, which is a 26-megapixel camera. With my shutter speed at 3 seconds, I used the built-in intervalometer to continually take successive shots.

As busy as this location is during the day, I bumped into only three people during my shoot. It is a bit of a hike down to the lookout, and people just don’t explore at night. So I dangled my feet over the fence and thought of Ferdinand the bull and all the historic places I had visited in Ronda that day.

After half an hour my eyes were adjusted enough and I could see that the brightest star had most likely moved out of the composition. That star had started in the middle of the frame, and because I was zoomed in with a 40mm focal length it had traveled a considerable distance to yield a long star trail. So even though I really didn’t see many other stars, I felt confident I had what I needed to put it all together in post.

The Post-Production

After loading the frames into Lightroom, I made only one adjustment: I turned off the automatic lens corrections. I always advise turning this off for stacking stars, otherwise you run the risk of creating moiré in the final stacked image. I was using 460 frames, which would result in about a 30-minute total exposure for the star trails.

Even though I have a fairly new souped up MacBook Pro M1, to stack 460 30-megabyte files would have definitely caused it to choke. So I stacked the images in sets of about 100 to create a series of five star trail images. Each stack followed this process:

  1. Select the frames in Lightroom.

  2. Choose Photo > Edit In > Open as Layers in Photoshop.

  3. In the resulting Photoshop file, select all the layers by clicking on the first, scrolling down, then shift-clicking on the last.

  4. Change the blend mode to Lighten.

  5. If desired, review the individual layers to edit out plane trails, stray light, etc.

  6. If desired to save hard drive space, flatten the layers.

  7. Save and return to Lightroom.

I then brought each of the five flattened stacks into Photoshop as layers, and used the Lighten mode on them to connect all the trails (Figure 5).

Figure 5. My five sequential star-stack images combined into one long stack.

Finally, I added the twilight shot as the top layer, and I and used a variety of masks and adjustment layers to match the exposures and blend them together as one cohesive image.

In the final photograph (Figure 6), look at the foreground areas outside what’s being illuminated by the streetlights. They are very dark, and that’s why I needed the twilight shot—just to bring out a little bit of detail in the rocks, waterfall and the rest of the foreground to make the overall image more pleasing, and to complete the visual story.

Figure 6. Nikon Z 6II with a Nikon Z 24-70mm f/2.8 S lens at 40mm. Foreground: shot with a 10-stop neutral-density filter at 20 seconds, f/11, ISO 100. Sky: 460 stacked frames shot at 3 seconds, f/8, ISO 800.

All in all this photograph took me about 1.5 hours of post-production work—the same amount of time I committed to shooting the image in the field!

Wrapping Up

Ferdinand didn’t want to fight, but I didn’t mind fighting all of those obstacles to get the shot that reminded me of one of my favorite stories from boyhood.

I’m pretty happy with it. I set out to create a complex photograph of a dream location under conditions I couldn’t control. I put my stamp on it, and hopefully inspired you to seize the night no matter what the scenario!

Gabriel Biderman is a partner and workshop leader with National Parks at Night. He is a Brooklyn-based fine art and travel photographer, and author of Night Photography: From Snapshots to Great Shots (Peachpit, 2014). During the daytime hours you'll often find Gabe at one of many photo events around the world working for B&H Photo’s road marketing team. See his portfolio and workshop lineup at www.ruinism.com.

UPCOMING WORKSHOPS FROM NATIONAL PARKS AT NIGHT

How I Got the Shot: Light Painting and Star Trails at Devils Tower

Stars at Devils Tower. Nikon D750 with a Zeiss 15mm Distagon f/2.8 lens. Ten stacked frames, each shot at 150 seconds, f/2.8, ISO 1600 (1,500 seconds total).

The Conditions

Shooting under moonless conditions can create consistent challenges for astro-landscape photography. The primary challenge is lighting your main subject. When it’s the Devils Tower in Wyoming, you’ve gotta get it right.

Gabe and I were leading a group of eager learners on a workshop a few years ago when I made the above image.

I was not standing at my camera—I was up at the base of the Tower, illuminating it.

So how did we do this?

The Shoot

Well, lemme first show you how it looks without being lit, which you can see in Figure 1.

Figure 1. Nikon D750 with a Zeiss 15mm Distagon f/2.8 lens. 150 seconds, f/2.8, ISO 1600.

It lacked the detail that screams, “Is that the mountain from that famous movie?!?” Right? Yeah.

But one frame did stand out: when some climbers who had to descend after dark illuminated the deep crevices that are the hallmark of this natural stone edifice (Figure 2).

Figure 2. Nikon D750 with a Zeiss 15mm Distagon f/2.8 lens. 30 seconds, f/2.8, ISO 6400.

Aside from that, we wanted more detail in the Tower. So I set my intervalometer to take many, many (infinite, in fact) exposures. (You can read more on how to do that in our post “Mastering the Intervalometer for Night Photography and Long Exposures.”

I knew I intended to make an epic star trail from this. So I aimed for longer exposure lengths of 150 seconds and let the sequence begin. I knew this was still short enough to manage the long exposure noise that the camera would generate in the mid-August Wyoming heat.

I grabbed a two-way radio and drove up to the parking lot. I hit the loop trail and started doing my own lighting. From so far away from the camera, how did I know I was executing the light painting sufficiently? That’s where the radio came in—I kept pinging Gabe to see if my flashlight was providing proper detail and coverage. Trusting Gabe to be the lighting director from the camera position was crucial.

Gabe advised me to cover about one-quarter of the arc around the base of the Tower. We tried a few variations and settled on a final strategy (Figure 3).

Before and after light painting from the base of the tower.

I shot many different variations (Figure 4) through the evening, sometimes re-framing, sometimes adjusting the exposure length. Even when you’re confident about your approach in the field, it’s always good to push the boundaries of your decisions and to give yourself more options to look at when back at the computer.

Figure 4. The different strategies I shot that night gave me lots of options to choose from in post.

The Post-Production

The final set of frames I chose to work with is this:

Figure 5.

Each image required a gradient for the sky, and a proper Range Mask set to 28/100 Luminance and 19 Smoothness. I also used the mask brush to remove the gradient from Devils Tower itself and from the trees below.

Once the mask was done, I made the adjustments, which were intended to emphasize (but not over-process) the sky. Sometimes that’s a fine line, and one we always want to be conscious of. You can see the mask I created in Figure 6, and the adjustments in Figure 7.

Figure 6.

Figure 7.

Then I needed to stack the frames in Photoshop. In several previous How I Got the Shot blog posts we’ve discussed stacking frames to create star trails and to combine different light-painted compositional elements into one image. This time I used the same technique to achieve both those goals in one photograph—i.e., to get the stars to trail and the light-painted sections of the Tower to composite.

The process is:

  1. Select all the pertinent frames in Lightroom by shift-clicking the first and last.

  2. From the menu, choose Photo > Edit In > Open as Layers in Photoshop.

  3. Once the image opens select all the layers by clicking on the top layer, pressing the shift key and then clicking on the bottom layer.

  4. In the Blending Mode dropdown above the layers (the box that defaults to saying Normal), choose Lighten.

  5. Save and close, which will bring the stacked image back into Lightroom where you can make final edits.

I was really pleased with the stacked result:

Nikon D750 with a Zeiss 15mm Distagon f/2.8 lens. Ten stacked frames, each shot at 150 seconds, f/2.8, ISO 1600 (1,500 seconds total).

The photograph has more mystery with the tree line falling into silhouette and the Tower having detail. This emphasizes where the viewer should look.

A Little Cleanup

Due to some people’s red headlamps and flashlights, the trees and ground closest to us picked up the color. It’s quite hard to edit away, so I brushed in some local adjustments subtracting highlights and whites. After stacking, that still wasn’t enough, so I ended up using layer masks to eliminate the distracting details.

(Hmmmm. Come to think of it, it may have been the brake lights of my rental car when I returned to the group. D’oh! And possibly a “mea culpa” moment. Whoops. Bad Matt.)

When I re-edited the stack this time, I noticed something new. I wanted to crop it to a vertical. It felt … more powerful. More focused.

The final, final result:

Nikon D750 with a Zeiss 15mm Distagon f/2.8 lens. Ten stacked frames, each shot at 150 seconds, f/2.8, ISO 1600 (1,500 seconds total).

Wrapping Up

I gotta say, I am excited to return to the Devil’s Tower with Chris later this year. It’s going to be amazing. What will he and I dream up together? And what will the workshop participants dream up? I bet it’ll be out of this world. (Yeah, I went there.)

How do you achieve better astro-landscape photography by collaborating with friends and peers? Tell us more in the comments, and show us photos!

Note: Want to join Matt and Chris to make epic night photography images at Devils Tower National Monument? We have two spots left for the workshop, so sign up now!

Matt Hill is a partner and workshop leader with National Parks at Night. See more about his photography, art, workshops and writing at MattHillArt.com. Follow Matt on Twitter Instagram Facebook.

UPCOMING WORKSHOPS FROM NATIONAL PARKS AT NIGHT

4 Ways to Remove Airplanes from Star Stacks

When I make a star stack sequence, I’m at a crossroads for my editing choices.

Do I remove the plane trails? If so, do I live with the tiny gaps in those star trails left behind by the removal process?

It’s a hard decision. On the one hand, the journalistic approach is, “That’s what happened in front of my camera—it’s the truth.” If that’s your creed ... you’re done! Make whatever levels and color adjustments you want and move on.

But when I desire to have a final image without plane trails, I spend some time to make sure it’s done right, and that I’m making a quality photograph.

Want to learn some techniques on how to do this? Is there a method—without having to be a professional photo retoucher—that doesn’t leave gaps? Read on, my fellow night photographer.

Note:

If you are unfamiliar with how to create a star stack, see these previous blog posts:

Prep: How to Find Which Layers Have Plane Trails

I used the same image stack for all the demos below. Shot in the Fruita Orchard of Capitol Reef National Park during our workshop in June 2018.

Gear:

Exposure details:

  • 63 images shot at 30 seconds, f/5.6, ISO 6400
  • total exposure duration: 31.5 minutes

I knew I wasn’t going for star points, so I chose a 30-second exposure to keep long exposure noise down in the high desert summer heat. The temps weren’t that bad, but I wasn’t taking any chances.

For expediency, I exported full-resolution JPGs from Lightroom to Photoshop. Stacking TIFFs straight from Lightroom with this many files can really choke a computer. As it was, the PSB file was 4.2 GB when saved.

Note:

Do not apply lens profile corrections before making a star stack. It can lead to irreparable moire in the final stacked image. If you want to do apply lens corrections, do so after stacking and flattening.

How to Find the Planes

  1. Create your image stack in Photoshop and save as a PSD or PSB file (the latter when the file is over 2 GB—don’t worry, Photoshop will prompt you if it’s needed).
  2. Identify which layers have plane trails. But how, you ask?
  3. I like to turn on all the layers and apply the Lighten blend mode to each so I can see everything.
  4. Then I click and hold on the eyeball icon at left of each layer and drag downward in groups of ten or so, while staring at the image. This gives me kind of a faux animated preview of the layers being added one by one. (See video below.)
  5. If I see plane trail (or a portion of one) disappear, then I click the eyeball on each layer, one by one, upward from the bottom until it disappears. That’s how I know I found the offending layer.
  6. I make that layer a color to identify it for further work later.

An alternative way to do this is by revealing only one layer at a time, from top to bottom. Which strategy to use is just personal preference. Unless you’re on a PC, apparently. Chris is a PC user, and the trick I detail above and in the video doesn't work for him. What he does is group the layers ten or so at a time, changes the blend mode of all the groups to Lighten, then hides each group one by one, which helps him narrow down the locations of trails more quickly. Finally, he goes into the offending groups and finds the offending planes.

Either way, this process is time-consuming. So be patient. Find those planes. For the photo in the video below, the process above took me about five minutes. (I made it faster for you to watch.)

Note:

You may also find meteors and satellites in there. We have another blog post coming soon on how to identify the differences between them.

4 ways to remove plane trails in a star stack with Layer Masks

  1. Remove plane trails in a flattened image in Lightroom.
  2. Use the black paint brush in Photoshop.
  3. Use the spot healing brush in Photoshop.
  4. Use layer masks in Photoshop.

Which one is best? I am going to explore all four and compare them, so you can decide which works best for you. And, you can bet that I will have an opinion about what works best for me, too. ;-)

Removing Plane Trails in a Flattened Image

This is the fastest method, but also the least likely to be effective in terms of quality. If you must have it fast, try this first. If you don’t like the results, try one of the options that follows.

  1. Open your flattened image with plane trails in Lightroom.
  2. Select the Spot Healing Brush.
  3. Click once at the beginning of the trail. (See note below.)
  4. Hold Shift on your keyboard.
  5. Click once again at the end of the plane trail.
  6. Repeat for every plane trail on every layer.

NOTE:

You can paint freehand with the trackpad on your laptop (most awkward), with your mouse (somewhat awkward) or with a tablet like a Wacom (hardly awkward at all). This applies to subsequent techniques too.

I find that using keyboard arrow keys to move the healing brush target around is easier to manage than just using a mouse or trackpad. But it causes “jaggies” (below) more often than not, no matter how precise you are.

Using a Black Paint Brush in Photoshop

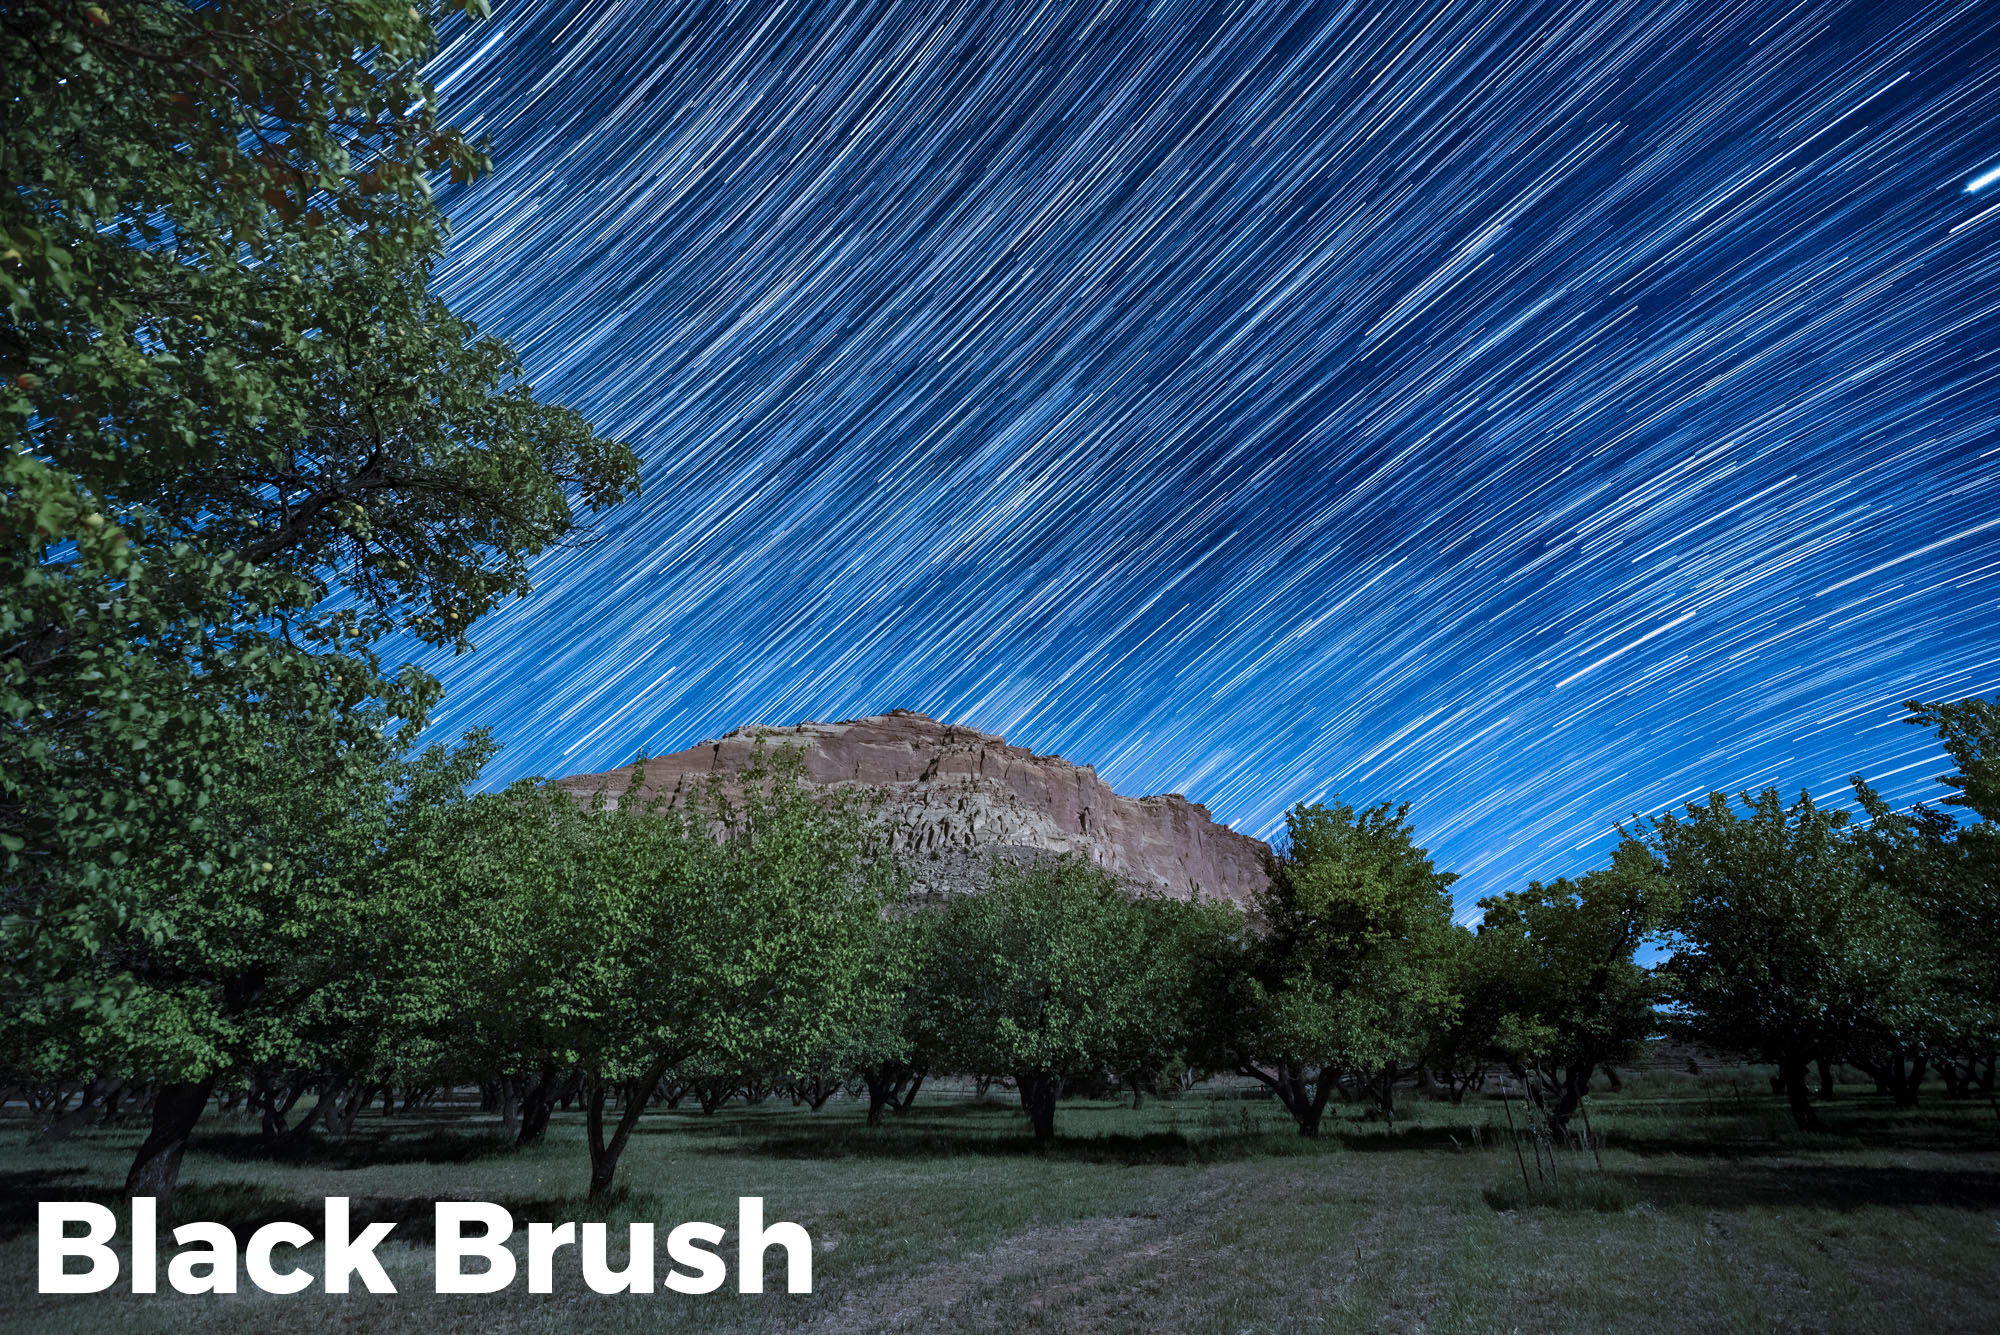
Since the Lighten blend mode for layers reveals the brightest pixels in a scene, painting with a black brush right on the image layer will make trails (which are bright) disappear.

  1. Select the Brush Tool with these settings: Opacity at 100 percent, Flow at 100 percent and Color at 100 percent black.
  2. Make your brush slightly larger than the width of your plane trail. (You may have to adjust this up and down, depending on the trail.)
  3. Paint over the plane trails. But only over the plane trails.
  4. Repeat for every plane trail on every layer.
  5. Merge layers or flatten when done with all.

Resulting image after using black brush to remove plane trails. Click to enlarge.

100 percent zoom crop to an area where a plane trail was removed.

In this video, I used the process of identifying layers first and then color-coding them before blacking out the trails. Even then, I discovered more along the way.

Note:

This is a destructive process. No going back. Unless you duplicate each layer you paint on and turn off the duplicate, but that increases your PSD/PSB size.

Using the Spot Healing Brush in Photoshop

I recently discovered this. While mucking about in Photoshop, editing my star stacks from Capitol Reef National Park earlier this year, I had a What If? moment. …

I asked myself, “What if I try using a different tool to remove star trails?” (I usually use layer masks, which we’ll get to in a little bit.)

  1. Select the Spot Healing Brush tool, and change the Type to Content-Aware.
  2. Make your brush slightly larger than the width of your plane trail.
  3. Click once at the beginning of the trail.
  4. Hold Shift on your keyboard.
  5. Click once again at the end of the plane trail.
  6. Repeat for every plane trail on every layer.
  7. Merge layers or flatten when done with all.

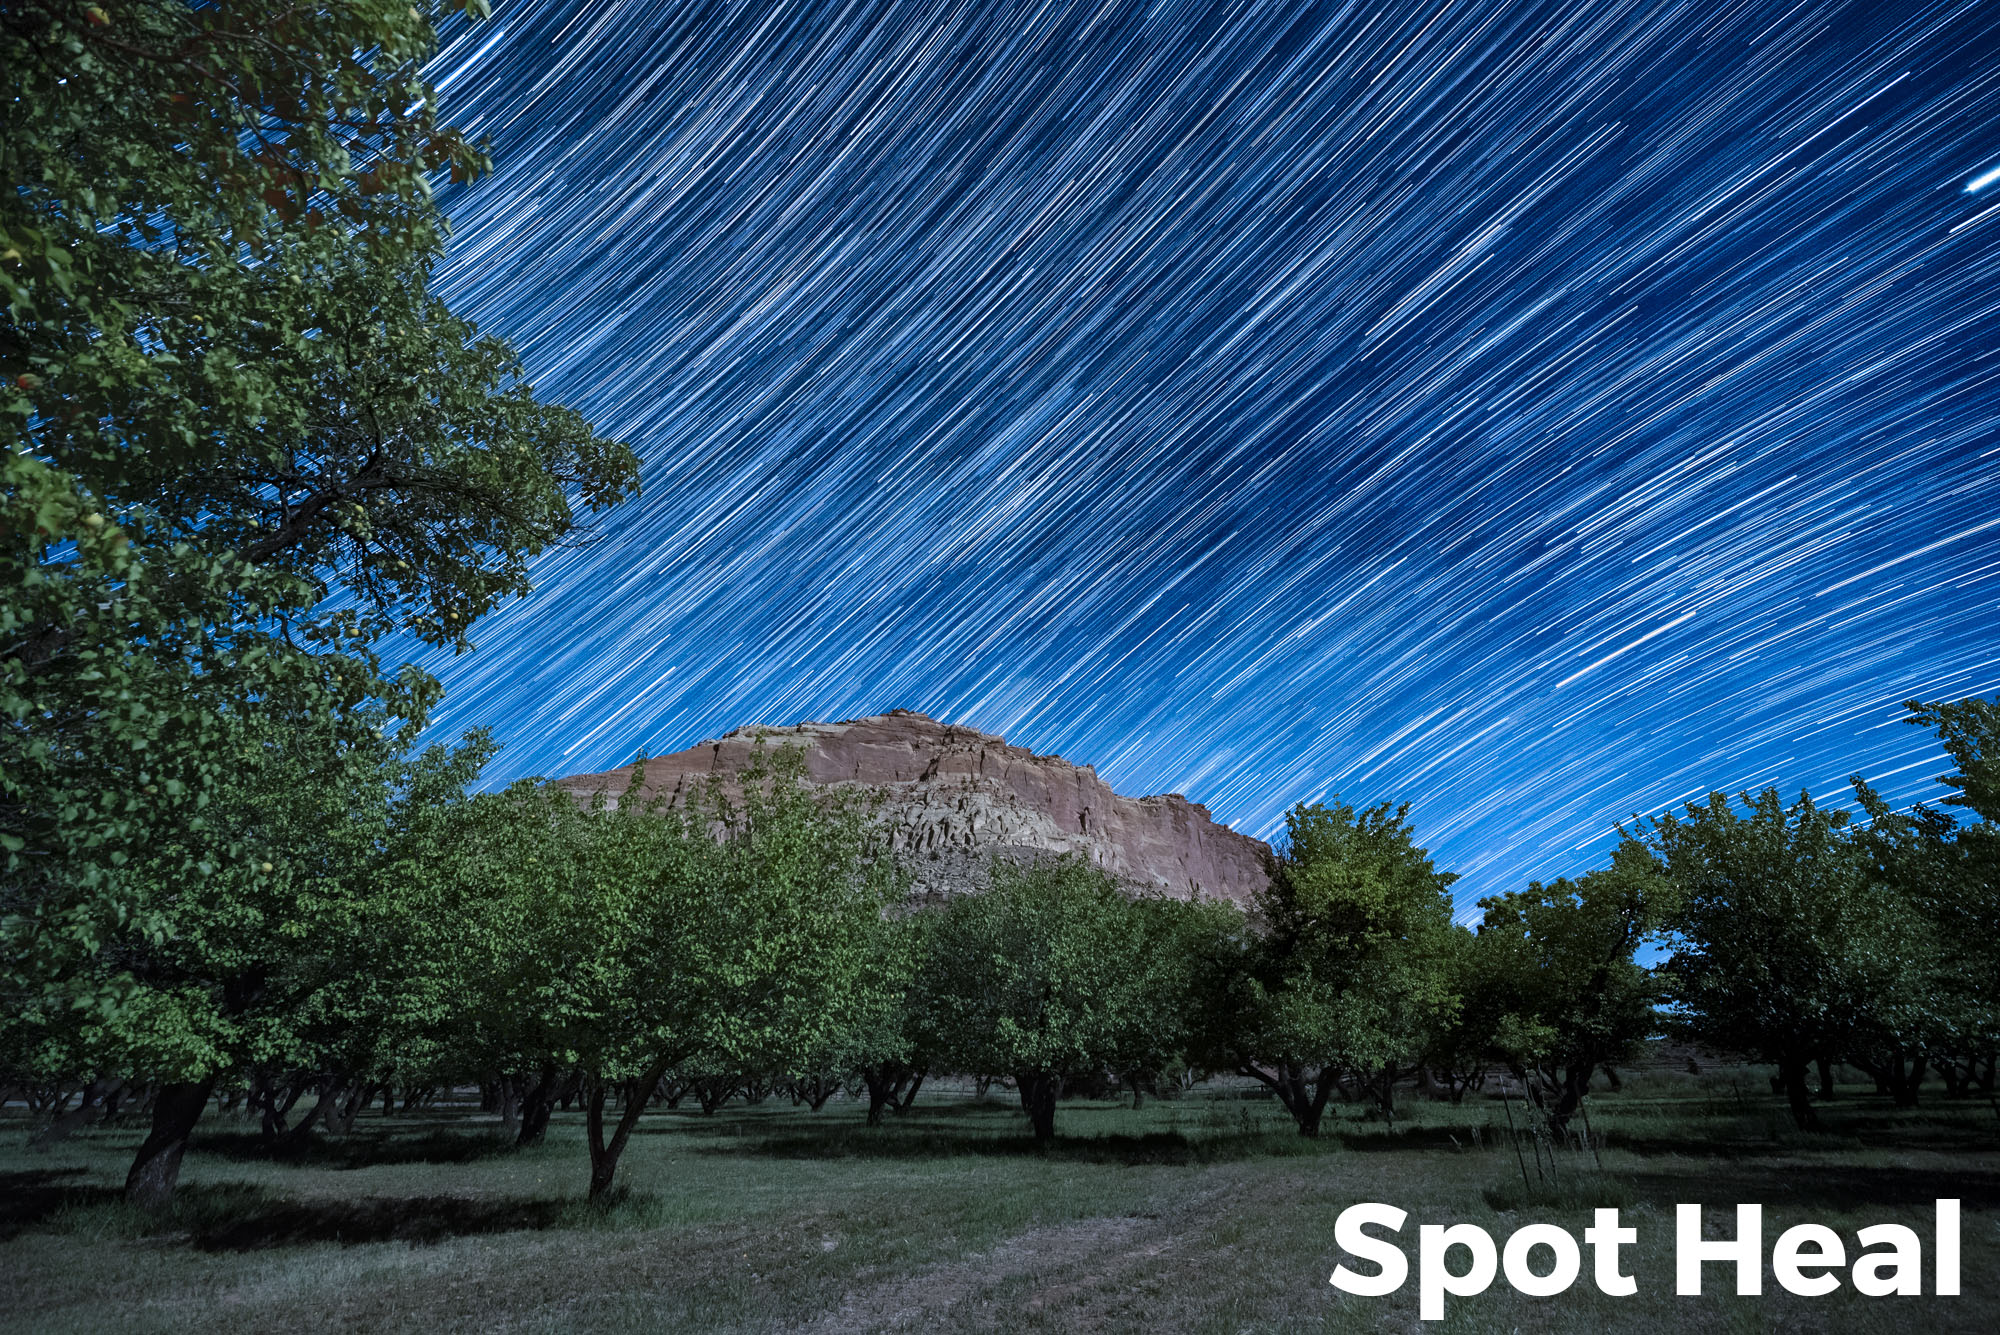
It works. I love this method, despite it being a destructive process.

Resulting image after using Spot Healing Brush to remove plane trails. Click to enlarge.

100 percent zoom crop to an area where a plane trail was removed.

In this video, I simply went from top to bottom to eliminate trails in each layer without color-coding them. I missed one plane trail, because I was kinda tired doing both back to back.

Note:

As mentioned, this is also a destructive process. No going back. Unless you duplicate each layer you paint on and turn off the duplicate, but that about doubles your PSD/PSB size.

Comparing the Methods

Let’s take a look at how the methods stack up against each other. (See what I did there?)

The edit in Lightroom of a completed, flattened stack? I immediately abandoned it. It was janky to complete, and undesirable:

And when your stars go the wrong way, it’s really hard to make it match:

So, all that’s left are the two competitors we’ve looked at so far. Below you can see the final images from each:

And here are some comparisons I made while viewing both simultaneously in Lightroom:

Above you can see that there isn’t really much difference between the two methods. At least in terms of image quality.

But … what did my time cost?

Painting Black

Pros: Easy to see if you covered a plane trail.

Using Spot Heal Brush

Pros: I just feel better seeing an image versus black lines all over. The trails are gone, and the layers still looks like a photograph.

Both methods have the same cons:

  • destructive to pixels
  • makes some gaps in the trails (thought remarkably few)
  • no way to go back on edits unless you duplicate your PSD/PSB beforehand

To Identify or not to Identify

I spent eight minutes identifying layers with stuff to eliminate.

I spent 30 minutes using the black brush on those layers I identified.

I spent 27 minutes using the Spot Healing Brush, layer by layer, without color-coding or pre-identifying layers.

It’s up to you which method helps you get through the process better. I can operate without color-coding in the future. One-by-one is the way for me.

Conclusion: Which Method Wins?

Guess what? Both strategies are just as effective. Yay!

And here is the proof: When gaps appear, they do so in the same places using both methods.

The above were from testing my own hypothesis that Spot Healing would work better. Surprise! I’m delighted to discover that for this test, both techniques performed the same.

Both methods create gaps. But you can meticulously fill them in with Photoshop prior to flattening. Use the clone tool, if you have the extra hours. ;-)

The Fourth Way—Using Layer Masks in Photoshop

This is how I’d always done it before my recent discovery. This method is non-destructive—if you save your PSD/PSB, you can always roll back the edits or modify them. (The downside, of course, is that an unflattened, many-layered file could be downright huge. If you’re not planning to save an unflattened file, this doesn’t provide much benefit.)

  1. Add a mask to a layer with a plane trail.
  2. Select the Paint Brush tool with these settings: Opacity at 100 percent, Flow at 100 percent and Color at 100 percent black.
  3. Make your brush slightly larger than the width of your plane trail.
  4. Click once at the beginning of the trail.
  5. Hold Shift on your keyboard.
  6. Click once again at the end of the plane trail.
  7. Repeat for every plane trail on every layer.
  8. Make your final contrast, color and other finish adjustments.

Give it a shot. You may like this better, especially if you are already masking out other things in your scene.

Et al.

Here are some examples of other stacks I’ve done using these techniques:

So go forth and capture, my fellow lovers of the night sky. And fear not the airplanes arcing across the heavens, for you can make their presence just a memory.

Matt Hill is a partner and workshop leader with National Parks at Night. See more about his photography, art, workshops and writing at MattHillArt.com. Follow Matt on Twitter Instagram Facebook.

UPCOMING WORKSHOPS FROM NATIONAL PARKS AT NIGHT