Urban Night Photography

How to Access and Photograph Abandoned Places

Do you have a fascination with abandoned places?

I do.

In fact, I coined a word for this 30-year obsession: “ruinism.” It means the beauty of decay, and it can apply to person, place or thing. It has been an overarching theme that I have tried to incorporate into my photography, both day and night.

Part of this has been exploring abandoned places—buildings, lots, junkyards—that have fallen by the wayside of the human race’s march across the landscape.

I’ve learned a thing or two over the years about getting into and out of these industrial skeletons, and I have been handcuffed only once due to trespassing. For this Halloween special, allow me to share the allure of abandoned places, how to do your research and get permission, and tips on how to best photograph and share your images with the world.

Sloss Furnaces, Alabama. Nikon D750 and Irix 15mm f/2.4 lens. Multiple stacked frames shot at 15 seconds, f/2.8, ISO 100.

Why Ruinism?

In this age of social sharing, the world has become much smaller than it was 10 to 20 years ago. There are very few whispers of secret abandoned places. Some locations have lasted for thousands of years while others are barely standing, helped by the vines and ivy that have replaced the walls.

My favorite class in school was ancient history, so when I had an opportunity to live in Greece for 6 months in the 1990s, it was a dream come true. In fact, that is where the term ruinism was born. I was visiting all the ancient cities: Rome, Delphi, Thebes, Mycenae, Troy, Constantinople. The modern world had grown around and incorporated the remnants of some of these age-old civilizations, while others had been completely forgotten by time.

When I walked through the streets of Pompeii, I imagined what it had looked like before Vesuvius erupted in A.D. 79—partly out of intellectual curiosity, and partly for creative purposes. When photographing these abandoned locations, I always try to tap into the history and capture the spirit. Long exposures, ghosts and light painting are wonderful tools to aid in this storytelling.

Getting Access

Besides the legal “pay for access” places, let me share a few examples of how to get in. The overriding theme is:

  • Do your research.

  • Understand the history and importance of this place.

  • Share your respect and passion for memorializing the location before it disappears.

  • Find the organization or person that owns/maintains it.

  • Never steal any artifacts—take only pictures!

Example 1: The Abandoned Village of Kayaköy, Turkey

While staying in the beautiful port city of Fethiye, I was told of the history and modern ruins of Kayaköy. I spent the day wandering around a town where the people had been forced to leave their homes, churches and shops due to protocols written up by the Treaty of Lausanne in 1923.

On the day I was there, no one else was present except for some sheep herders and their flock. The sheep wandered into roofless homes at will. Time had taken back this town. It felt like I had finally experienced ruinism to the highest degree.

Gateway to Kayaköy. Pentax K1000 with TriX film. Exposure unrecorded.

Church of Kayaköy. Pentax K1000 with TriX film. Exposure unrecorded.

The key to accessing Kayaköy: The village was in a remote area but open to all who were interested and had the money and a means to get there. If you were to visit today, there is an entrance fee of $1, and restoration limits some access to the church and many of the buildings.

Example 2: The Abandoned Apartment

Abandoned places can be huge like Kayaköy or they can be the apartment next door.

I was living in Pátras, Greece, in 1995 when this mystery revealed itself. A 5.1 earthquake in 1993 had seriously damaged the town and the neighbors just up and left. There were plenty of cracks in the walls for us to peep in and most doors weren’t locked in this small community. So I entered with my friend and we used long exposures on film to give voice to the ghosts that remained.

Abandoned Apartment, Pátras. Pentax K1000. Pentax K1000 with TriX film. Exposure unrecorded.

The key to accessing the abandoned apartment: We reached out to the neighbors to learn more, and we ended up being responsible for looking after the place and putting a lock on it. When something like this happens, be smart, safe and respectful. Anything we moved, we put back in place. Like most abandoned buildings, there is a time limit to its existence, unless it is deemed of historic importance.

Example 3: The Abandoned Casino

A real dream-come-true location is the Constanța Casino in Romania. Built in 1910 aside the crashing waves of the Black Sea in the art nouveau style, the casino closed its doors to the world in 1990. However, the symbol of this ancient grandeur was adopted by the city and they struggled for many years to find a way to preserve this masterpiece.

Constanța Casino. Nikon Z 6 with a Nikon 24-120 f/4 lens. 1/500, f/11, ISO 200.

Constanța Casino. Nikon Z 6 and Nikon 14-24mm f/2.8 lens. 1/30, f/10, ISO 400

The key to accessing the Constanța Casino: Fortunately I have a friend in Romania who loves ruins and history as much as I. We led an Opulence and Decay workshop with National Parks at Night and Atlas Obscura in 2019, which included access to this location. My contact worked very closely with the town that was restoring the casino. We had to prove our love for preserving this building and of course pay a fee that went to helping stabilize it for future generations. It was an amazing experience and epic workshop. (If you want us to revive this workshop, let us know in the comments!)

Winging It

I understand that access can be the biggest of all hurdles. Sometimes you just stumble upon an abandoned farmhouse in the middle of nowhere. There aren’t any “No Trespassing” signs or neighbours for miles away. What do you do?

If you enter this property, you will be seen as a trespasser by the law. So it’s best to think of this as the “initial scout” and take pictures safely from a legal and respectful distance.

Then, find any neighbors who may be nearby, or go into town and show these pictures and ask who might own the property. If you are seen as a photographer and documenter first, instead of urban explorer or vandal, good things will happen.

Silver City, California. Nikon D700 with a Zeiss Milvus 21mm f/2.8 ZF.2 lens, lit with a Coast flashlight. 4 minutes, f/5.6, ISO 400.

For example: I was on a road trip with Troy Paiva and Joe Reifer and we used Google Maps to identify what looked like an old, abandoned mine. We drove there only to find a gate and a “No Trespassing” sign. We debated what to do.

During that 5 to 10 minutes, a weathered Jeep with a Willie Nelson character came flying down the road with a barking dog not far behind. He asked us “what the hell” we were doing at the entrance to his property. We explained that we were photographers with a fascination for the past. Troy had a copy of his book and showed it to the man, and that was the key. Having a website, prints or a book that can show your passion for abandoned places can often help break down those barriers.

The end result was that within 5 minutes we were all best friends with Irish (which turned out to be his name), getting a private tour of his silver mine followed by 2 nights of access.

I understand there is a certain excitement in exploring the unknown that is greatly heightened when you don’t have permission. I also know that some places will never grant permission to any visitor because they are deemed too unsafe. If you decide to break into those places, you’d better understand the dangers involved and realize that no insurance will cover you when you trespass. We neither recommend nor condone this course of action.

Doing it the Right Way

A perfect example of doing it the right way has been my experience and relationship with the Bannerman Castle Trust.

I first saw the ruins of Bannerman while riding the Metro-North Railroad up to Rhinecliff, New York, in 2001. You always want to get a “water view” window seat on the train as the tracks hug the Hudson River all the way to Montreal. I was mesmerised by water and landscapes that rushed by—Storm King Mountain, the bridge walkway over the river, and many mansions.

But wait, what is that? A castle-island resting in the middle of the river?

Luckily the previous owner had used a side of the castle as a “billboard,” and I had my first clue: Bannerman Island Arsenal.

Bannerman Arsenal. Nikon D750 and Nikon 24-70mm f/2.8 lens. 1/250, f/11, ISO 200.

I had no reception on the train but wrote down the name and pinned the location on Google Maps. I later found a little information about the history, but being an island, the only access was via kayaks.

A few years later, the Bannerman Trust established a website and daytime tours of the castle from May to October. On the boat ride over, I shared my passion for ruinism and my excitement about Bannerman with a member of the trust. That laid the groundwork for later leading overnight photography workshops.

It took a few months to hash out the details, but we both wanted to see the idea succeed. The trust was interested in promoting the location, getting a unique interpretation and getting (of course) additional funding for the restoration.

Since then Matt Hill and I have led 14 Bannerman overnight workshops. I’m leading two more trips next August. (If you are interested, join the waitlist.)

Bannerman. Sony a7S with a Sony 10-18mm f/4 lens. 12 minutes, f/4, ISO 1000.

Bannerman. Nikon Z 6 with a Nikon 14-24mm f2.8 lens. 45 stacked frames shot at 100 seconds, f/5.6, ISO 400.

I’ve seen the once roofless residence become a completely intact museum that shares the history of Bannerman and Pollepel Island. Over time, walls have crumbled and braces have been installed to stabilize what is left.

This has obviously been a best-case scenario, where both Matt and I have become honorary members of the Bannerman Castle Trust. I have also established the same relationships with historic iron furnaces: Sloss in Birmingham and Carrie in Pittsburgh.

In Conclusion

The allure and proper access will hopefully lead you down a path of successfully photographing abandoned places. My main tip on how to best get into and photograph these special spots is to really understand them and try to tell their story.

A few more tips:

  • When sharing locations that are fragile, consider tagging them less (or not at all) on social media and keeping them sacred and preserved places that others can happily stumble upon. Don’t share GPS coordinates of spots that could end up getting overrun and trampled.

  • The world as a whole is trying to preserve its past. There are plenty of organizations you can join that will grant you safe and legal access to many forgotten places.

  • The U.S. National Park Service preserves many wonderful abandoned locations that offer legal and safe access. You can see a list of some of them here.

Night photography can aid your creativity by illuminating the spirit of these places with creative long exposures under the night sky. Light painting can also reveal the story you want to tell as seen by this eerie shot taken by Tim Cooper in Grafton Ghost Town right outside Zion National Park:

Grafton, Utah. Nikon D700 with a Nikon 24mm f/2.8 lens, lit with a Coast HP5R flashlight. 1 minute, f/9, ISO 200.

We’d love to see your favorite night photos of abandoned places, and to hear the stories behind them. Share in the comments below, or on our Facebook page, or on Instagram (tag us @nationalparksatnight #nationalparksatnight #seizethenight).

We hope your journey to abandoned places is a safe, smart and creative one!

Gabriel Biderman is a partner and workshop leader with National Parks at Night. He is a Brooklyn-based fine art and travel photographer, and author of Night Photography: From Snapshots to Great Shots (Peachpit, 2014). During the daytime hours you'll often find Gabe at one of many photo events around the world working for B&H Photo’s road marketing team. See his portfolio and workshop lineup at www.ruinism.com.

UPCOMING WORKSHOPS FROM NATIONAL PARKS AT NIGHT

Controlling Highlights in Urban and Suburban Night Photography

I love shooting suburban night scenes. Which is a good thing, because I live in an awesome place for it: the historic, charming, picture-perfect village of Catskill, New York.

But working a suburban environment (and especially an urban environment) at night comes with a major challenge: artificial lights. Wherever we find artificial lights at night, we also find blown-out highlights in photos.

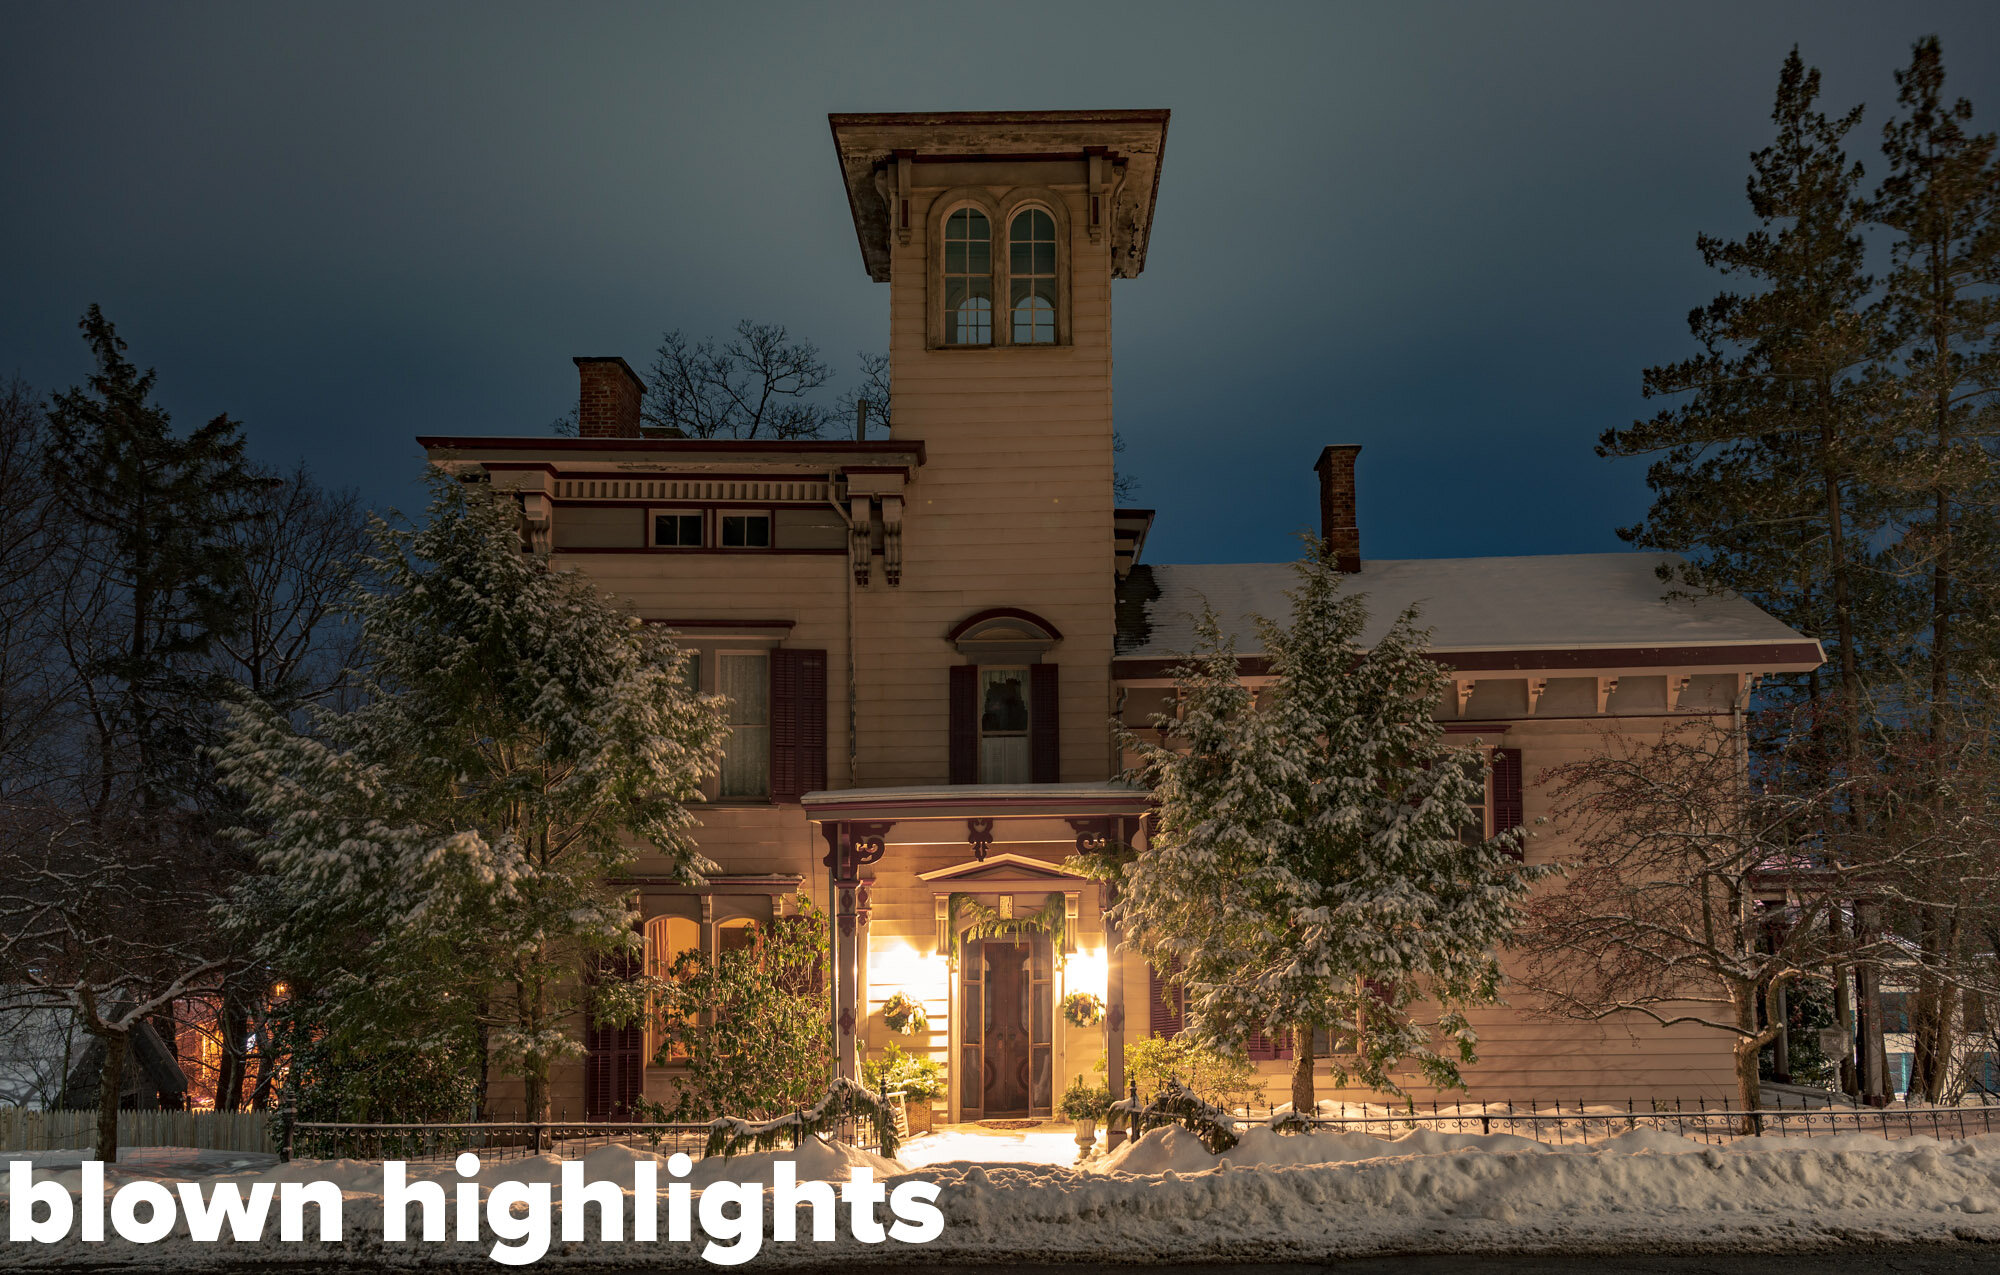
While working on my #CatskillNights project, it’s common for me to see a cool home that looks great to the naked eye but that doesn’t look so great in a single exposure. The dynamic range between the brightest brights and the shadow details are just too far apart.

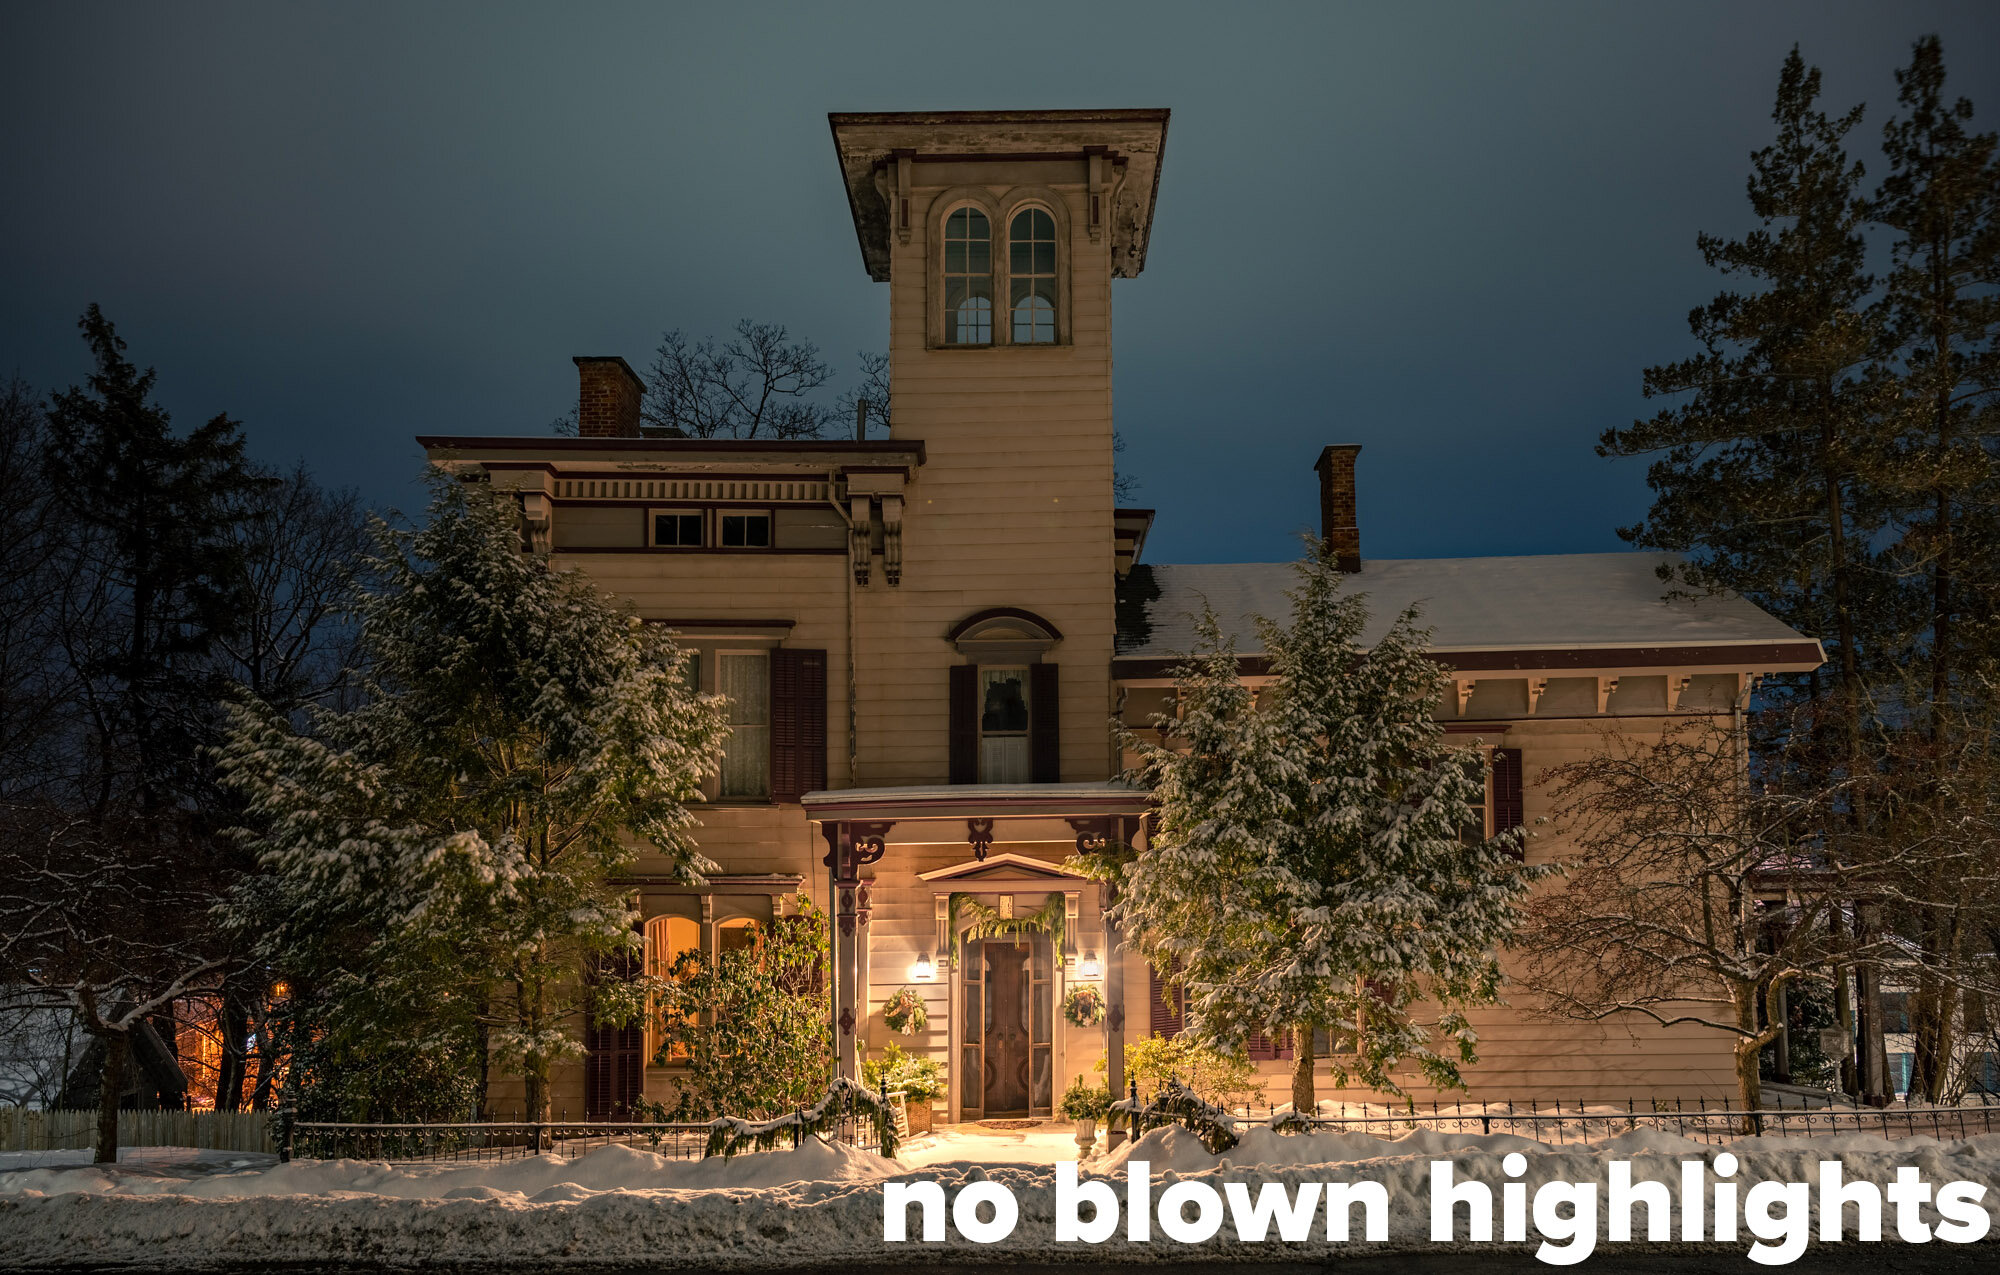
Castle in the Snow, Catskill, New York. Nikon Z 6II with a Nikon 24-70mm f/2.8 S lens at 24mm. Four merged frames shot at 30, 10, 3 and 0.6 seconds; f/5.6; ISO 100.

How do we control this? By shooting multiple images at different exposures and combining them during post-processing into an HDR image.

But you must shoot it right on scene to have a chance of processing it right in post. So let’s begin with:

Getting it Right in Camera

First up, try to strategically hide visible light sources behind columns or trees. That will save you lots of highlight headaches. Why? Because it’s not the light that’s causing the problem—it’s the light source. It’s the bulb, the lamp, the streetlight itself. If you can hide those things behind objects in the composition, they go from being a problem to being magic.

If you can’t do that, no worries. Read on.

For my first frame, I shoot for an ideal overall exposure that has clear shadow detail. The highlights will blow out. That’s fine. For now, essentially you just want your camera’s histogram not to collide with the left side (Figure 1). Don’t worry about the right.

Figure 1.

For my second frame, I stop down 1 to 2 stops to rein in some highlight data, and then I inspect the image. And the histogram. Then I shoot more frames. I keep reducing the shutter speed by 1 to 2 stops until the highlights retain color and tonality.

Nikon Z 6II with a Nikon 24-70mm f/2.8 S lens at 24mm. 30 seconds, f/5.6, ISO 100.

10 seconds, f/5.6, ISO 100.

3 seconds, f/5.6, ISO 100.

.6 seconds, f/5.6, ISO 100.

To be extra sure, I zoom to 100 percent to ensure there is detail. If I don’t see highlight detail, I stop down further and make another exposure.

Below is an example of how a single shot can have terrible highlight transitions, versus a processed HDR composite. Look at the first image around the lantern and note the missing details on the wall, then look at the second image and note the complete details on the wall. It’s subtle when it’s right, but blatantly obvious when it’s wrong.

That’s it, really.

Make a great overall exposure and keep reducing your shutter speed until you get beautiful light sources with no highlights blowing out.

Also, you may notice that I shot every image in this post at ISO 100—because that’s the native ISO of the Z 6II. Do the same. Find your camera’s native ISO and shoot there. Cameras produce images with the widest possible dynamic range at native ISO, which is essential for this type of work.

You might consider getting fancy with your skies in a final, longer exposure (knowing you can mask the bottom half out in post—see Tim’s blog post on this in the near future). You could also create star trails, or points, or make really interesting cloud streaks. The sky is the limit (hee-hee).

Below are three more straight-out-of-camera image sets that show how I bracketed exposures to set myself up for a good night HDR final image. Each starts with the good overall exposure and ends with the frame that has decent highlight detail.

Processing the HDR Raw Materials

Thanks to constant improvements in software, making natural-looking HDR images is easier than ever. Many software vendors offer HDR options. I will be limiting this demo to how I use Adobe Lightroom Classic.

(Note: I find that using Adobe Photoshop for HDR is less intuitive and flexible—for me, anyway. I prefer the DNG workflow of Lightroom, and having only rasterized images coming back from Photoshop is too limiting.)

In the Lightroom grid mode, I select all the images in the sequence, right-click (Control-click on a Mac) and choose Photo Merge > HDR (Figure 2).

Figure 2.

In the HDR dialog (Figure 3):

  1. I toggle Auto Settings on and off to see which gets me closer to my goal. More often than not, Auto settings “on” is better for me.

  2. As for Auto Align, I always leave it on—no harm in doing so.

  3. For most nights, setting Deghost to “none” works fine for me. Unless there is a stiff wind or other movement in critical areas.

Figure 3.

Once I click “Merge,” a task is created inside Lightroom, the job will be processed, and the merged image will appear in the catalog alongside the other images (Figure 4).

Figure 4.

Now for the magic of editing.

For urban/suburban images, I first neutralize the color temperature and then warm it up a tad. (Tap the W key to activate the White Balance Selector, click on something white, then use the Temp and/or Tint sliders to warm to taste.)

Figure 5.

That gives me a good starting point for marching through the rest of my processing process:

  1. I go straight to Profile and change it to “Adobe Landscape.”

  2. I start sliding the Dehaze slider to the right. Pushing Dehaze also adds saturation, so …

  3. I usually pull back the Saturation slider a tad.

  4. I try lightly lowering Contrast.

  5. I usually drop Highlights down and push Shadows up.

  6. I make sure the black point is at the dead left of the histogram to get rid of any muddy shadows.

After doing those top-level edits, I use Transform (Figure 6) to straighten any vertical keystone effects from having used a wide angle lens tipped upward.

Figure 6.

Finally I do highlight control. Using a local brush, I make sure the visible light sources are believably detailed. I may lower the exposure, highlights or whites a little bit to taste. Or not at all. I am just looking for some details and hue in the light sources (Figure 7).

Figure 7.

I aim to shoot every light bulb to render it perfectly, yet to also make it look like a light source participating in the illumination of the scene. It’s a delicate balance to pull off naturally. Too much detail equals too much fake.

Less Has Been More

I have noticed that I’ve had a lot of success with HDR composites that are made from only two images. One that’s a solid general exposure and one that’s for extreme highlight control.

Why is that? I’m convinced the dynamic range of my Nikon Z 6II is so expansive that I have enough information to make a decent exposure of everything except for the light-source highlights. So I’ve found myself shooting fewer frames for sequences—and if I shoot more frames, they’re strictly for highlight control and not for revealing shadow details.

Here are some examples, each showing the good overall exposure followed by the highlight-control exposure followed by the final HDR:

I tested that theory by processing only one of the best single exposures to the best of my ability, then processing an HDR, and comparing. Noticing the areas of the image that actually needed to be improved really locked in for me how I need to shoot to make a “meh” urban photo into a banger.

Do the same. Test your particular camera to learn how you need to expose to make this all happen. Note that the older your camera is, the less dynamic range it probably has, so the more frames you’ll probably have to shoot to get good detail throughout the exposure.

Summary

It’s pretty simple to make gorgeous HDR images in urban and suburban areas:

  1. Get a good overall exposure, ignoring blown-out highlights.

  2. Get the highlights right in camera—shoot as many images as you need to get detail in them.

  3. Combine the images in Lightroom.

  4. Cook to taste (tastefully).

Have fun out there and be safe!

Matt Hill is a partner and workshop leader with National Parks at Night. See more about his photography, art, workshops and writing at MattHillArt.com. Follow Matt on Twitter Instagram Facebook.

The Conversation Continues …

See Matt and Lance talk more about “Controlling Highlights in Urban and Suburban Night Photography” in our #BlogChat YouTube program:


UPCOMING WORKSHOPS FROM NATIONAL PARKS AT NIGHT

Shooting Downtown After Sundown—Light Painting in the Urban Environment

Light painting in an urban environment can be quite a different experience if you are primarily accustomed to working in natural landscapes. For example:

  • Moonlit landscapes are probably the easiest situations for light painting. You can work with any combination of exposure variables. There’s no pressure to get the lighting done quickly, so there is usually plenty of time to develop and execute a plan to get the shot. The working conditions are relatively constant, and the ambient light is easy to deal with.

  • Light painting in astro-landscape conditions is often addressed with Low-level Landscape Lighting (LLL), which involves using a very dim continuous light source (or sources) in a fixed position. LLL eliminates the pressure of scrambling to fully light a scene in the short 15- to 30-second exposure time required to keep stars as points of light. Many light painting tools are too bright to effectively control when working with high ISOs, wide apertures and relatively short shutter speeds. Still, the approach is often straight-forward.

On the other hand, light painting in urban or artificially lit environments presents a couple of different challenges from light painting a natural landscape. The first is extreme scene dynamic range or contrast, and the second is the potential for wildly varying color temperatures of existing light sources. But both of those challenges also can be part of what makes urban night photography and light painting rewarding, as I will show in the following examples.

Figure 1. Plymouth Waterfront. To expose properly for this image, I had to use less exposure than I would have liked to avoid clipping the highlights in the background. This left the wall in the foreground severely underexposed, and thus ripe for light painting. Nikon D750 with a Nikon 24-120mm f/4 lens at 55mm, light painted with a Coast HP7R flashlight. 30 seconds, f/8, ISO 140.

In Figure 1, the Plymouth waterfront scene was illuminated primarily by high pressure sodium vapor lights, supplemented by a metal halide light on the building in the background. I had to underexpose the image to keep the background structure from blowing out, which left the wall of the foreground building in deep shadow. My strategy was to expose for the most important highlights and allow the rest of the exposure to fall into place.

It was a perfect opportunity to use light painting to fill in the underexposed shadows. I scraped the light from a Coast HP7R along the edge of the building, from out of the frame to camera left. This brought out the texture of the wall and the ivy.

The choice of a (more or less) daylight white-balanced LED flashlight contrasted with the very warm sodium light that illuminated the foreground, middleground and tree. The combination of both the angle and color of the added light provided depth and another layer of texture to the otherwise ordinary scene. Mundane subject matter can be made much more interesting with effective lighting.

Figure 2. Burial Hill Cemetery. Located in downtown Plymouth, Massachusetts, the cemetery is the final resting place of several Pilgrims and of the founders of the Plymouth colony. Canon 5D Mark II with a Nikkor 28mm PC f/3.5 lens. 4 minutes, f/8, ISO 400.

Figure 2 is an example of a scene where the overall illumination is a combination of mostly high pressure sodium vapor lights and moonlight. The cemetery sits on a hill above the town, and as a result receives mostly indirect light. The golden-orange glow on the trees indicates sodium vapor lighting, and the purplish sky gives away that moonlight was present. Without moonlight, the sky would likely have appeared black, or almost so due to the exposure difference between the dark sky and the brightly lit street scene.

The gravestones were subtly lit by the combination of the various ambient lights, some indirect, some direct (hence the shadows), but the sum total gives a warm white balance. I chose a cool, daylight-balanced flashlight and backlighting to create a more dramatic effect. Notice the greenish edges and rim lighting on the stones. If you look carefully, you might just spot a ghost or two, but they are probably not the ghosts of pilgrims. I’m reasonably sure that pilgrims did not wear jeans.

Figure 3. Winthrop, Massachusetts. From left: sodium vapor streetlight with LED flashlight and daylight white balance, simulated tungsten flashlight with tungsten white balance, LED flashlight with tungsten white balance. Canon 5D Mark II with a Canon 24-105mm f/4 lens at 55mm. 30 seconds, f/8, ISO 100.

When shooting in the mixed light of an urban environment, it’s important to consider the different appearances of the various light sources, as well as how your light painting will complement or contrast.

In Figure 3, the ambient lighting is again primarily very warm sodium vapor, and I did the light painting with a much cooler LED flashlight. On the left, the white balance is set to daylight, which matches the color of the light painting. On the right, the white balance is set to tungsten, which still gives a slightly warm appearance to the image, but the light-painted subject contrasts strongly with the background.

For the version in the center, the white balance is also set to tungsten, but I have simulated the look of a light painting source that is matched to the overall scene. I did this in Lightroom with a local adjustment and the new Hue slider to illustrate how using a light painting tool that has a similar color temperature to the ambient light compares to one with a contrasting white balance.

In those three examples, you can see how adjusting the white balance either to match the overall scene or to match the light painting can affect the look and feel of the image, as well as the relationship between objects lit with different light sources.

Figure 4. Providence, Rhode Island. I used a bright flashlight at a low angle to simulate the look of car headlights on the SUV. Mixed street lighting with LED flashlight. Canon 5D Mark II with a Nikkor 28mm PC f/3.5 lens. 10 seconds, f/8, ISO 200.

In Figure 4, the red light in the window and the three giant smokestacks are what drew me to this scene in Providence, Rhode Island. I didn’t want to include the SUV on the right side of the frame, but it wasn’t going anywhere so I had to make the best of it. My solution was to get behind the SUV and hit it with the brightest flashlight that I had to make it look like another car was approaching from behind. Yet again, the cooler color of the light painting contrasts with the warmer street lighting.

If you’ve seen my light-painted landscape photographs, then you may remember that I use a similar technique when photographing under natural light: I usually use a warm, yellowish incandescent light to contrast the cooler, blue natural light in the landscape. Same idea in Figure 4, but the colors are reversed.

Now that LED street lighting is becoming more dominant, and urban lighting is becoming more color-neutral, my urban light painting strategy is changing. These days, carrying a warm- and a cool-color temperature light to contrast or blend in with existing light isn’t always enough.

Fortunately there are a range of new light painting tools available these days with variable brightness and color adjustments. Any regular reader of our blog will be familiar with the Luxli Viola (which we use mostly for Low-level Landscape Lighting), but there are other useful tools, such as the similarly versatile Nanlite PavoTube 6C and the more directional ProtoMachine LED8.

Figure 5. Under the Zakim Bridge, Boston. I set the white balance to 2400 K to neutralize the color of the light on the concrete structures, so the daylight-balanced LED raked low across the labyrinth appears very blue. The color and quality of the light helped to juxtapose the soft spirals against the cold hard concrete forms of the highway in the background. Canon 5D Mark II with a Zuiko Shift 24mm f/3.5 lens. 2 minutes, f/8, ISO 100.

To me, the many different light sources that come from all directions and in lots of different colors is a big part of what makes photographing in urban environments exciting. Rather than trying to “correct” for the different colors of mixed lighting, I find it much more rewarding to work with the contrast and color.

Wrapping Up

A few other things to consider when working in artificially lit environments:

  • Let light be your subject. Allow yourself to be drawn in by light as much as (if not even more than) by the physical forms in your image.

  • Smaller, more intimate scenes often make for better photographs in the urban jungle. It’s easier to manage the extreme contrast of street lighting in a smaller, contained space.

  • Look for scenes with different light sources falling on distinct surfaces. Mixed lighting can be your friend.

  • In general, avoid including light sources in your photos. Rules are meant to be broken, but hiding a light behind a sign or a tree, or even around a corner, is an effective way to cut down on contrast and to reduce the chance of flare in your image. But be careful of lights just outside the frame—these are the ones that really cause flare.

  • Understand that you will need to add a lot more light to an urban scene than you may be accustomed to when working by starlight or moonlight. Because urban scenes are brighter, we usually work at native ISO for the best image quality in dynamic environments—and that means you need to add more light than you would at lower ISOs.

  • Just as in nature, add light to fill in dark shadows, or to add emphasis to an important part of your scene.

  • Stay alert. Keep an eye on your gear, be aware of people around you, and watch out for traffic that may not be aware of you or your camera’s presence.

Night photography and light painting by artificial light in the built environment is a lot of fun, and it harks back to the earliest days of night photography when the available materials were not sensitive enough to record an image by starlight or moonlight. Urban night photography presents different challenges than photographing a landscape at night, and with the right mindset adjustment, it can be equally rewarding.

As always we’d love to see any images inspired by our blog posts, so tag us on Instagram (@nationalparksatnight), or post in the comments or to our Facebook page.

Lance Keimig is a partner and workshop leader with National Parks at Night. He has been photographing at night for 30 years, and is the author of Night Photography and Light Painting: Finding Your Way in the Dark (Focal Press, 2015). Learn more about his images and workshops at www.thenightskye.com.

UPCOMING WORKSHOPS FROM NATIONAL PARKS AT NIGHT

That’s a Wrap: Recapping Our Livestream Night Photography Shoot in Pittsburgh

Greetings from Pittsburgh!

I’ve spent the last week here, visiting family, but also upping my night photography portfolio of this beautiful place. Pittsburgh has all the classic elements that make for a great urban night photography experience: rivers surrounding a downtown skyline, tons of iconic bridges, and plenty of vantage points along the riverfront or up in the hills to compose multiple interpretations of this scenic city.

I was having so much fun photographing Pittsburgh that I wanted to share it with anyone else who wanted to come—virtually, anyway. So this past Wednesday, for the first time ever, we did a live night shoot, livestreamed on Instagram. It ended up being an online night photography party!

The Shoot

I set up at one of the perfect viewpoints of Pittsburgh: Allegheny Landing, between the Roberto Clemente and Andy Warhol bridges. We livestreamed during twilight, the blue hour, which is the best time to balance the city lights with the night sky in one exposure. Big shout out to all of you who joined in, asked questions and enjoyed the shoot. For those who missed it, you can watch it here:

The Photos

Of course, that was just the shoot. Post-processing is half of the photographic process, and that’s the half I’ve been doing in the two days since. So now, with that done, I’m checking in to share the three photos I shot during the livestream, as well as a couple of others from my trip to hopefully inspire you to seize the twilight in your city!

The Movement

I shot my first frame about 10 to 15 minutes into civil twilight. The city lights and sky perfectly matched in terms of exposure. However, I wanted more movement in the clouds and water, so I waited another 10 minutes. Twilight illumination changes quickly—in that 10 minutes I lost more than 3 stops of light. Then I was able to get to a 30-second exposure, which gave me smoother reflections and a better sky. However, some of the brighter city lights were blowing out, so I took an additional shot at 1/2 second to blend in post.

Fujifilm X-T2 with a Fujifilm 8-16mm f/2.8 lens. Two blended frames shot at 1/2 and 30 seconds, f/16, ISO 200.

The Drama

The next goal was to start looking for different angles to shoot the bridge. I loved the drama of shooting under the bridge, so that’s what I tackled first. This proved to be a fairly easy shot to pull off, but I still needed two frames: a base exposure at 30 seconds and 5-second exposure for maintaining the brightest highlights.

Fujifilm X-T2 with a Fujifilm 8-16mm f/2.8 lens. Two blended frames shot at 5 and 30 seconds, f/16, ISO 200.

The Detail

For the last bridge shot, I got up on the deck and looked for a detail to home in on. I kept things simple and looked for even illumination that didn’t include a large swath of the sky (which was recording as just black at that point).

Fujifilm X-T2 with a Fujifilm 90mm f/2 lens. 2 seconds, f/6.4, ISO 400.

The Pano

I love shooting Pittsburgh at night, so I got out for a couple of other evenings too. One of my favorite photos from the trip was this five-image panorama I shot from a high vantage point that looks directly at Point State Park and the confluence of the three rivers (the Allegheny, Monongahela and Ohio). I shot this during the end of civil twilight and had to blend to maintain a few of the brightest highlights.

Fujifilm X-T2 with a Fujifilm 90mm f/2 lens. Five stitched frames shot at 4 seconds, f/13, ISO 200.

The Rotunda

I finally own a wide enough lens (the Fujifilm 8-16mm, which is a 12-24mm full-frame equivalent) to do justice to The Pennsylvanian, one of the most famous rotundas in the U.S. Built at the turn of the 20th century, The Pennsylvanian is one of the finest examples of Beaux-Arts architecture. It served as a sheltered turning space for carriages transporting people to and from the nearby train station.

Fujifilm X-T2 with a Fujifilm 8-16mm f/2.8 lens. 2 seconds, f/10, ISO 400.

Wrapping Up

Let us know in the comments what you thought of the live shoot. The response so far has been great and we hope to soon share similar experiences. Make sure you are following us on Instagram—we typically do a live conservation every Wednesday at 8 p.m., and of course we’re always posting new images from our night adventures!

Gabriel Biderman is a partner and workshop leader with National Parks at Night. He is a Brooklyn-based fine art and travel photographer, and author of Night Photography: From Snapshots to Great Shots (Peachpit, 2014). During the daytime hours you'll often find Gabe at one of many photo events around the world working for B&H Photo’s road marketing team. See his portfolio and workshop lineup at www.ruinism.com.

UPCOMING WORKSHOPS FROM NATIONAL PARKS AT NIGHT