coma

Five Questions: Barns, Filters with Auroras, Star Trail Settings and More

The night photography world is full of questions, and we’re happy to help with answers.

This installment of our “Five Questions” series features inquiries about photographing barns on the Blue Ridge Parkway, coma with Nikon Z lenses, moving a Lightroom catalog on a Mac, using filters when shooting auroras and settings for star trails.

If you have any questions you would like to throw our way, please contact us anytime. Questions could be about gear, national parks and other photo locations, post-processing techniques, field etiquette, or anything else related to night photography. #SeizeTheNight!


1. Clapboard on the Blue Ridge Parkway

Question:

I am thinking about traveling to the Blue Ridge Parkway to do some star photography and would love to do some light painting of old barns or structures. I am wondering if you have any locations you can recommend. — Michael S.

Mabry Mill, Blue Ridge Parkway. © 2021 Chris Nicholson. Nikon D5 with a Nikon 24-70mm f/2.8 lens, lit with four Luxli Fiddle LED panels. 30 seconds, f/2.8, ISO 6400.

Answer:

The Blue Ridge Parkway is a great place to find barns! But many are on privately owned or leased farms along the parkway; you could still shoot those, but would want to ask permission of course, especially if photographing them at night, and absolutely if you’re going to light paint them.

Sticking to barns that are not privately owned, here are some tips:

Stay north of Asheville. The section of the parkway south of Asheville (and even for a bit north) is mostly mountainous. The northern two-thirds of the parkway—perhaps safely stated as “north of the Linn Cove Viaduct”—is more rural and agricultural.

If you’re open to just historic clapboard structures that aren’t barns, you can’t drive more than a few miles without seeing some. These come to mind immediately: Mabry Mill, Puckett Cabin, Brinegar Cabin. Lots of others scattered about.

For barns in particular, off the top of my head: the Johnson Farm at Peaks of Otter (you’ll need to hike to it), Explore Park (though you’ll want to ask about access after 8 p.m., as it’s managed by the city of Roanoke) and the farm at Humpback Rocks Visitor Center. — Chris

2. Non-Coma Z Lenses

Question:

I just switched to the Nikon Z 6II and am looking for a recommendation for a lens without coma distortion. I have tried and returned two Rokinon 14mm f/2.4 lenses with severe coma. My preference would be a lens in the 14-24mm range. — Edmund

Answer:

You are going to love the Z 6II! The FTZ adapter works well, so it gives you lots of options, but both the Nikon Z 14-24mm f/2.8 and Nikon Z 24-70mm f/2.8 are among the very best lenses Nikon has ever produced. Pricey, but worth it. Another option (assuming you have the FTZ adapter) is the Nikon’s F-mount 14-24mm. There is nothing better than those three lenses at this time. — Lance

3. Moving Lightroom on a Mac

Question:

Is there a simple way to migrate Lightroom files on a Mac? I will soon have to bring in a new and larger external hard drive. — Julie P.

Answer:

Yes, and the process is actually pretty simple.

  1. With Lightroom closed, plug in the old drive and the new drive.

  2. Copy all of the information from the old drive to the new drive.

  3. Unplug your old drive and launch Lightroom. You will see question marks next to your folders, because Lightroom can no longer find your old hard drive.

  4. You need to locate the parent folder for your images. In Lightroom, navigate to the topmost folder in your Folders hierarchy. That may well be the parent folder, but it’s possible that the true parent folder is hiding above it. By right-clicking on that topmost folder, you will see an option to Show Parent Folder. This command will show the folder containing that topmost folder, if there is one.

  5. Right-click on your parent folder and choose Find Missing Folder. Lightroom will open your system’s Finder.

  6. Navigate to the new drive, then choose the matching parent folder and click Choose.

The parent folder and all of its subfolders (all on the new hard drive) will now be linked back with Lightroom. — Tim

4. Light Pollution Filters and Auroras

Question:

I just read your article on light pollution filters. Will these filters also be usable when shooting Northern Lights? — Claron K.

Answer:

Yes, I believe they would be useful for shooting Northern (or Southern) Lights when near inhabited areas. As auroras tend to be green, pink, purple and sometimes blue, the orange/yellow blocking ability would have a complementary effect. However, you could be lose up to 1 stop of light, so keep that in mind. — Matt

5. Star Trail Settings

Question:

I just reviewed your “How I Got the Shot: Lake McDonald” blog post about star trails. Phenomenal image! I have done a ton of research on how to do this kind of photo, but was hoping for a simple recommendation for settings and timing. I’ll be shooting with either a Nikon D850 or a Nikon Z 6 with a 14-24mm lens. — Darlene

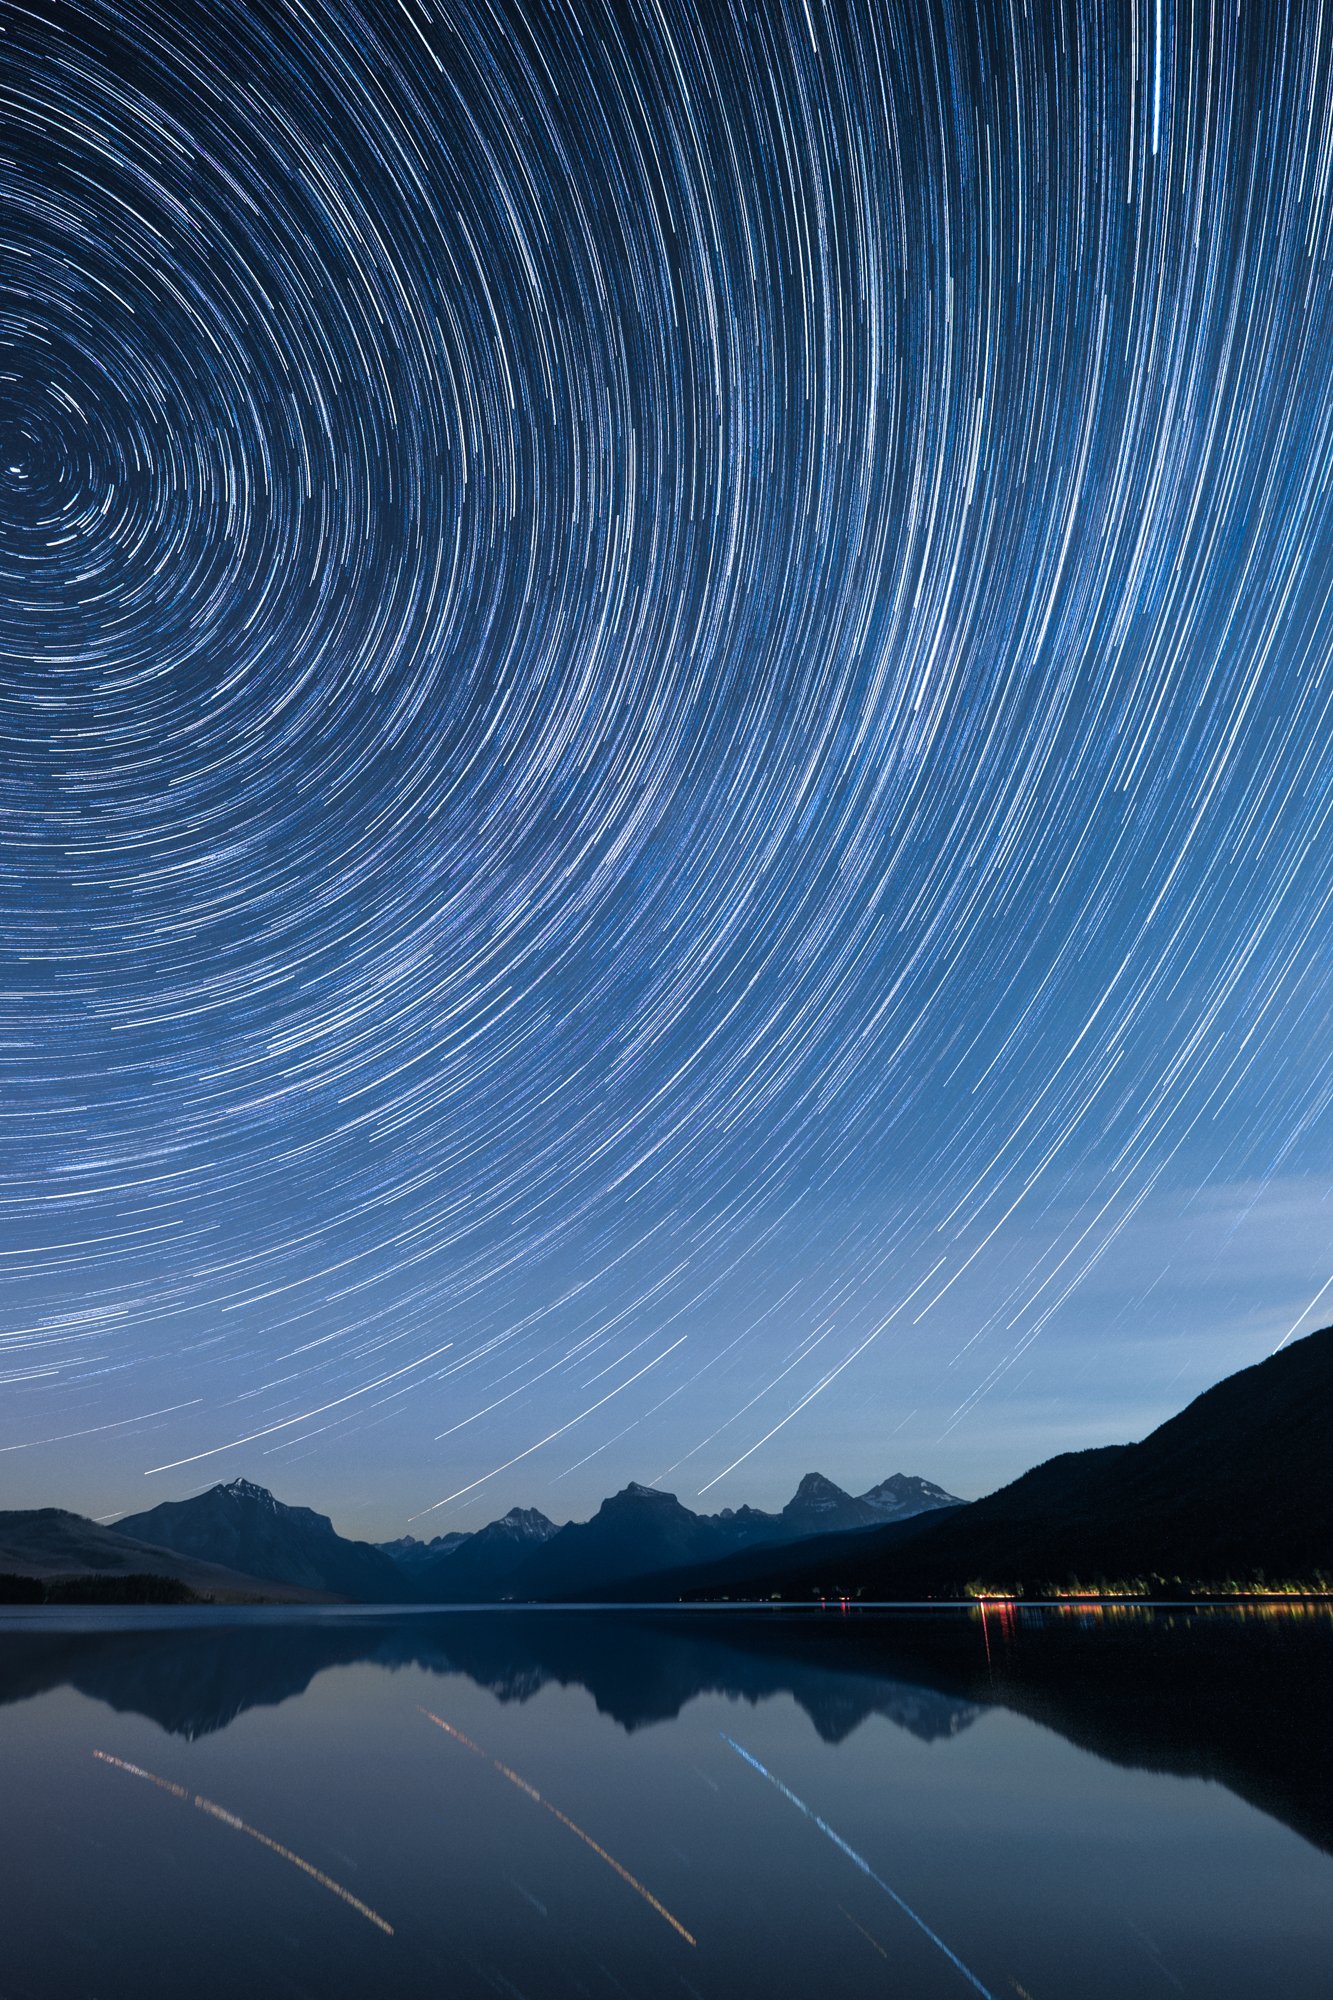
Star Circles Over Lake McDonald. © 2015 Gabriel Biderman. Fujifilm X-T1 with a Fujifilm 10-24mm f/4 lens. 41 stacked frames, each shot at 2 minutes, f/4, ISO 3200.

Answer:

There is no simple formula for star trails. You need to find the balance between a proper base exposure, how long you want to go, and image quality.

You can capture trails with either one long exposure or with multiple shorter exposures that you later stack in Photoshop. Single exposures are often best for up to 15-minute shots, but when you want longer trails you’ll most likely want to shoot multiple frames to stack.

Do a high ISO test shot to figure out the proper exposure. Then you want to get to a more optimal image quality setting. Lower your ISO to something you’re comfortable with in terms of noise (for example, maybe ISO 800), and then adjust your shutter speed accordingly to compensate.

Also consider apertures, in this regard: The wider the aperture, the higher number of stars will appear. While that might sound like a good thing, too many star trails could look too chaotic and distract from the rest of the scene. For example, on a dark night f/2.8 will show an overwhelming number of trails, while f/8 would create a more subtle effect. Under a full moon this isn’t so critical, as not as many stars are visible anyway. Either way, just be careful that you don’t stop down so much that you have to crank up your ISO and sacrifice image quality.

Another consideration is how long your camera’s shutter can be open without generating long-exposure noise (speckled red, blue and green confetti-like specks in your image). This noise is produced when a camera processor overheats during long exposures, but higher outdoor temperatures and lower humidity also play a factor. You have to learn what your camera can tolerate by running some tests in different conditions. For example, if the ambient temperature is 60 to 65 F or less then you can usually get away with 4- to 6-minute exposures, but if the temperatures are 80 F or higher then you might be limited to 30 seconds or 1 minute.

To counteract that effect, you might wonder about using long-exposure noise reduction (LENR). You can use that quite effectively if you’re shooting one long exposure for star trails, but it would be countereffective for stacking. The reason is that for most cameras, LENR disables the shutter after each exposure (for the same amount of time as the shutter speed), which would create breaks in your star trails.

The final decision is how long you want your star trails to be. When facing north for circumpolar trails, you want to shoot for at least 1 hour, and the longer the better. If you are facing east, west or south, you can get away with shorter total exposures—8 to 30 minutes might be sufficient. — Gabe

Chris Nicholson is a partner and workshop leader with National Parks at Night, and author of Photographing National Parks (Sidelight Books, 2015). Learn more about national parks as photography destinations, subscribe to Chris' free e-newsletter, and more at www.PhotographingNationalParks.com.

UPCOMING WORKSHOPS FROM NATIONAL PARKS AT NIGHT

Five Questions: Star Trails Under Moonlight, Coma, Great Smoky Mountains and More

Many of you like to ask questions about night photography. And guess what! We kinda like answering questions about night photography. That’s how we roll. So let’s … um … roll!

This installment of our “Five Questions” series features inquiries about star trails under moonlight, a very dim light panel, coma testing, Lightroom panels, and Great Smoky Mountains National Park.

If you have any questions you would like to throw our way, please contact us anytime. Questions could be about gear, national parks and other photo locations, post-processing techniques, field etiquette, or anything else related to night photography. #SeizeTheNight!


1. Star Trails in Moonlight

Star trails on a moonlit night, Yosemite National Park. © 2020 Tim Cooper. Nikon Z 6 with a Nikon Z 24-70mm f/4 lens. Ten stacked exposures shot at 2.5 minutes, f/9, ISO 100.

Question:

Last night I reviewed some star trail photos. Several were long exposures under moonlight, which turned out very bright—out of the camera they looked like daylight. Which would be better—lowering the ISO (from 400), closing down the aperture (from f/4), or using a neutral density filter? — Kathy E.

Answer:

In the circumstances you describe, the thing to do would be to go down to ISO 100 and also stop down to f/5.6 or f/8. Full moon exposures of 4 to 6 minutes at f/8 and ISO 100 are about right, depending on the desired effect.

If adding light painting, one might consider adjusting the base exposure up or down to manage the ratio of existing to added light. If longer star trails are desired, then combine multiple exposures in Photoshop until the trails reach the desired length. It’s possible to stop down further to get longer shutter speeds, but if you stop down too much then dimmer stars won’t show up.

There’s really no reason to use a neutral density filter for this situation—it only increases the odds of problems with flare or general loss of image quality from lesser glass in front of the lens, or from dirt, finger prints or condensation. The only time I use ND filters at night is when shooting long exposures of the moon streaking through the frame. — Lance

2. Seeing Coma

Question:

I read your blog post about measuring lens coma, and I want to compare the Sigma 14-24mm f/2.8 with the Zeiss 18mm f/2.8 and the Zeiss 25mm f/2.0 (I own both of the latter). What magnification in Lightroom should I use when comparing the images from these three lens? When I zoom to 11:1 (the greatest magnification), I really can’t tell what I am looking at because the stars just look like little boxes. — Hadley

Answer:

So glad you are inspired to run your lenses through the paces. Awesome. I recommend 4:1. If stars are not round at that magnification, then you’re probably looking at coma. — Matt

3. A Very Dim Light

Question:

During one of your presentations at B&H’s OPTIC Imaging Conference, there was a recommendation for a portable light that could dim to levels lower than most other lights available. Unfortunately I didn’t write it down. Can you share this gear recommendation? — Jason L.

Answer:

Thanks for watching our class during OPTIC! The light we were referring to is the Luxli Viola 2. When used with the Luxli Composer app, you can drop the intensity to as low as .5 percent.

For Low-level Landscape Lighting we typically use the Viola at .5 to 2 percent. It also optionally comes with a diffusion panel that would dim it down a touch more. — Gabe

4. Solo Panels

Question:

When I am in Lightroom’s Grid mode and have the Folders panel open, the Collections panel is all the way underneath and requires a lot of scrolling to get to. Is there a way either to lock the Collections panel in position so it is always visible at the bottom while the Folders panel is expanded, or to place the Collections panel above the Folders panel? — Marc

Answer:

If you right-click (PC) or control-click (Mac) in the dark gray title area of any panel, you can select “Solo Mode.” This will enable a feature that always collapses all of the tabs except the one you are using. In addition to solving your specific problem, this keeps the whole Lightroom interface cleaner and easier to work with. — Lance

5. Smoky Spots

Newfound Gap, Great Smoky Mountains National Park. © 2019 Matt Hill. Nikon Z 6 and a Nikon 70-200mm f/2.8. 871 Seconds, f/4, ISO 200.

Question:

My daughter and I are planning a trip to Great Smoky Mountains National Park for four nights. We would appreciate your recommendations for the best night, sunrise and sunset photography. My daughter is expecting our first grandchild and I am looking forward to taking a few maternity photos in Cades Cove, so any thoughts on that would be great too. — Susan E.

Answer:

For sunrise and sunset, you’ll want to be at the overlooks. Clingmans Dome is good for both (especially with clouds in the valley), and the overlooks on the southern half of Newfound Gap Road can be good. Because you’re in the mountains, you need to be up higher to see the sun break the horizon. Also, this is technically outside the park, but the overlooks on the Foothills Parkway (also a administered by the National Park Service) can be good.

Not for sunrise and sunset itself, but for shooting in the post-sunrise and pre-sunset light, I can’t recommend Cades Cove enough. I could spend a whole week shooting just in there. It’s a great place for those maternity photos—just drive the loop road and you’ll find far more locations than you can use. Also look at the two dirt roads that cut across the valley (Hyatt and Sparks Lane), as they’re quieter and rather scenic.

For night photography, Cades Cove is great, but no cars are allowed after sundown, so you’d have to walk. You’d be looking at anywhere from 2 to 11 miles roundtrip, depending on how much you wanted access to. (You could also go in on a bike.)

For stars, again, get to the overlooks and/or to Clingmans Dome. You can also find some open skies along Little River Gorge Road and in the meadow next to the Oconaluftee Visitor Center. If open skies aren’t important and you’d just like some things to light paint, try the abandoned resort town at Elkmont.

Finally, because you’re staying near Gatlinburg, you might want to try the Roaring Fork Motor Nature Trail. It’s a part of the park that many visitors don’t go to because it’s not off the main park road, but is certainly good for photography, especially under overcast skies. — Chris

Chris Nicholson is a partner and workshop leader with National Parks at Night, and author of Photographing National Parks (Sidelight Books, 2015). Learn more about national parks as photography destinations, subscribe to Chris' free e-newsletter, and more at www.PhotographingNationalParks.com.

UPCOMING WORKSHOPS FROM NATIONAL PARKS AT NIGHT

Getting the Best Star Points for Astro Landscapes: How to Test Lenses for Coma

It’s time to talk about something scary that hides in dark corners. It’s an unwanted guest, and has ruined many star parties. The regret comes in the morning, and in the form of a lens aberration called “coma.”

The technical term is comatic aberration. This is not to be confused with chromatic aberration. They sound very similar. Chromatic aberration is color fringing at high-contrast edges in an image, and it’s quite easy to correct in post-processing.

Comatic aberration, on the other hand, has to do with a different type of lens artifact. In night photography terms, coma is when stars start elongating or distorting to look like spaceships or seagulls (Figure 1)—not because of problems with an exposure, but because of quirks in how a lens works. Coma ruins star points, but it’s also a problem with star trails. Imagine: That odd shape drags across the sky, making large, fat trails that can be distracting in a composition (Figure 2).

Figure 1. See the odd shapes of the stars? That’s coma. The shapes can also present as “wings” or diamonds. Fuji X-T1 with 7Artisans 7.5mm f/2.8 fisheye lens. 58 seconds, f/2.8, ISO 6400.

Figure 2. Coma also presents a problem with trails, which will be fatter than normal. Fuji X-T1 with 7.5mm 7Artisans Fisyeve f/2.8 lens. 90-minute stack, f/2.8, ISO 6400.

While not impossible to work with in post, coma is tedious to repair (or to clone out, or to paint out with special brushes). To be frank, I’d rather re-shoot with a better aperture or lens than correct a photo full of coma.

Why Does Coma Matter?

When I got serious about astro-landscape photography, I paid attention to certain things that I believed directly affect the quality of the final image. Coma is one of those things that matters to me. And I know my colleagues at National Parks at Night also care about it at the same level. In fact, Lance Keimig was who first taught me about it.

Now I am at a crossroads. As I move fully to mirrorless on my Nikon Z 6, I want to replace all my F-mount lenses with native Z-mount equivalents. So I am testing a bunch of lenses to see exactly what I want to be carrying in my backpack. As I test, my primary criterion is—you guessed it—coma.

Coma most often occurs on fast, wide lenses. The most common culprits are lenses with apertures of f/2.8 or wider, which are exactly the lenses that are best for astro-landscape photography.

Milky Way over Bryce Canyon National Park, with very little coma. Nikon D750 with a Viltrox 20mm f/1.8 MF lens. Foreground exposure created by blending 25 frames in Starry Landscape Stacker, each shot at 13 seconds, f/2.8, ISO 6400. Foreground exposure 323 seconds, f/2.8, ISO 1600. Blended in Photoshop.

When coma occurs, it is strongest at the corners of the image. It appears less so at the top and side edges, and is unlikely to (but could) appear at the center.

The easiest way to reduce or eliminate coma is to stop down the lens. The aberration is likely to sufficiently diminish by f/5.6. But that’s an aperture that’s not usually wide enough to create shutter speeds that can capture sharp stars in an astro-landscape image.

So the better alternative is to have a lens that doesn’t need to be stopped down to begin with. All lenses have coma to some degree, but some lenses are certainly better than others. In night photography, we want fast ultrawide lenses in which coma disappears or is nearly nonexistent at f/2.8. Why? Because that’s what’s best for star-point and Milky Way photos.

This is the reason we love the Nikon 14-24mm f/2.8. It exhibits almost no coma when shot wide open. This is also why we love the Irix 15mm f/2.4. It too exhibits almost no discernible coma when shot at f/2.8. Both of these lenses are extraordinary.

Unfortunately, my goals for my new kit take me away from these dear optics. While both of those brands are working on Z-mount versions of those lenses, neither has a release date. Also, I do not want to carry an FTZ adapter. While it does allow any F-mount lens to be mounted to a Z-series camera, those lenses tend to be heavier than Z-mounts. Lighter, more compact lenses are part of why I wanted to go mirrorless to begin with. So onward I must journey.

I strive to make the highest-quality photographs I can. I do some printing now, and I plan on doing even more this winter. So when I make 20-inch, 30-inch or 40-inch prints, I want them to evoke the feelings I had when visiting the gorgeous destinations where I made the images.

Night photography is a process of acknowledging which variables are hard boundaries and which are acceptable areas for compromise. Coma is one place I will not compromise. Therefore, I test all the lenses I consider for purchase. I suggest you do the same. To that end, below I will reveal how I recently tested four lenses, and will discuss how to interpret the results.

Preparing a Lens Test

This part is really simple. Grab a notebook and a pen. Draw a grid/table. At the left, write the full apertures of your lenses as rows going downward. Across the top, make a column header for each lens you are testing.

Note: Yes, for sure it’s good to run these tests on lenses you’re thinking of buying. Rent one, borrow one from a friend, whatever. But it’s also good to test lenses you already own, so you know where and when they begin to fail you. Then you can compensate in the field when needed.

My notes from this test. Why am I making notes during the test rather than just checking metadata in Lightroom? Because none of the ultrawide lenses I was testing have electronic contacts, which means the metadata does not contain either the make/model of the lens nor the aperture used in the exposure.

These are the four lenses I recently tested:

  1. Samyang MF 14mm f/2.8 for Nikon Z

  2. Venus Optics Laowa 15mm f/2 FE Zero-D for Nikon Z

  3. Viltrox 20mm f/1.8 MF for Nikon Z

  4. ZEISS Distagon T* 15mm f/2.8 ZF.2 for Nikon F

B&H Photo kindly sent me the Samyang and Laowa for evaluation. I tested these against my tried-and-true Zeiss Distagon. I own the Viltrox, having chosen it already to replace my 35mm Sigma Art as my standard wide lens and for shooting panos.

Performing the Coma Lens Test in the Field

I chose a new moon, and I drove west for 15 minutes out of Catskill, New York, where farmland leaves broad, open, dark rural skies. This combination of choices gave me the maximum number of stars to work with. (If you run your test during a different moon phase, do so a couple of hours before the moon rises or a couple of hours after it sets. You want to be able to see even the faintest of stars.)

Step 1: Nail the focus.

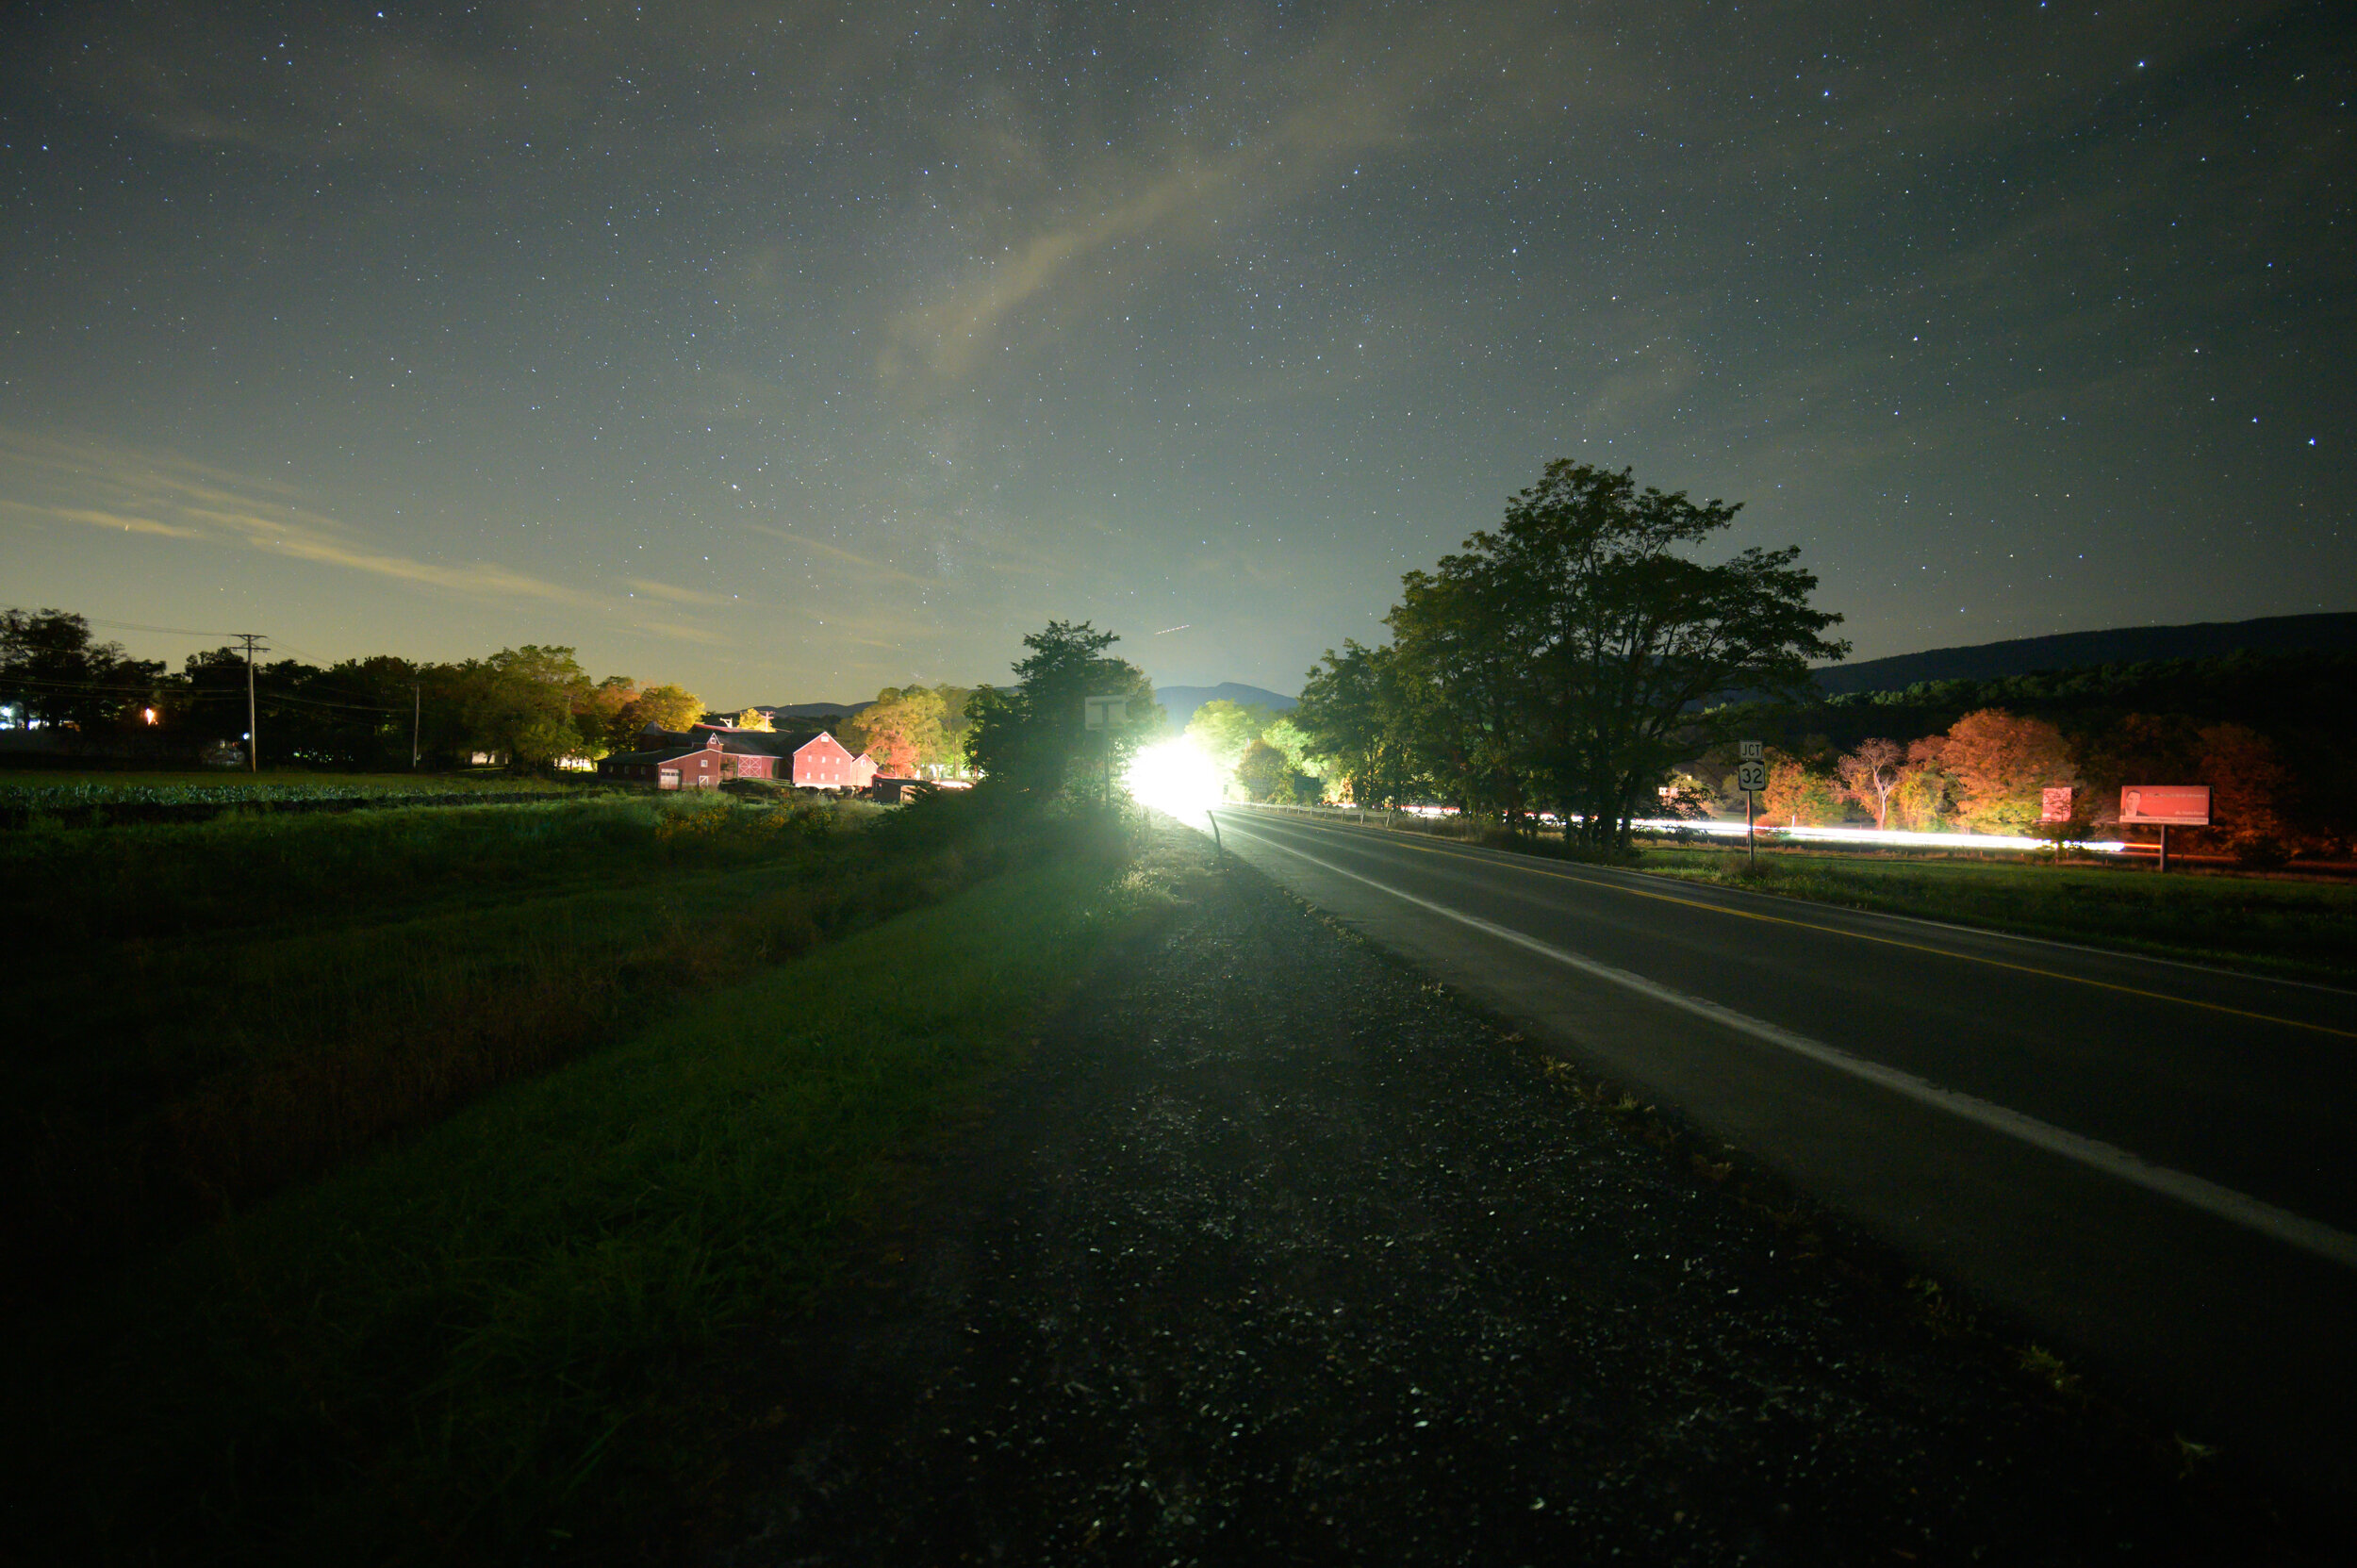
I set up a quarter-mile away from a traffic light so that I could use it to zoom in and really hit the perfect focus. For reference, I took a shot of each perfect focus. See below.

To ensure I ended up with stars that didn’t blur due to movement, I used the following settings: ISO 6400 and the proper NPF calculation for sharp star points (using the Accurate setting in the PhotoPills calculator, as opposed to Default).

Step 2: Make a test shot at each aperture up to about f/5.6.

As noted earlier, this is where coma disappears on most lenses anyway. Moreover, you’re highly unlikely to be shooting star photos at smaller apertures than this.

Step 3: Take Good Notes.

As you make your test images, look at them on the back of your LCD and note the filename in your notebook grid.

OK! That’s all you really need to do in the field. But I suggest that you really take the lenses for a drive. Shoot some star stacks, some star trails, car trails, etc. Get cozy with the lens in general.

Examining the Coma Lens Tests Results

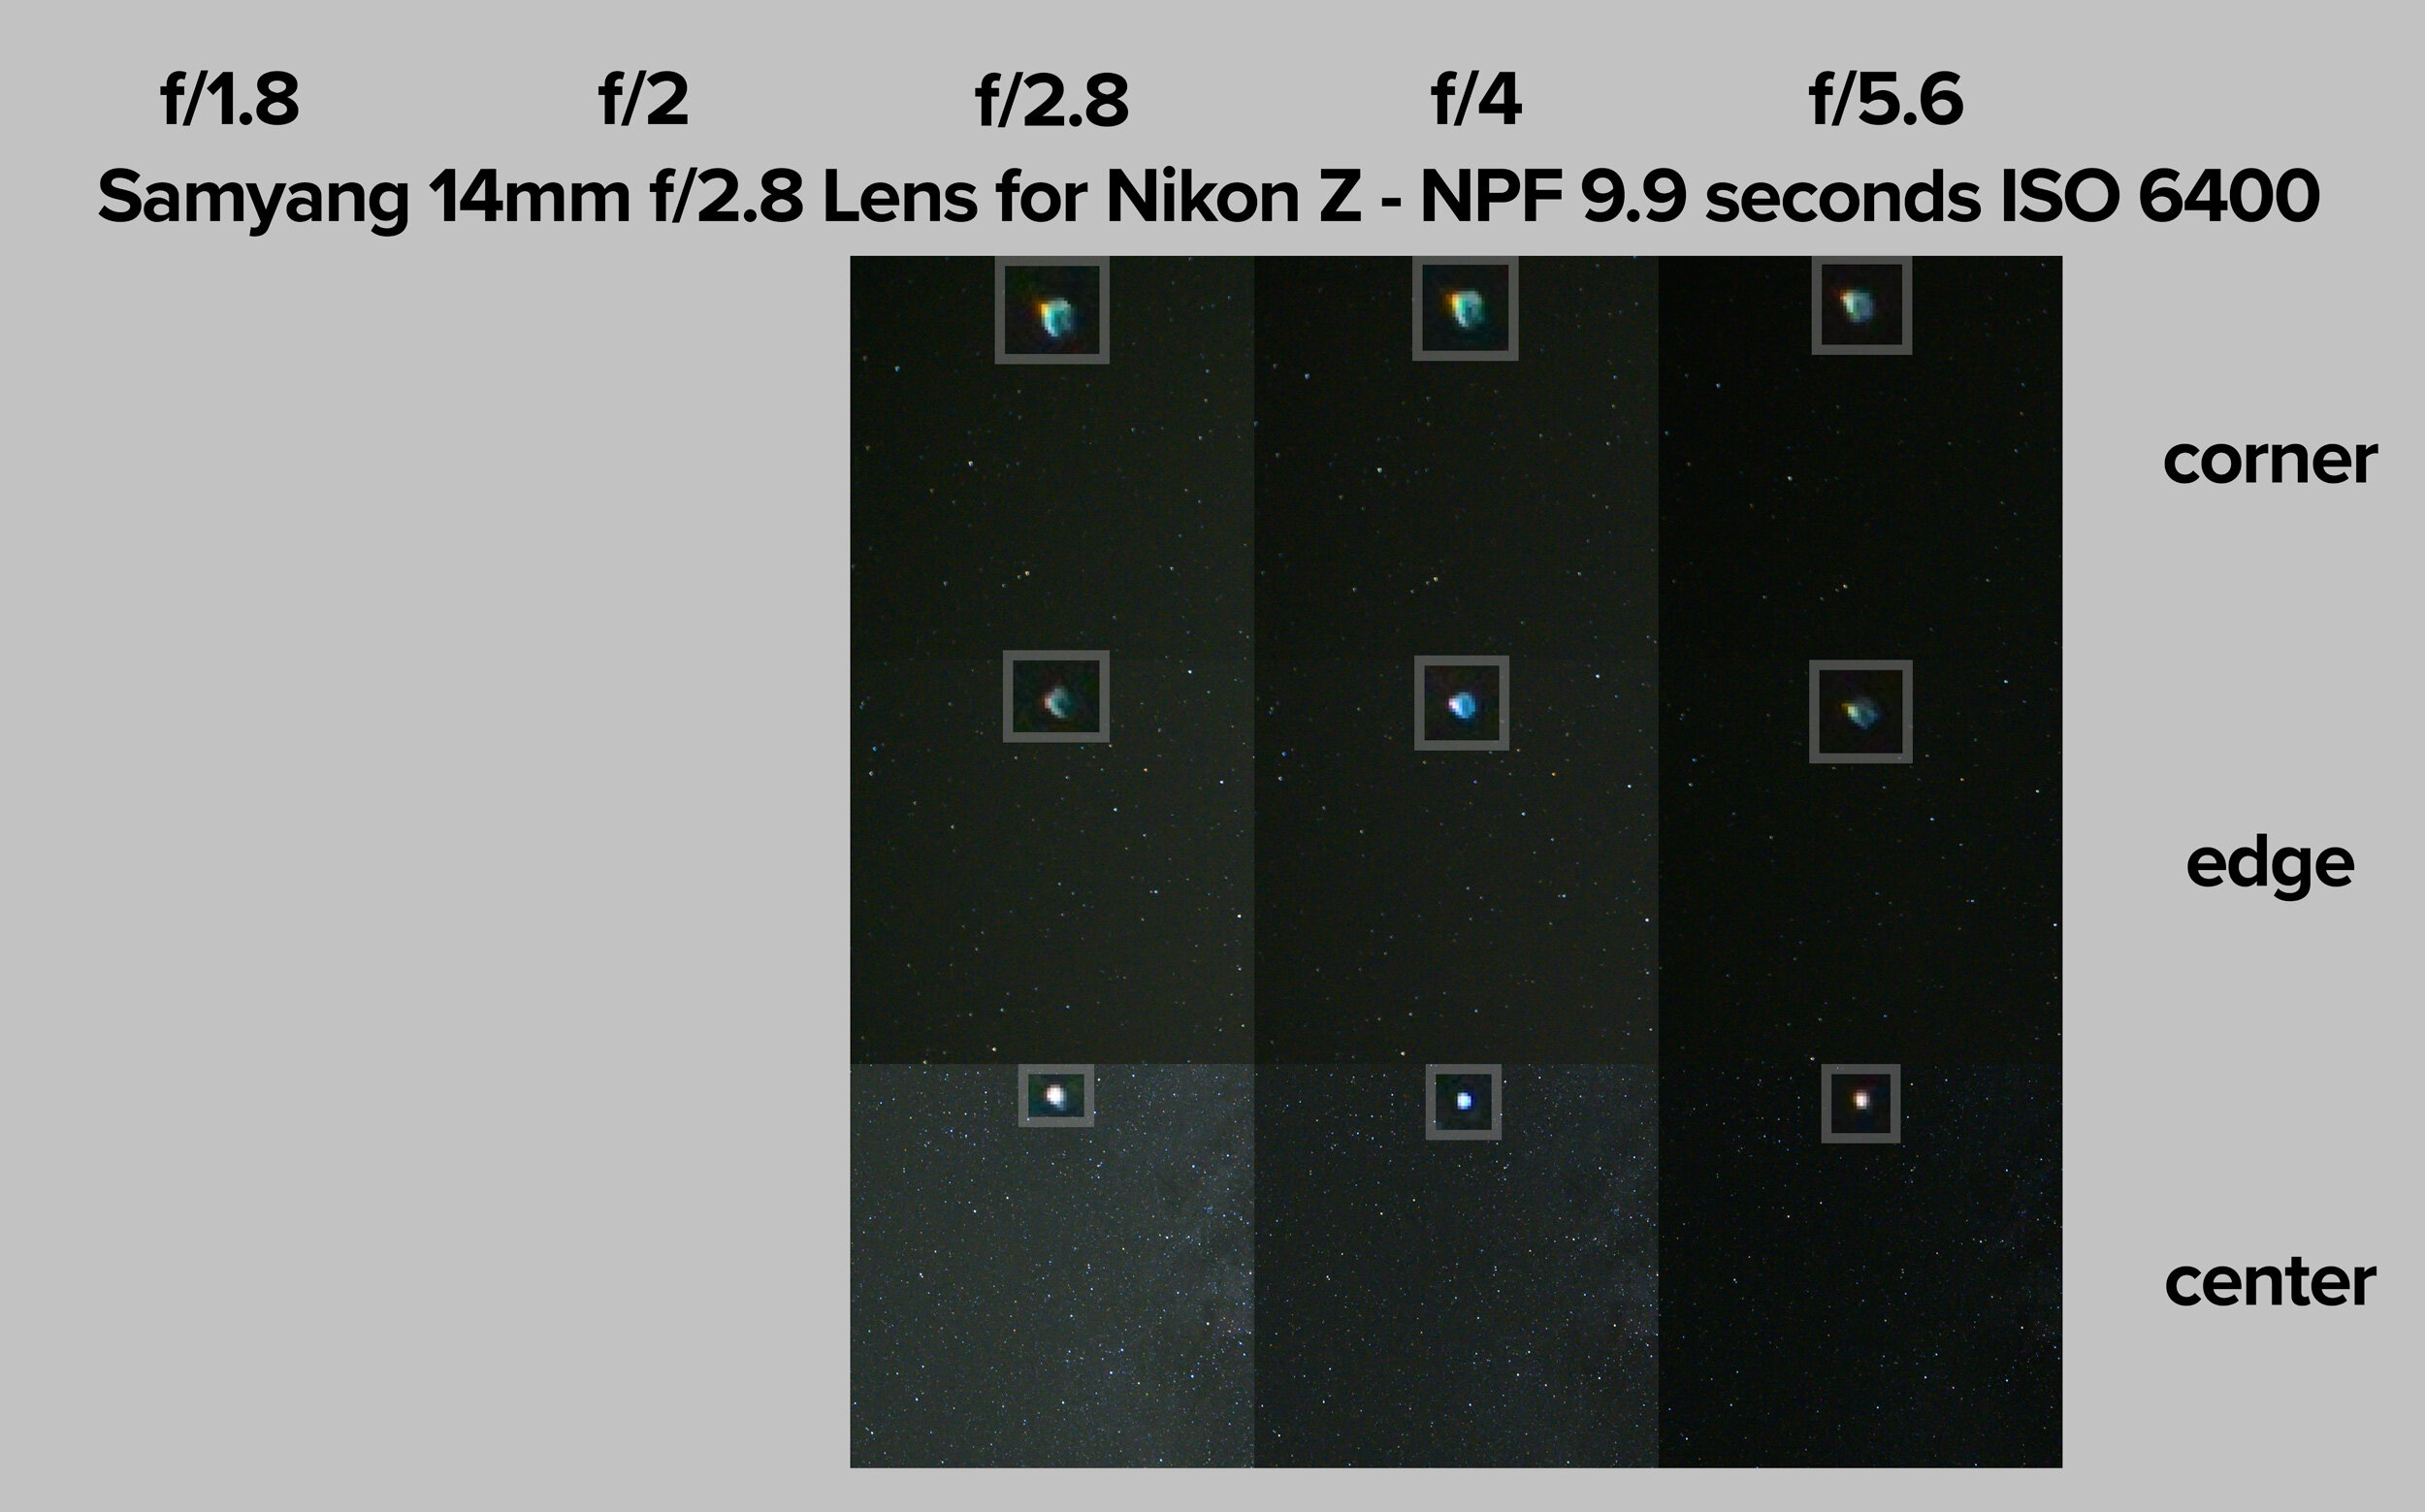
At 800 percent zoom, look at the shape of the stars.

  • acceptable/ideal = round and crisp

  • unacceptable/comatic = irregular shapes that look like birds, flying saucers, donuts, cigars, etc.

It’s that simple.

Wanna pixel-peep? Download the full-resolution JPGs from my test:

The results of my lens test?

  1. I am purchasing the Laowa 15mm f/2 Z-mount and selling my Zeiss Distagon F-mount. Surprisingly, the Laowa has a little less coma than the Zeiss at f/2.8. And the former feels like half the size. That’s a double win.

  2. The Samyang has coma even at f/5.6, so it’s not a good lens for astro-landscape photography.

  3. The Viltrox 20mm f/1.8 is a keeper! No coma at f/2.8. Perfect for star points. It’s heavy, but the focus is smooth and it’s sharp as heck.

Now I can rest easy knowing that my first two native Z-mount lenses are friendly to night photography.

I hope this helps you both understand what coma is, and how to perform your own reliable tests. Now go and test your lenses. Share the results in the comments below or on our Facebook page

Matt Hill is a partner and workshop leader with National Parks at Night. See more about his photography, art, workshops and writing at MattHillArt.com. Follow Matt on Twitter Instagram Facebook.

UPCOMING WORKSHOPS FROM NATIONAL PARKS AT NIGHT