Pemaquid Point Lighthouse. One Luxli Viola light, mounted on a stand out of the frame, camera-left. This image could have been made with traditional light painting, but walking on the wildly uneven rock below Pemaquid Point Lighthouse with only a sliver of moonlight wasn’t fun. Taking the easy way out by working with a stationary light seemed the prudent thing to do. I wanted to show the texture of the rock without distracting from the reflection in the foreground. · Nikon D750 with a Sigma 24mm f/1.4 Art lens. 386 seconds, f/4, ISO 1600.
Any regular reader of our blog will know that all five of us use the Luxli Viola as an added light source in many of our images. In this week’s post, I’ll be discussing using a Luxli or similar light source versus a flashlight, and more specifically explaining the difference between light painting and the newer technique called Low-level Landscape Lighting, or LLL.
“Light painting” has become an umbrella term that many people use to describe any addition of light to a night photograph. In practice, light painting is simply using a hand-held light source that is usually moving to illuminate part or all of a scene during a long exposure. It’s a time-tested technique that has been employed by photographers for decades. It’s fun, it’s versatile and it’s effective. I still use it more often than any other technique in my own work.
Alabama Hills. In order to get the depth of field required for this image at 22mm, I needed to stop down to f/7.1. I also wanted to keep the shutter speed as short as possible to make sure that the stars would not trail. Moonlight and ISO 6400 allowed for an exposure time of just 4 seconds, which isn’t much time to run around with a flashlght, so LLL was my best option for lighting. · Nikon Z 6 with a Tamron 15-30mm f/2.8 lens. 4 seconds, f/7.1, ISO 6400.
LLL is a technique that was developed and evolved concurrently with astro-landscape photography over the past eight years. As opposed to traditional light painting, LLL utilizes very dim constant light sources that are usually maintained in a fixed position during the entire exposure, or possibly even for an entire night. LED panels that feature adjustable brightness and color temperature—such as the Luxli Viola—mounted on a tripod or light stand are the most common light source used for LLL, but any dim light can be used.
The goal of LLL is generally to leave the light on during an entire exposure in order to match the brightness of the foreground in an astro-landscape scene with the brightness of the sky, thus creating a realistic-looking image that requires minimal post-processing.
Advantages of LLL
Why go through all that instead of wielding a flashlight for a few seconds? LLL presents a few advantages.
Again and Again
One big advantage is repeatability. Because the light is fixed, it will be the same from one image to the next, unlike light painting where it can be very difficult to repeat complex lighting from one frame to the next.
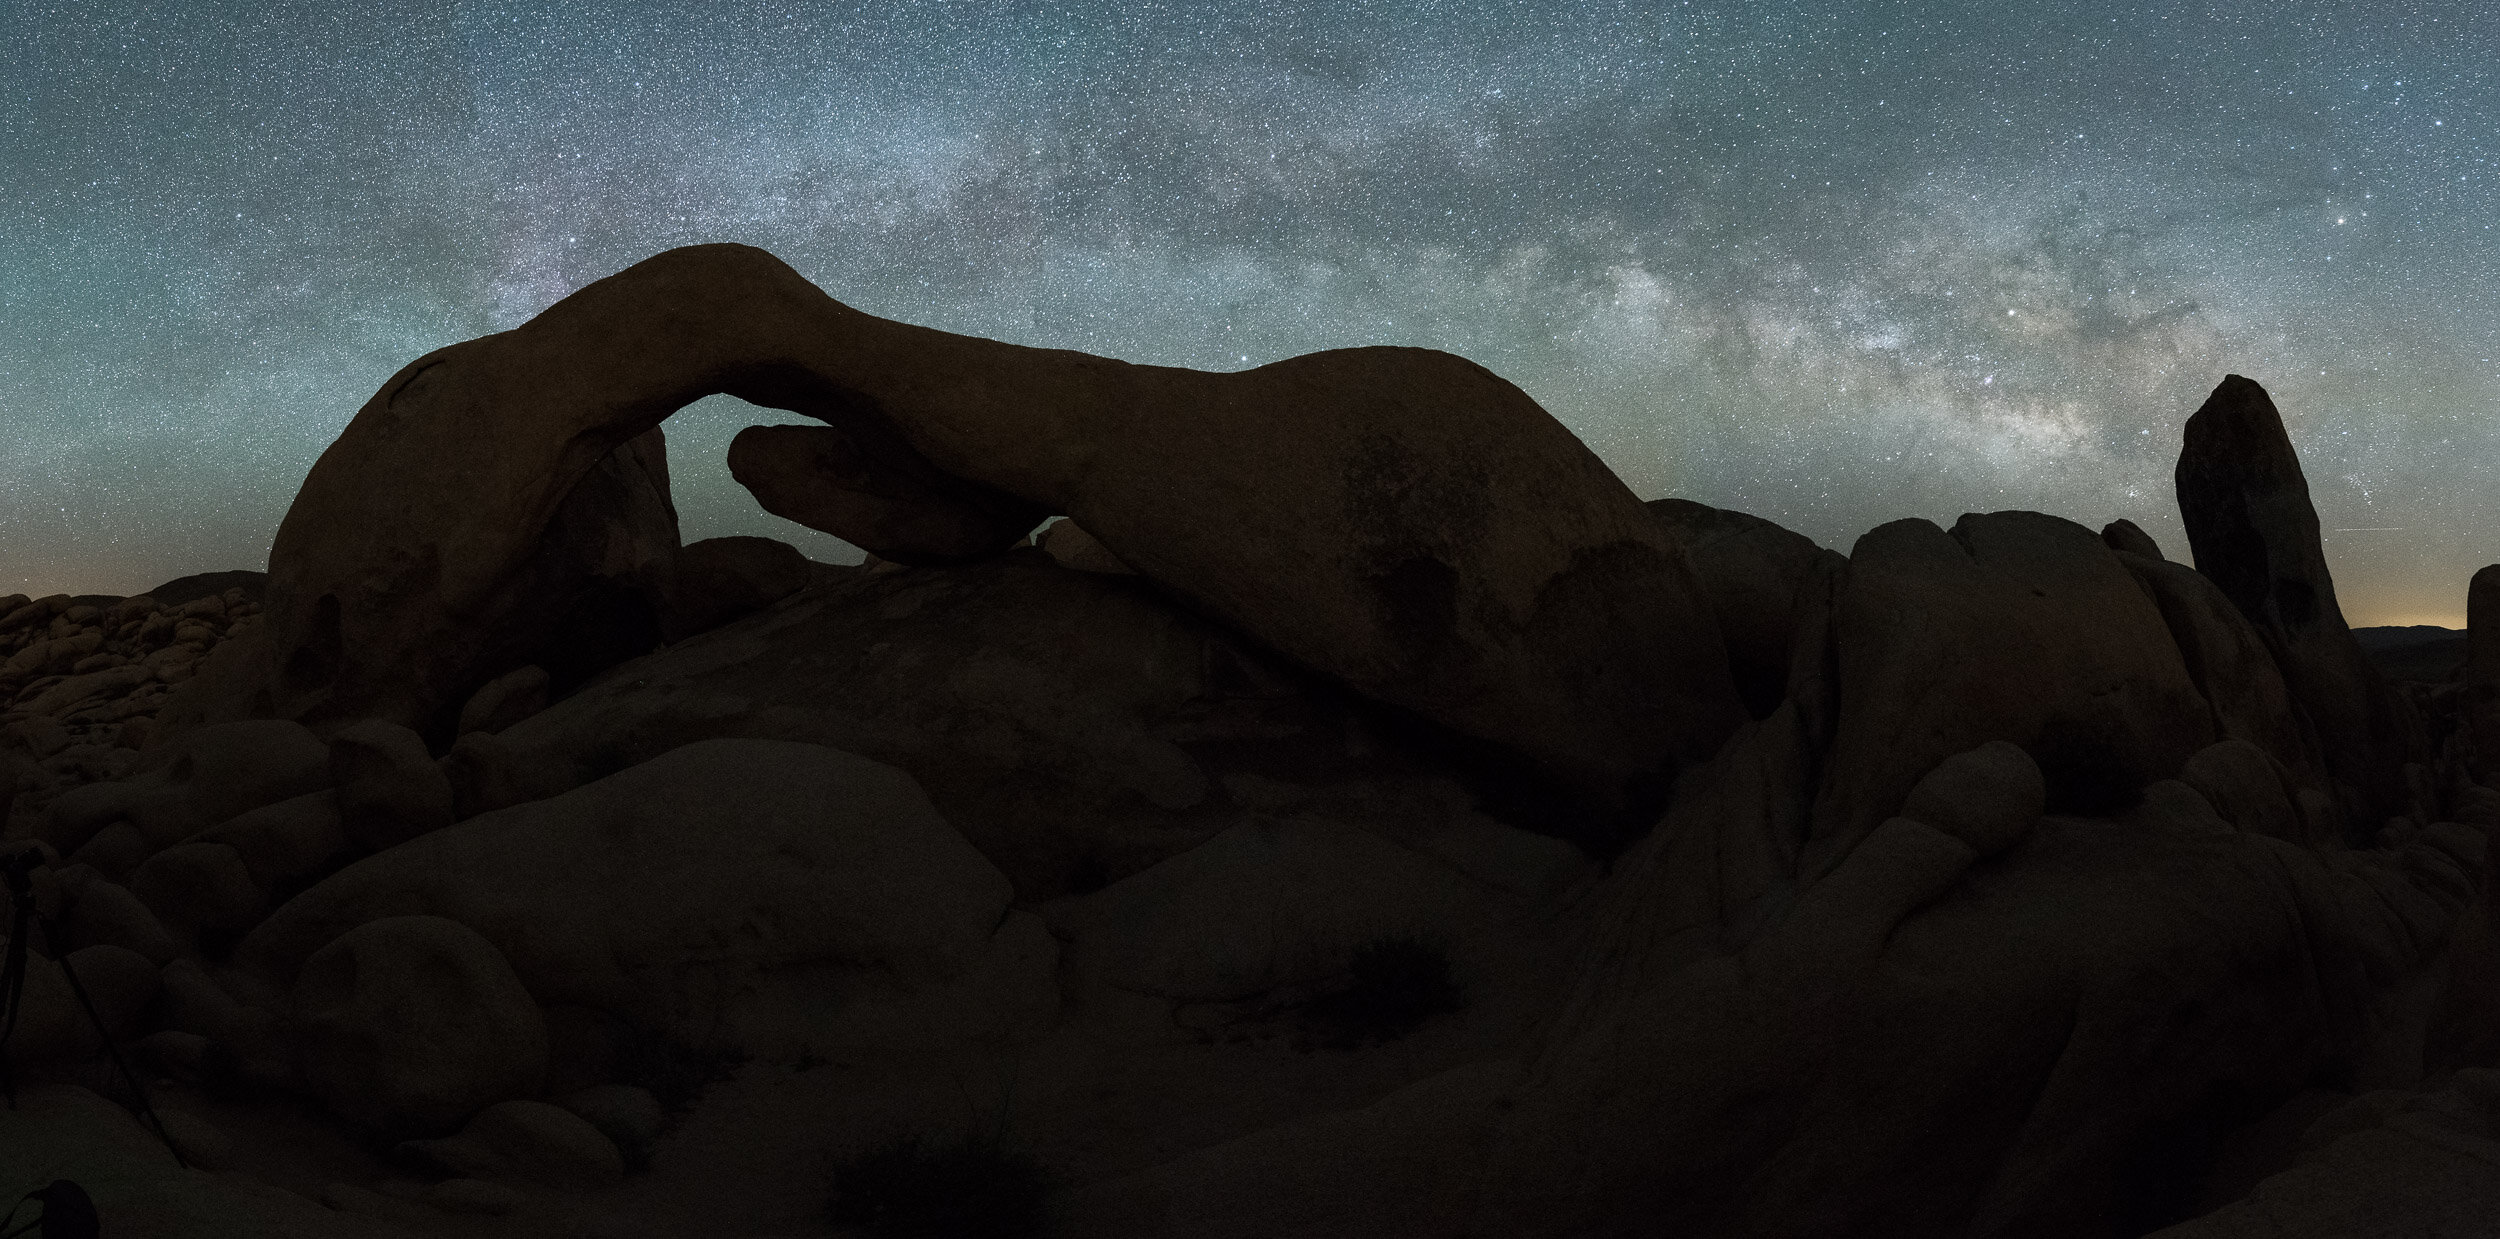
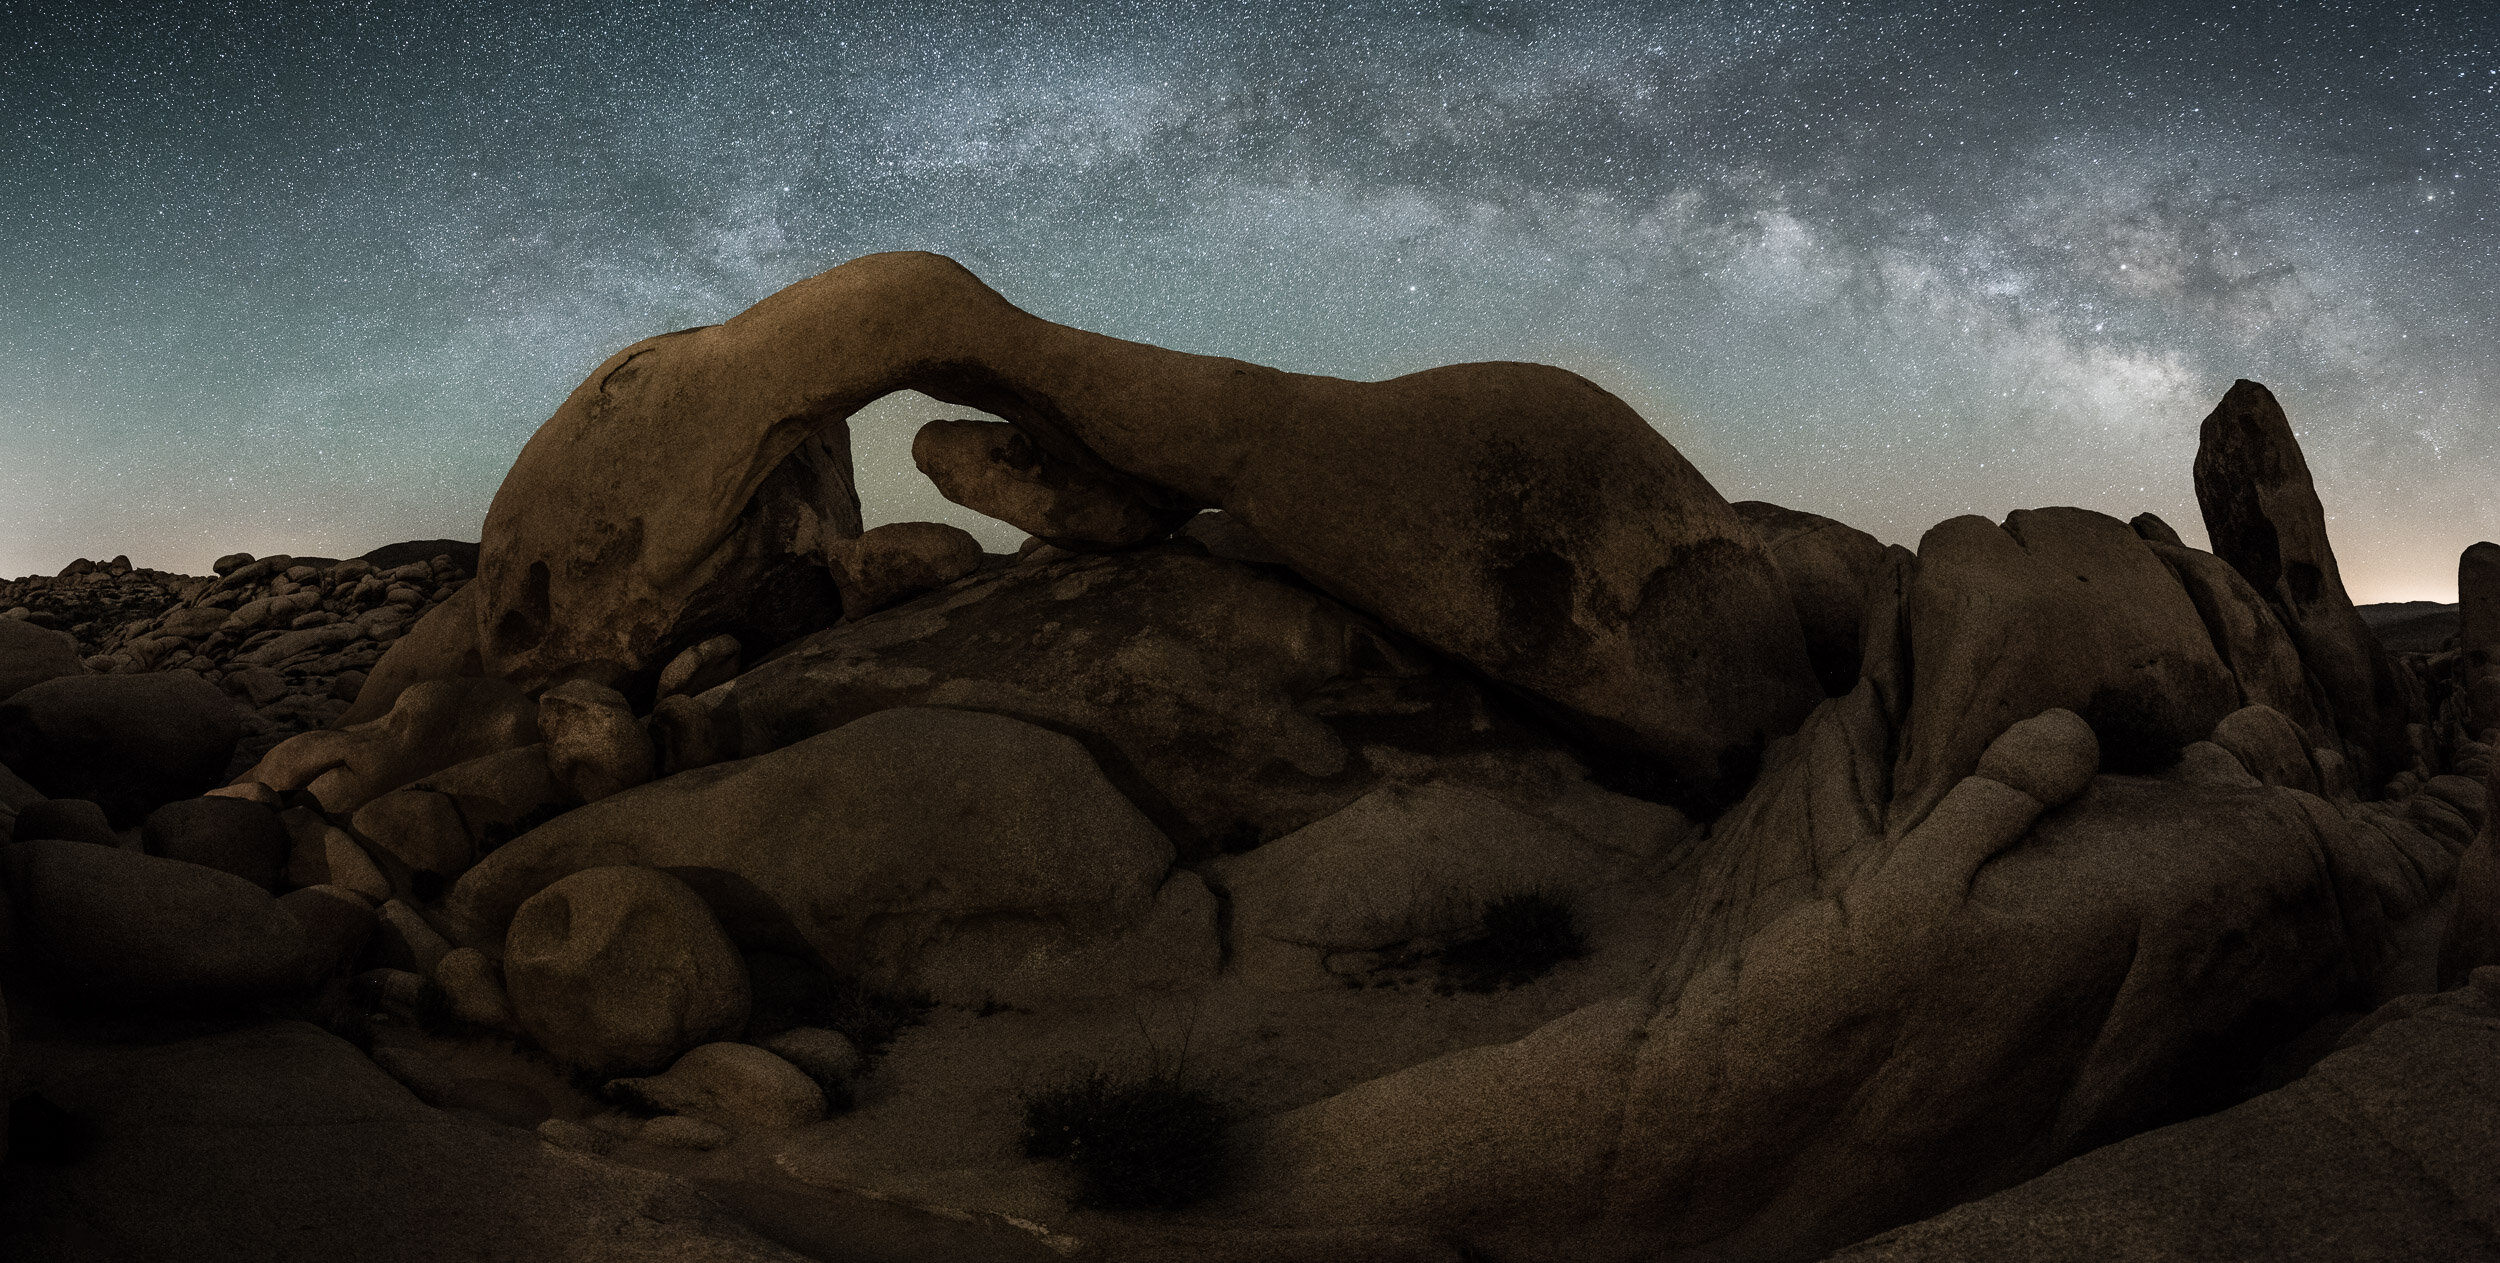
Arch Rock Panorama with Milky Way, Joshua Tree National Park. This before-and-after example shows how LLL can be used to create completely natural looking lighting in astro-landscape images. When making a panorama, having consistent lighting for each frame is critical. I made this image during a workshop collaborating with many of the participants. By using three Luxli Violas in fixed positions at the lowest brightness setting, everyone in the group was able to nail this difficult shot. · Nikon D750 with a Tamron 15-30mm f/2.8 lens. 20 seconds, f/3.2, ISO 6400.
Time Constraints
Night photographers are these days faced with two additional challenges when photographing by starlight, and the LLL technique helps with both of them.
The first problem is one of a technical nature. Astro-landscape exposures typically range from 15 to 30 seconds, which does not leave much time for light painting, especially if a scene is large, treacherous or complex. Imagine trying to light from three or four different positions during a 20-second exposure while navigating uneven rocky ground by starlight!
It’s possible to light various parts of a scene in different exposures and combine them in post-processing to form a final image, but that technique requires a substantial amount of time at the computer in Photoshop, and some people (such as myself) prefer to do the work in the field.
Space Constraints
The second problem has more to do with people than photography. With increased numbers of photographers and non-photographers alike out enjoying nature and our national parks at night, large numbers of bright flashlights being waved around willy-nilly has ruined numerous masterpieces. National Parks at Night has always stressed communication and collaboration during our workshops to enable groups of people to photograph together without getting in one another’s way, but not everyone is as considerate as our awesome workshop participants!
The Rattle Dragon, Borrego Springs. Nine stacked frames, each shot at 3 minutes, f/8, ISO 320. Ricardo Breceda‘s amazing 350-foot serpent in the Anza Borrego desert photographed with three Luxli Viola lights on stands to illuminate the sculpture. I could have used traditional light painting techniques for this image, but lighting such a large creature from different angles was more easily achieved with fixed-position LLL. · Nikon D780 with a Nikon 24-120mm f/4 lens.
Many people who use LLL are striving for images that don’t look like any light has been added to their images. Their goal is to add just enough light to balance the foreground exposure with the sky and call it done.
For me, old habits are hard to break. Although I use and love my Luxlis on almost every night shoot, my own technique is more of a hybrid of LLL and light painting. I’ve been known to mount a Luxli on a boom arm and hold it over my head while walking along a clifftop or under redwood trees. In other situations I might use a Luxli mounted on a stand, or propped against a rock to light part of a scene, and light the rest of the image with a flashlight. As much of my work is done where the human-made and natural environment intersect, I’m not necessarily trying to make my images look completely natural. I try to make them look more interesting with interesting light.
Regardless of the technique you use to light your night shots, the goal is the same––either to add emphasis and draw the viewer’s attention to a particular part of a photograph, or to fill in dark and underexposed areas to make for a better exposure.
LLL Gear
If you are ready to jump in and give LLL a try, you could rest your light source on a nearby rock or tree branch, or you could start with just one panel light on a second tripod—but more than likely you’ll soon end up with two or three lights and accompanying stands. The Impact LS-RL7 Reverse Legs Light Stand is a good option, as is the Manfrotto MS0490A Nanopole. And if you want the lightest of stands, the Nanopole comes in a Carbon Fiber version that weighs in in at a tidy 1.8 pounds.
I mentioned the Luxli Viola at the beginning of this article as NPAN’s LED panel of choice. It is one of the more expensive LED panel lights available, but the quality of the light, the variability of color temperature (as well as the ability to create almost any color you can imagine) and the useful app that allows for remote control of one or multiple Luxlis all make it more than worth the cost. The Viola also comes with a mini ball head that makes aiming the light right where you want it much easier.
The Luxli Viola, the LLL tool of choice for all the NPAN instructors in most situations.
A couple of budget options to get you started are tea lights from a dollar store or diffuse inflatable camping lights, but you probably won’t get good color from them.
LLL Tips
So, how do you light the landscape with low-level light? The basic concepts of LLL and traditional light painting are similar. The primary difference is that your light or lights are stationary, and usually much dimmer than light painting tools. Here are a few guidelines:
Light from 45 to 180 degrees from the camera, never from the camera position.
Compose, then focus, then determine your base exposure, then add light where needed.
Make test exposures, review the results, make adjustments.
Move the light, be mindful of shadows, adjust the intensity as needed.
If you are using a Luxli or other variable color tool, match or contrast the color of your light to the overall scene.
If using a Luxli, consider pairing it with their free Composer app, which allows you remotely change the intensity, color temperature and hue, rather than having to walk back and forth between the light and the camera to make changes.
Work with a partner, or even in a small group, sharing the lighting and the work.
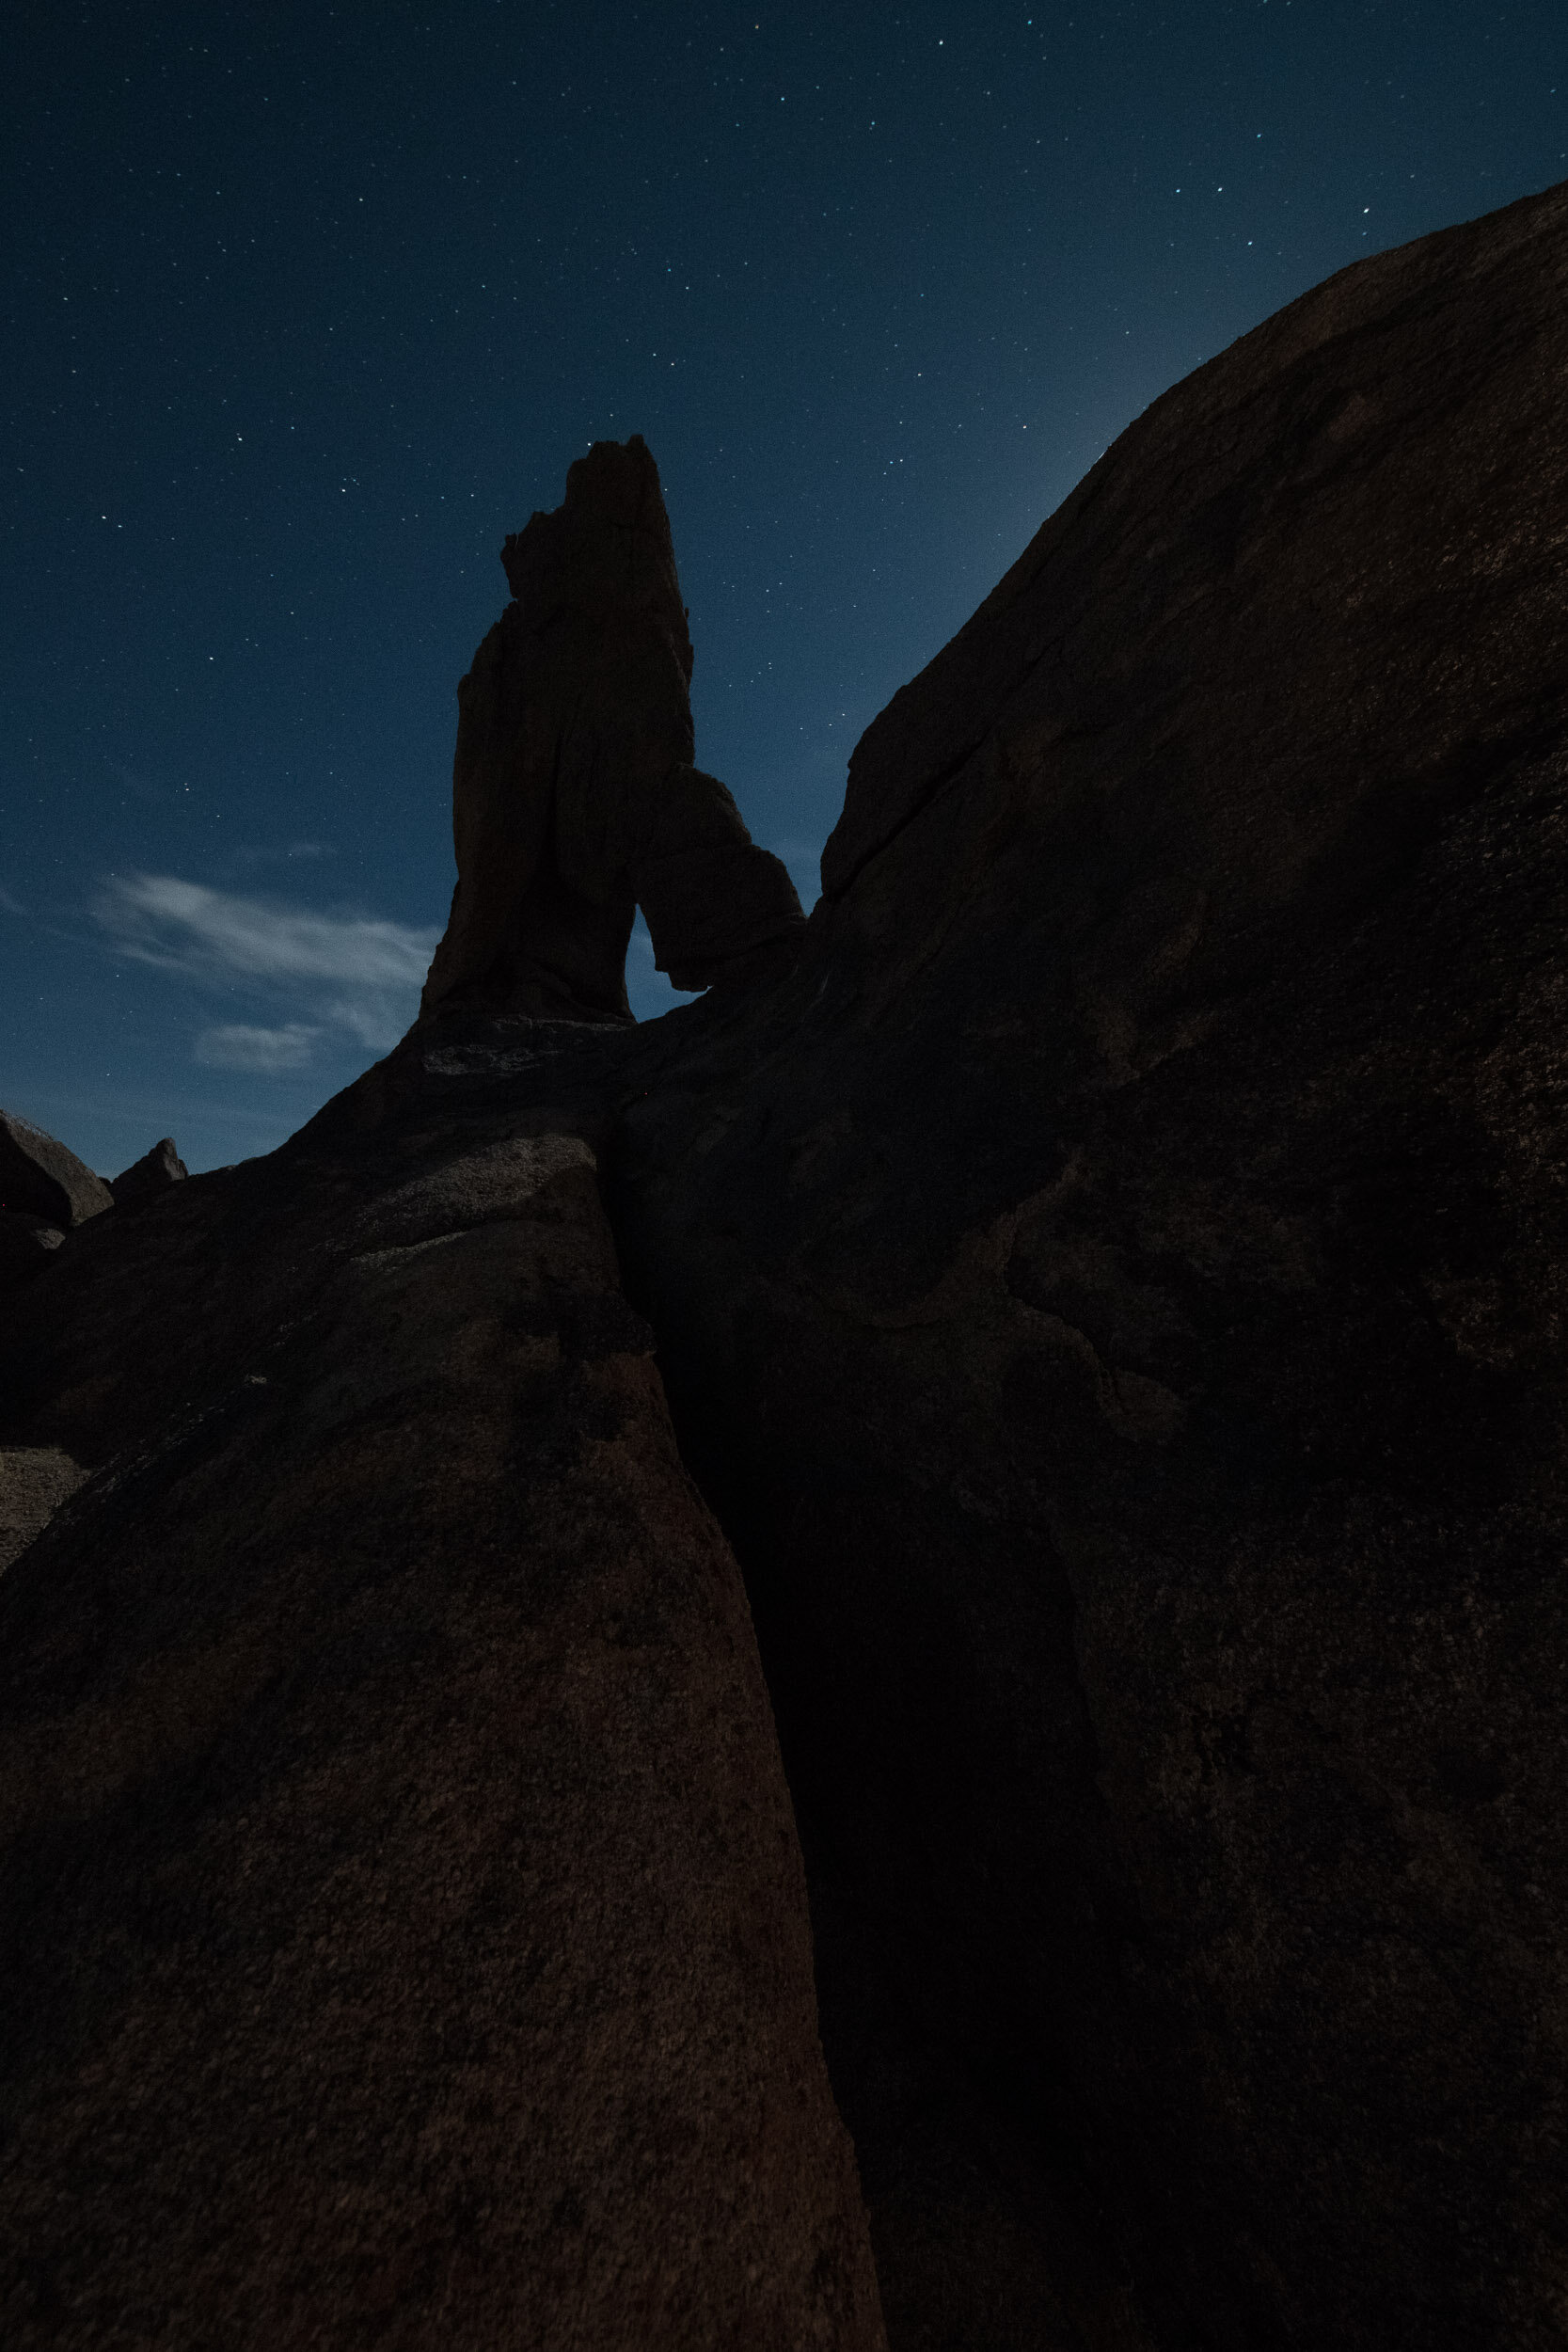
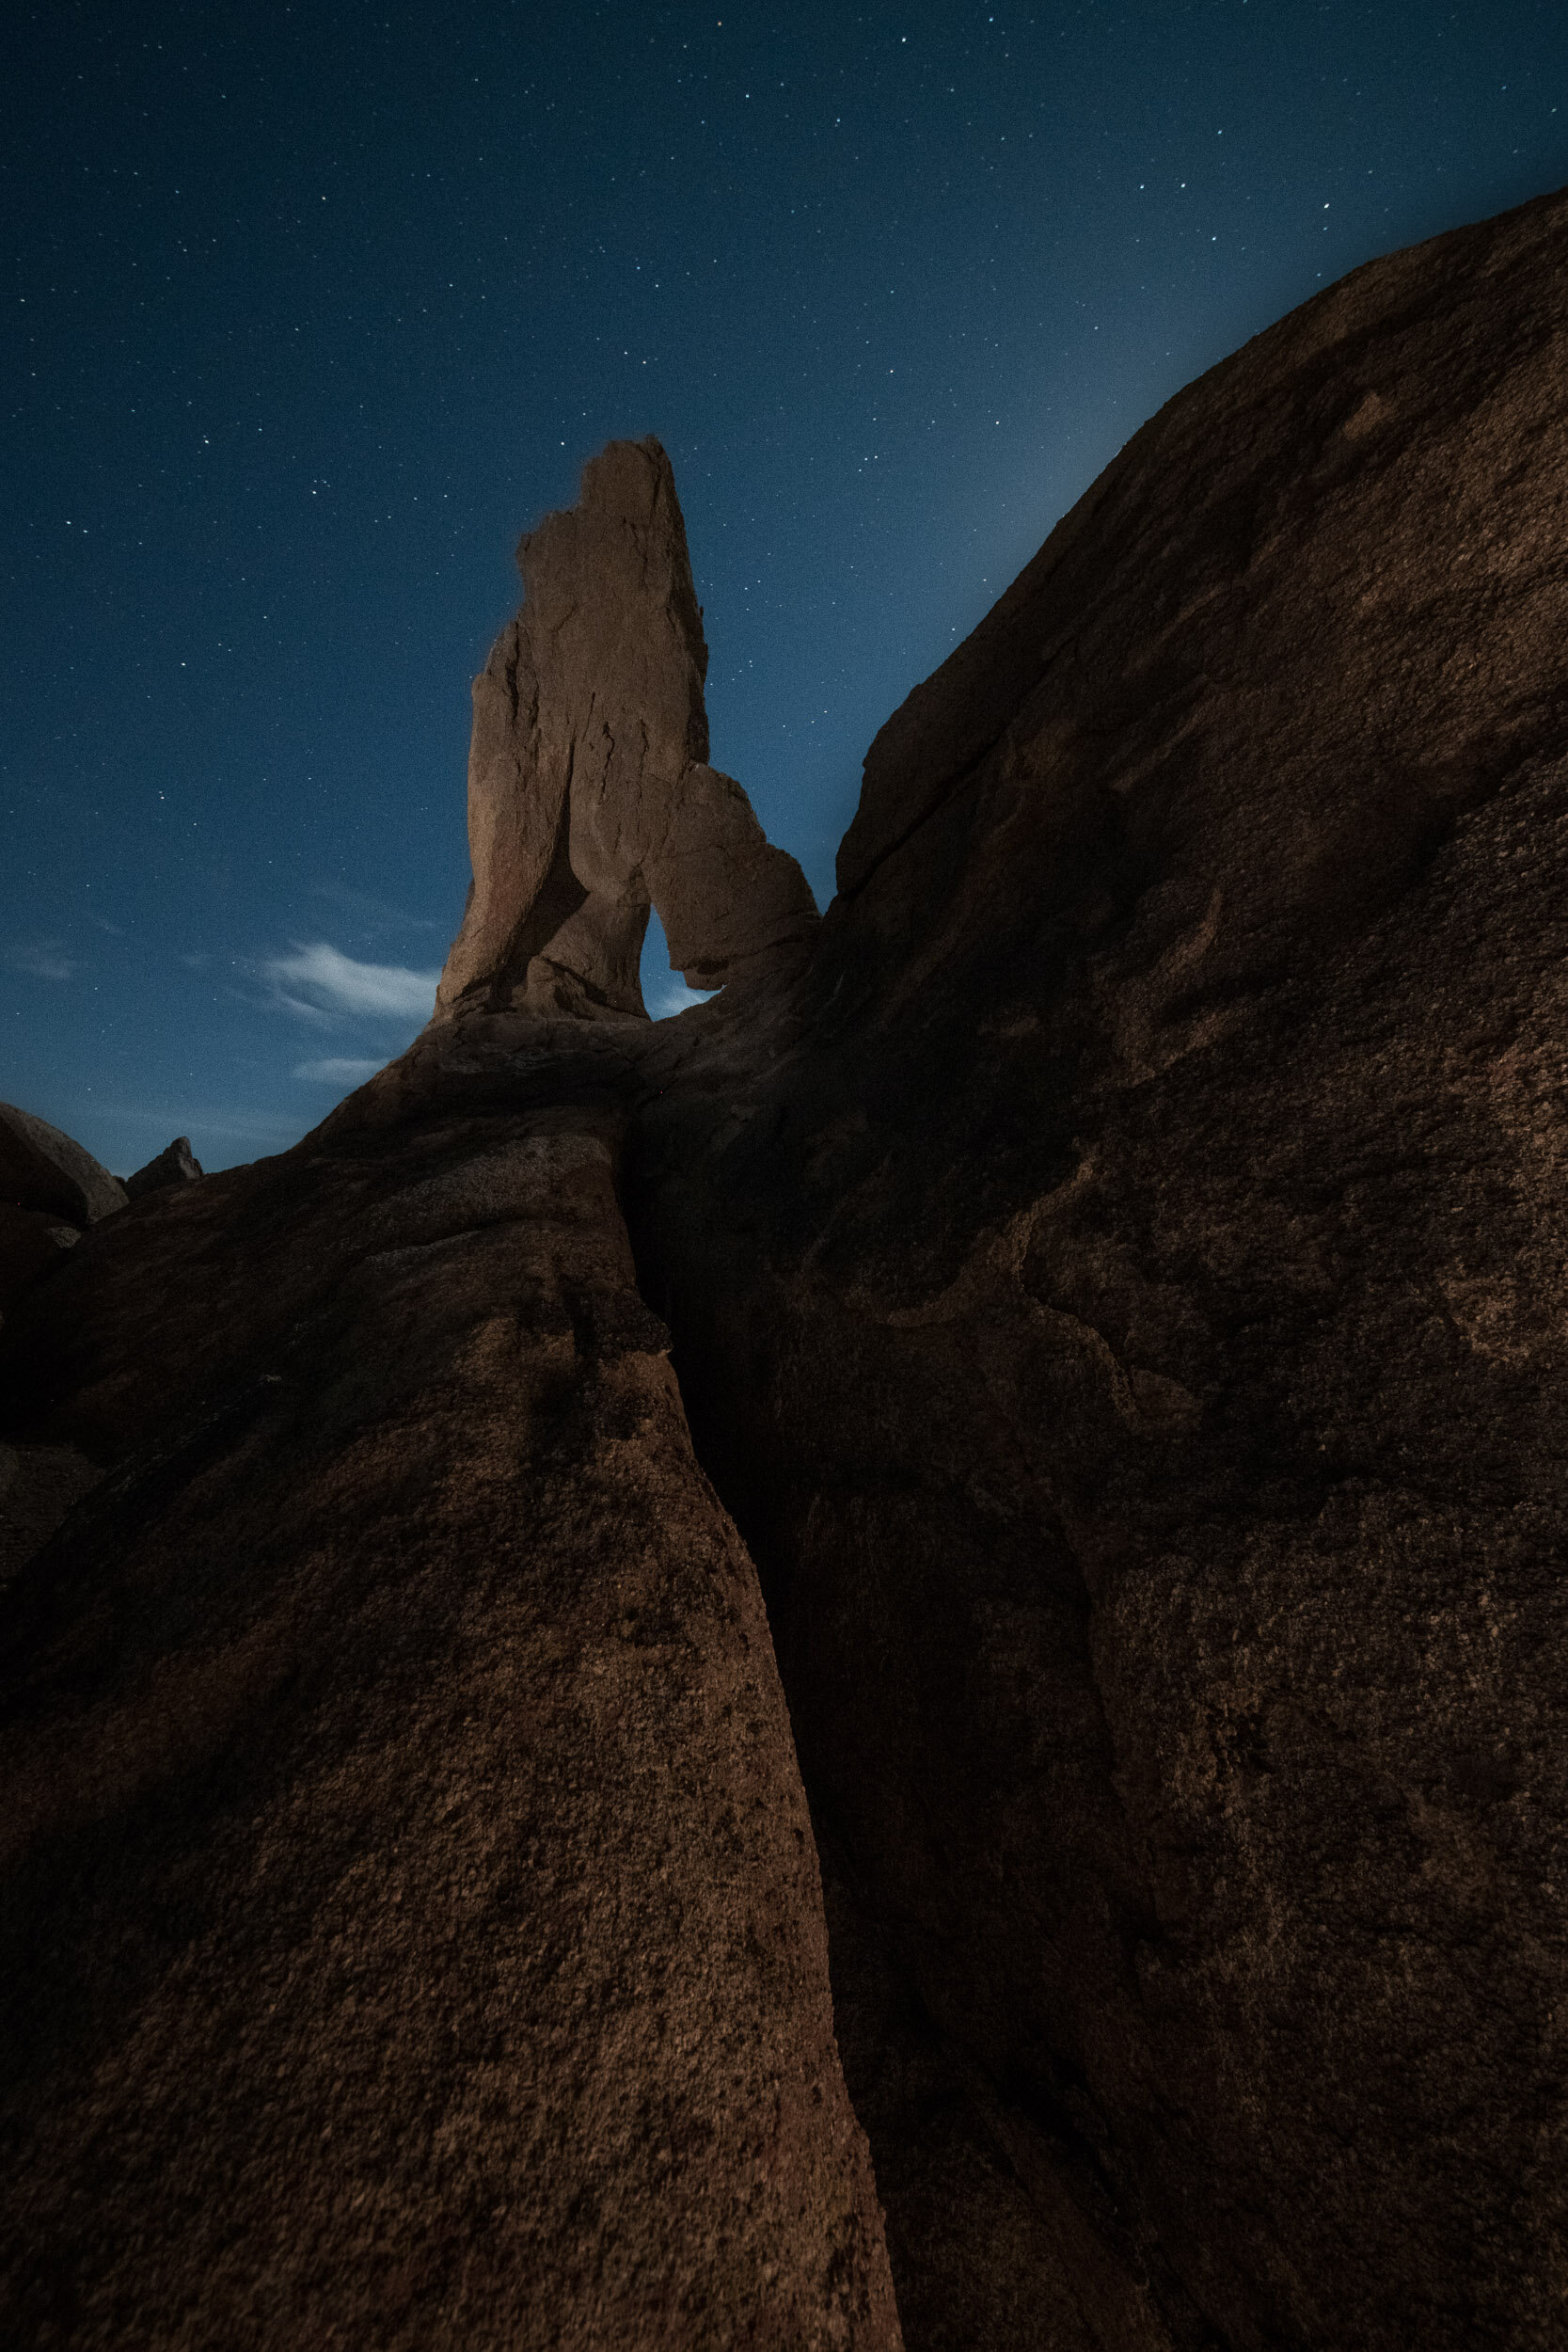
Lady Boot Arch, Alabama Hills. Here’s another before and after example. The full-ish moon was rising behind the rock on the right. I was more in the mood for star points than trails, so I needed to keep the exposure short. The landscape was full of narrow crevices that seemingly were designed for twisting ankles and banging knees. I used light painting on a different version of this image that night, running like a nutcase between the formations during the short exposure, but that wasn’t an option for this shot. One light was on a stand high to camera-right, and another was leaning against a rock to the left of the arch. · Nikon D780 with an Irix 11 mm f/4 lens. 25 seconds, f/8, ISO 3200.
Wrapping Up
Regardless of the tools you use, Low-level Landscape Lighting is an essential technique to have in your night photography toolbox.
If you’re inspired to get out and try this, or if you’ve done it before, we’d love to see your images. Share your images in the comments section or on our Facebook page, or post them on Instagram and tag us (@nationalparksatnight).


