Five Questions: Nikon Z 8 for Night, Perseids, Aurora Apps and More

The night photography world is full of questions, and we’re happy to help with answers.

This installment of our β€œFive Questions” series features inquiries about the new Nikon Z 8, locations to shoot the Perseids, aurora apps, filter systems and an Irix lens.

If you have any questions you would like to throw our way, please contact us anytime. Questions could be about gear, national parks and other photo locations, post-processing techniques, field etiquette, or anything else related to night photography. #SeizeTheNight!


1. The Nikon Z 8 and Night Noise

Question:

Since the Nikon Z 8 was announced this week, do you have an opinion about it with respect to night photography and noise, and how it compares to Nikon’s other mirrorless cameras? I’m currently shooting with a D850, which I really like but it’s getting long in tooth. In your opinion, what is the best high-res Nikon mirrorless camera for night photography at this point? β€” Jeff

Answer:

Three of our team members shoot with the Nikon Z 6II, one with the D780 and one with the D5. Between all of us, we’ve shot the Z 7 and Z 9, but none of us owns one, and none of us intends to own one. That tells you something about our preferences, but it doesn’t mean those are bad cameras, even for night photography. Shooting priorities matter.

We haven’t done methodical comparisons between the Z models, and the Z 8 is not yet shipping, so we have no experience with that model. But from our experience shooting Z cameras, here’s what we know:

We have found that the Z 6II has a slight edge in high ISO characteristics, with the Z 9 not that far behind. The Z 8 features the same 45.7-megapixel full-frame sensor and Expeed processor as the Z 9, so the former should perform as well as the latter does for a high-resolution camera at night. In other words, the Z 8 is kind of a mini Z 9, so we’d expect the same results.

That would mean the Z 6II would still be the best option for low-light photography in terms of high ISO noise, all things being equal.

However, all things usually aren’t equal. There is a lot that goes on in determining the best noise characteristics of any given camera. You could do a side-by-side test by shooting the same scene with all of same parameters, but that may not be the best test for night photography.

For example, when shooting to freeze star points, you need to use a faster shutter speed on a camera with a higher pixel count than you would on one with a smaller pixel count to achieve the same visual result. This means you need to use a faster ISO on that higher-resolution camera. Now you are no longer comparing apples to apples.

The Z 8 autofocus is sensitive down to -9.0 EV, making it the best camera autofocus for low-light photography.

There are other considerations with the higher pixel count as well. Such as:

  • Do you like to do a lot of star stacking? High-resolution files can really bog down that process due to their sheer size.

  • Do you like to make giant prints? If so, a higher-resolution camera could be a great choice.

  • Another consideration would be the better low-light focusing the Z 9 and Z 8 haveβ€”a feature called β€œStarlight View.” If you have trouble focusing at night, this capability alone may trump everything else.

  • The Z 8 simulates the Z 9 in high-speed capture, advanced auto-focusing capabilities and superhigh-resolution video. If you like to shoot sports and wildlife in addition to night photography, those robust features would be a huge asset.

In short, we have not shot with the Z 8 yet so we can’t really say how it will compare with the other Z models. We do look forward to getting our hands on one and putting it through its paces, but seeing as none of us shoots with the other higher-resolution cameras, my guess is that our collective preference will remain the Z 6II. β€” Tim

2. Perseids from the Curb

Question:

Can you recommend someplace I could go to photograph the Perseid Meteor Shower where I’d have the possibility of an outstanding foreground and dark sky for the meteors? One caveat: I have a knee issue. β€” H.

PhotoPills confirms that Great Sand Dunes National Park could be a great Perseids option.

Answer:

It sounds like you need a good roadside location. You also definitely need someplace with a north/northeast view and no light pollution in that direction, nor a mountain range blocking the sky.

Great Sand Dunes National Park is awesome for those criteria. You can shoot roadside and have the dunes in front of the mountains with the sky above. I’d even be tempted to attempt a vertorama with a blue hour bottom and star field above.

Badlands National Park also has some spectacular pull-outs where you could do the same. The beaches of Olympic National Park fit the bill, but the ones with the best foregrounds require at least a little bit of a walk, and slippery stones may be troublesome if the tide is receding. At Crater Lake National Park, shooting from the lodge over Wizard Island could be amazing. β€” Matt

Note: For more information about shooting meteor showers, be sure to check out our e-book Great Balls of Fire.

3. Tracking Auroras

Question:

Can you share the aurora tracking app that you use? β€” Deborah C.

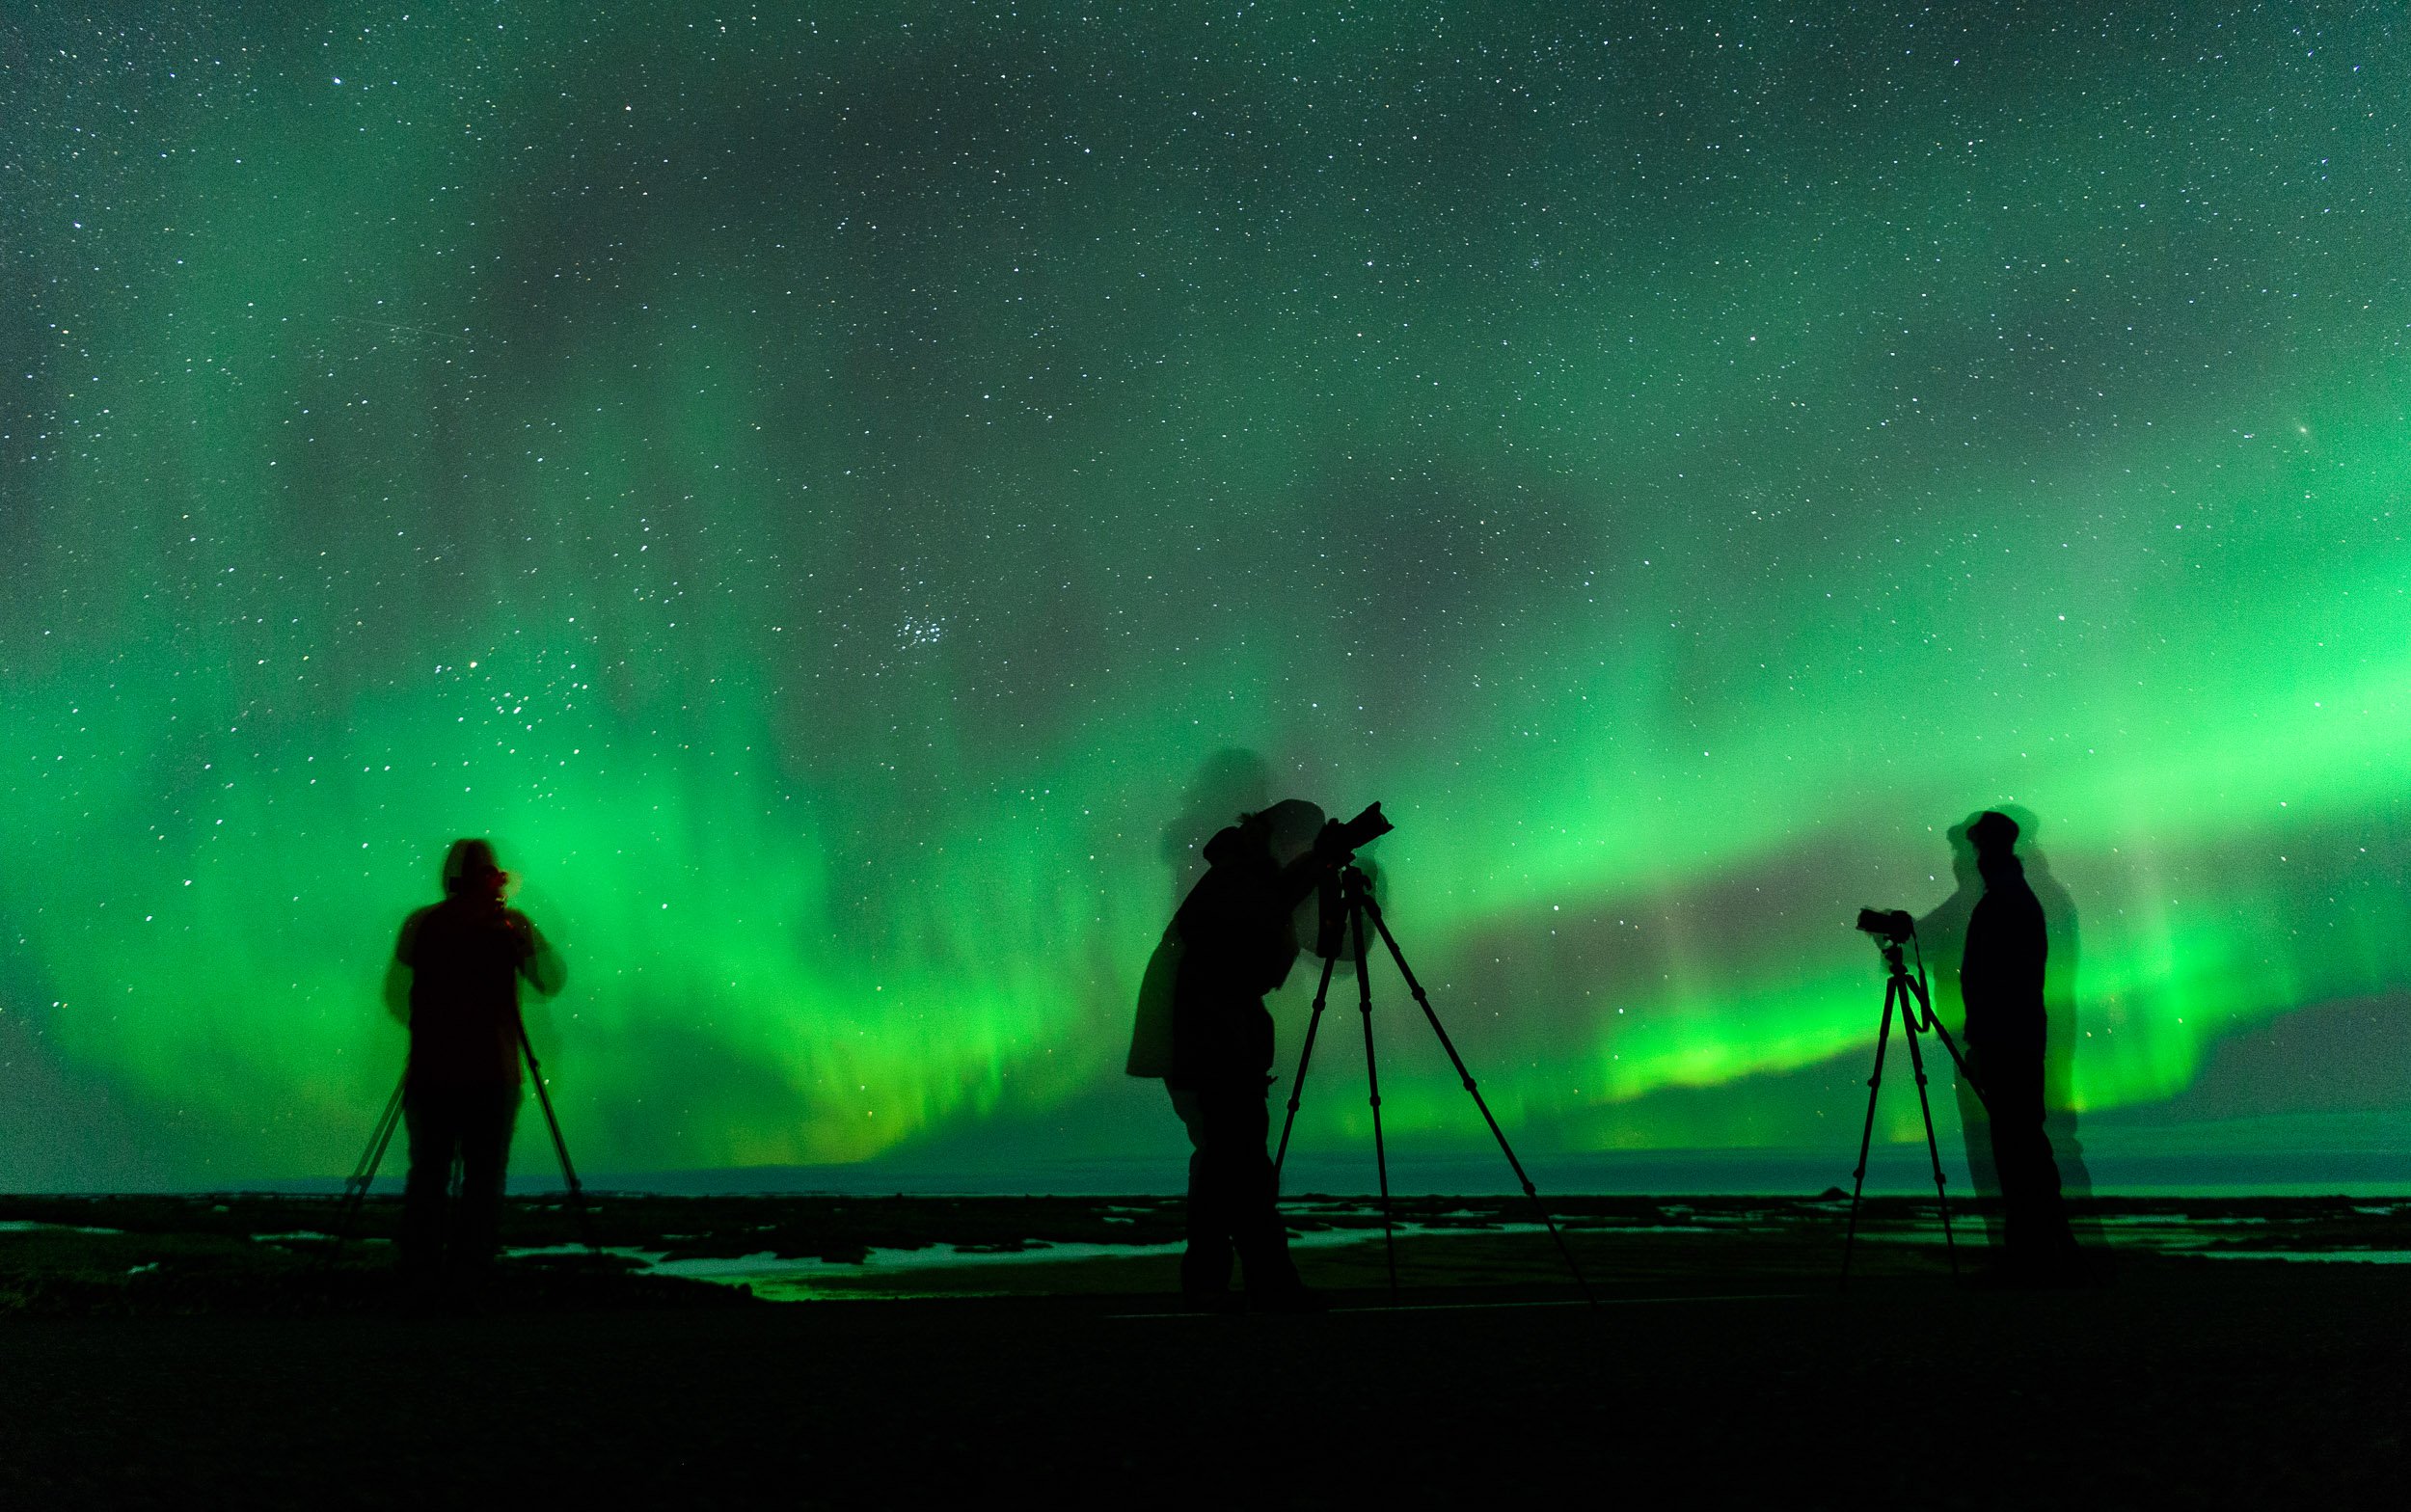
Vatnajokull National Park, Iceland. Β© 2023 Chris Nicholson. Nikon D5 with a Nikon 14-24mm f/2.8 lens. 4 seconds, f/4, ISO 6400.

Answer:

The answer is ... several! I’m on Android, and I use My Aurora Forecast. Lance, Tim and Matt are on iPhone, and they use Aurora Forecast (Lance, Tim), My Aurora Forecast & Alerts (Matt) and SpaceWeatherLive (Matt).

We recommend using more than one. Pooling info from different sources can give a more accurate picture of what might happen and where. Also, it can be nice to set up an automated alertβ€”sometimes we can end up shooting auroras on a night we didn’t know they’d happen. β€” Chris

4. Finding a Filter System

Question:

I’d like to get a filter system that works with my lensesβ€”primarily an 82mm and 95mm. But I also have a very concave lens (the Sigma 14-24mm f/2.8), so I’m thinking I need a 150mm system. β€” Rachna

Answer:

Welcome to the wonderful world of filters! This is a great way to extend long exposures during the day and night.

I’m a fan of square systems, as they offer the most versatility. Going down the path you suggest, I suggest you invest in these three things:

  1. NiSi 150mm Filter Holder for Sigma 14-24mm lens

  2. the adapter rings for 105mm, 95mm and 82mm filter threads

  3. Starter Kit that includes 6-stop, 10-stop and 3-stop graduated 150mm neutral density filters

This is pricey but gets you everything you need, albeit in a big kit. (Most people who invest in 150mm filters find them cumbersome, but that’s the way it goes.)

Alternatively you can use rear ND filters for the Sigma and then use 100mm filters for your other lenses. This would be more cost-efficient, as well as a smaller footprint on your lenses and bag. The caveat is that there are no rear graduated ND filters, so scenes that would normally call for them would need to be shot with multiple exposures and blended in post.

But if you do choose to go that way and use a 100mm square filter system, the NiSi V7 Advance Kit includes pretty much everything you would need except the 95mm adapter. However, the caveat with this system is that the circular polarizer will work only with lenses 82mm or smaller.

Another thought is that most mirrorless lenses are smaller than their DSLR counterparts, and they don’t have bulbous front elements. Therefore, switching to mirrorless also facilitates a more compact and cost-efficient filter system.

Finally, why do I keep recommending NiSi? There are lots of filter systems that are great. I happen to like NiSi because they are a good value. I’ve been using them for more than 5 years and couldn’t be happier. β€” Gabe

5. Eyeing the Irix 21mm

Question:

I have a Canon R6 mirrorless camera and I’m looking for a good, fast astro lens. I noticed you recommended the Irix 15mm f/2.4 lens. Is the Irix 21mm f/1.4 good for astro too? β€” Jim

Answer:

I’ve shot with the Irix 15mm for years and am quite fond of it. You need to stop down to f/3.2 to eliminate most of the coma. I have not shot with the 21mm yet but will be receiving one soon. Based on their other f/1.4 lenses, I’d expect that you’ll need to stop down to f/2.8 or thereabouts to minimize the coma.

The main thing for you and the R6 is that these lenses are DSLR-mount only. If you don’t mind using the adapter, then I’m sure either would be a great lens for youβ€”the choice just depends more on your style of shooting. The 15mm focal length is quite wide, so you really need a foreground.

My first choice would be the Canon 15-35mm f/2.8, which wide open should get you coma similar to the stopped-down Irix lenses. But if that is not in your budget, I’d go with whichever of those Irix lenses fits your shooting style the best. β€” Lance

Chris Nicholson is a partner and director of content with National Parks at Night, and author of Photographing National Parks (Sidelight Books, 2015) and Photographing Lighthouses (Sidelight Books, 2023). Learn more about national parks as photography destinations, subscribe to Chris' free e-newsletter, and more at www.PhotographingNationalParks.com.

UPCOMING WORKSHOPS FROM NATIONAL PARKS AT NIGHT

A Whole New Bag of Tricks: Check Out the Features in Adobe's Latest Update

Earlier this week Adobe released its latest updates to Lightroom and Photoshop. As happens sometimes, this particular release included some tweaks that are exciting for night photographers.

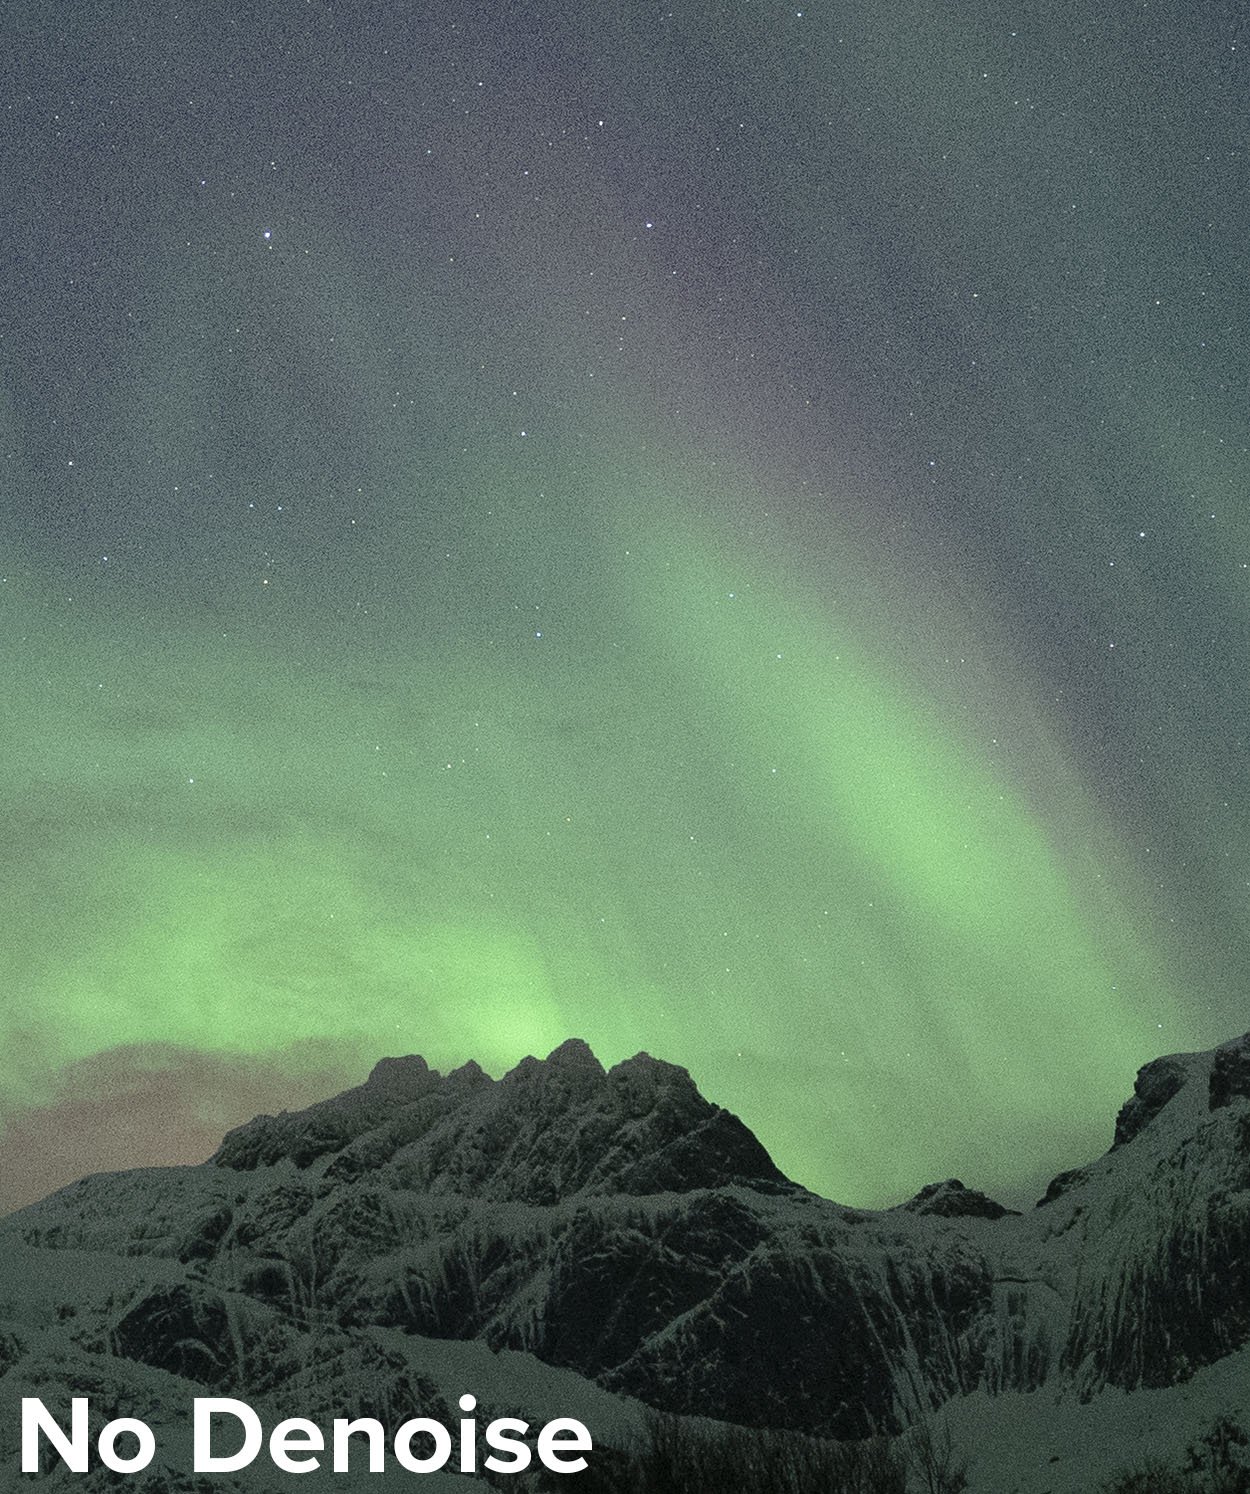
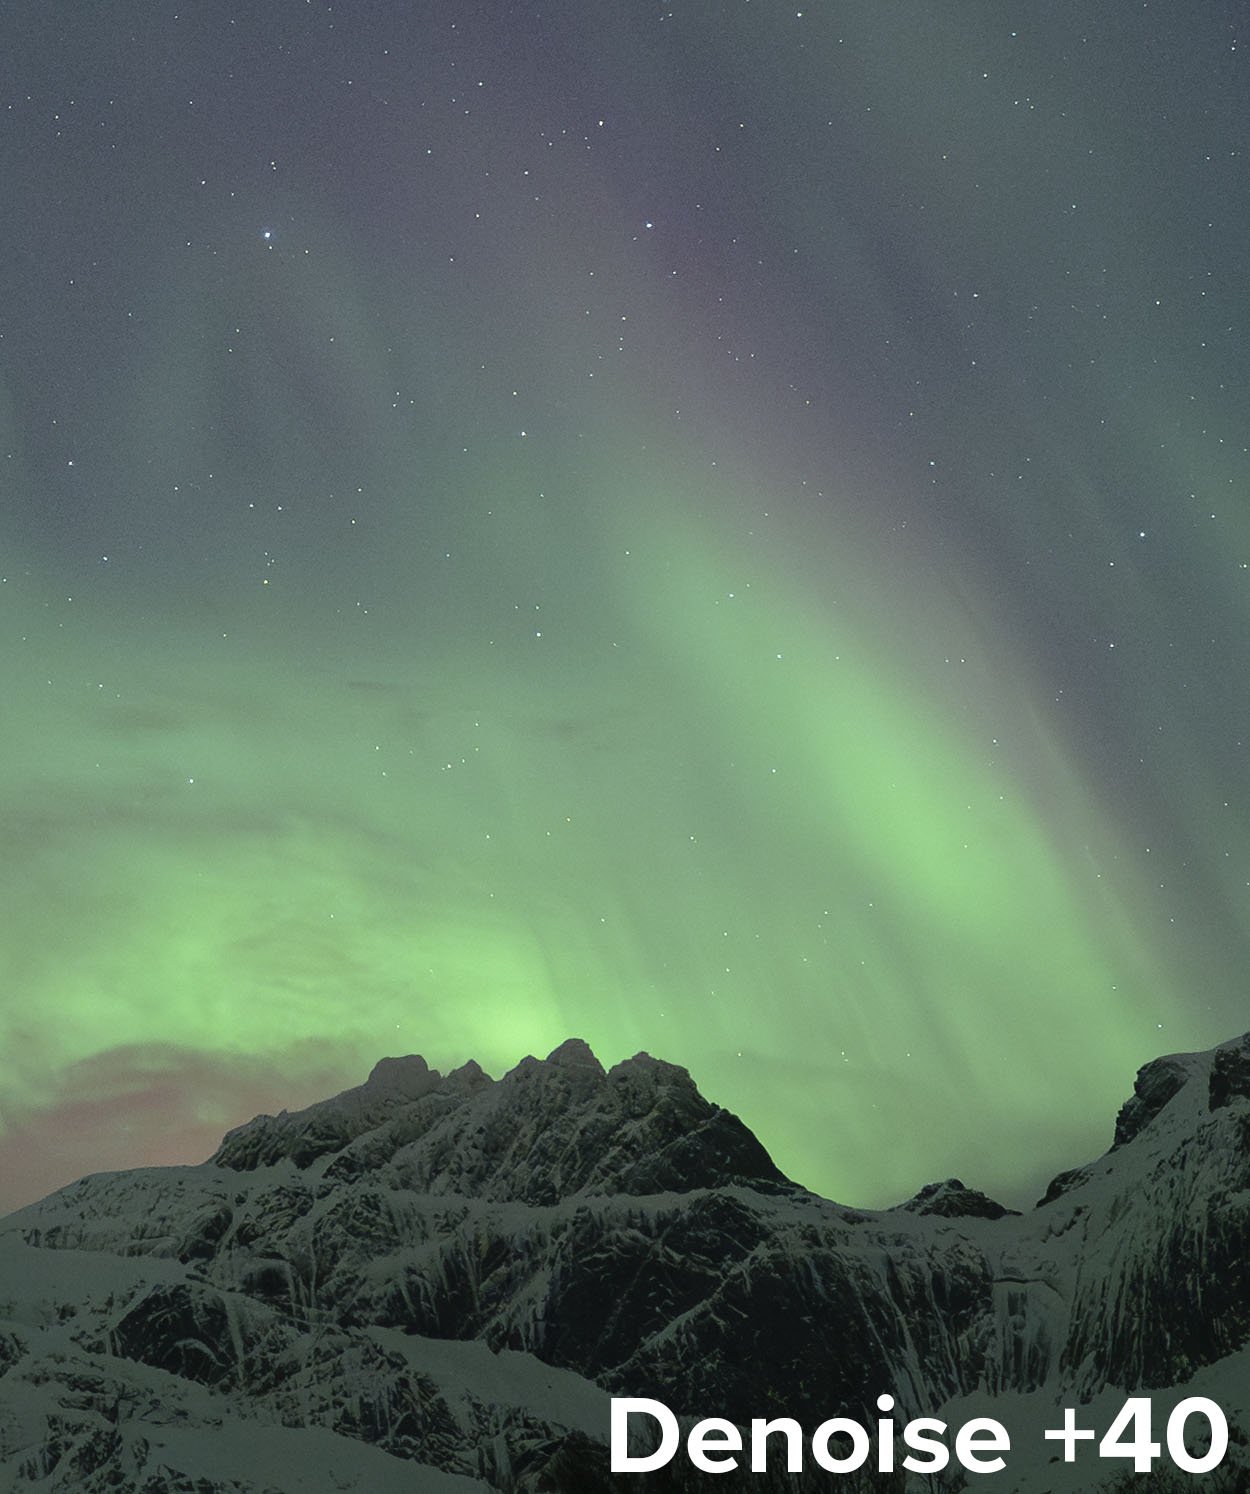
The biggest among those was the introduction of Lightroom’s new AI-based Denoise feature, which is simple to use and amazingly effective. On Tuesday we published a video post that explains the new Denoise feature (see β€œCutting Through the Noise: Lightroom Just Made Night Photography Better”). You can see the power of this new tool in these before and after pictures:

But Denoise isn’t the only new thing to be excited about in Lightroom and Photoshop. Several other new features in this release will prove to be a real benefit for the night photography enthusiast. In today’s blog post, I’m sharing a video to show all the new tools and tweaks that you’ll want to look into, as well as some tips on how to use them, including:

  • the new ability to use Lightroom Curves adjustments on a masked selection

  • how to use the targeted adjustment tool to speed up manual changes to Curves

  • the new ability to open multiple images into the same Photoshop file as Smart Object layers (and why you’d want to do that)

  • two examples of using two Smart Object layers for better control when creating a blue hour blend

Check it out below.

Wrapping Up

All in all, it’s a great day to be a night photographer!

What are you most excited about in the latest Adobe updates? What photos are you making with them? Share in the comments below, or on our Facebook page, or on Instagram (tag us @nationalparksatnight #nationalparksatnight #seizethenight).

Tim Cooper is a partner and workshop leader with National Parks at Night. Learn more techniques from his book The Magic of Light Painting, available from Peachpit.

UPCOMING WORKSHOPS FROM NATIONAL PARKS AT NIGHT

Cutting Through the Noise: Lightroom Just Made Night Photography Better

While Adobe’s focus is on creating benefits for all photographers, every now and then they come up with a feature that is a huge benefit to us night owls, in particular.

This is the case with their latest Lightroom update (12.3). As of today, Lightroom users have AI noise reductionβ€”and we’ve tested it, and it’s excellent. For those of us shooting high ISOs at night, this stands to be a game-changing addition to our processing workflow. Simply put: It makes night photos better.

Milky Way at White Pocket. Nikon Z 6II with a Nikon Z 14-24mm f/2.8 S lens at 24mm. 2 minutes, f/4, ISO 1600 (foreground); 8 seconds, f/2.8, ISO 6400 (sky); blended in Photoshop. Both images used Adobe Lightroom’s new Denoise slider at a setting of 23.

Adobe’s new Denoise tool works seamlessly within the Lightroom raw workflow. It can be applied to images just out of the camera or to images that you have already labored over in the Develop moduleβ€”including those you have processed using complex masks.

The process of ridding your images of noise in Lightroom couldn’t be easier. Check out the following video for our tips and tricks on using Adobe’s fantastic new AI noise reduction feature.

Of course, this isn’t the only update Adobe made this week, but we wanted to immediately get you the news on this huge improvement for night photographers. Be sure to check out our blog post this coming Saturday, in which we’ll cover more about Denoise, plus other new features that will help out night photographers.

Tim Cooper is a partner and workshop leader with National Parks at Night. Learn more techniques from his book The Magic of Light Painting, available from Peachpit.

UPCOMING WORKSHOPS FROM NATIONAL PARKS AT NIGHT

Editing Auroras: How to Post-Process Your Northern Lights Photos

If you’ve read our previous blog post, or if you’ve been reading the news, or if you’ve been outside at night in the past two weeks, then you are already aware of the fantastic displays of auroras that have been dazzling observers even at latitudes that hardly ever see the phenomenon.

We were fortunate to have experienced these auroras on our recent photography tours to Iceland and Norway’s Lofoten Islands, which was the subject of last week’s post (β€œSpring Solar Storm Brings a Week of Amazing Auroras”), as well as the subject of our Instagram feed all this past week (and next).

Auroras over Gimsoystraumen, Lofoten Islands, Norway. Nikon Z6 II with a Nikon Z 14-24mm f/2.8 lens at 14mm. 6 seconds, f/2.8, ISO 3200.

If you’re outside shooting at night, such an amazing display of northern (or southern) lights tends to generate a lot of of frames to bring home. And that translates into a lot of post-processing on the to-do list.

We’d like to help. So we decided to create a tutorial on how to process your beautiful aurora images.

In This Video

In the following video I’ll show you how I use Lightroom to maximize the visual power of auroras in your night photos. I’ll cover:

  • techniques to control contrast and brightness

  • the Dehaze, Exposure, Shadows and Whites sliders, and how they can be used to better separate auroras from the surrounding sky

  • using profile corrections to even out the sky

  • local and global adjustments to target individual areas of the scene

Your Turn

Have you been out photographing the auroras? We’d love to see your photos! Share in the comments below, or on our Facebook page, or on Instagram (tag us @nationalparksatnight #nationalparksatnight #seizethenight).

Tim Cooper is a partner and workshop leader with National Parks at Night. Learn more techniques from his book The Magic of Light Painting, available from Peachpit.

UPCOMING WORKSHOPS FROM NATIONAL PARKS AT NIGHT

Spring Solar Storm Brings a Week of Amazing Auroras

Science makes much predictable, but sometimes the universe still surprises us. It did so again this week, as the strongest solar storm in over half a decade slammed into our planet, creating amazing displays of auroras that extended halfway down the Northern Hemisphere.

The phenomenon started early in the week, when a coronal hole 20 times wider than Earth appeared on the face of the sun. The resulting solar winds were directed right at us, and soon aurora forecasts were sending the Kp index through the atmosphere.

Even before that, reports of Northern Lights were reverberating throughout the night photography world. Over the past 10 days we’ve seen posts on Instagram and Facebook, and received photos and questions from our friends and workshop alums.

Better still, we happened to be running two international night photography tours at the time, both in places perfect for viewing auroras: Iceland’s south coast and Norway’s Lofoten Islands. Both locations provided front-row seats to the most inspiring northern lights show we’ve seen in years.

Below are some of the images we’ve made over the past week and a half.

Vatnajokull National Park, Iceland. Β© 2023 Lance Keimig. Nikon D780 with a Tamron VR 15-30mm f/2.8 G lens. 6 frames shot at 13 seconds, f/4.5, ISO 5000, stitched in Adobe Lightroom.

Flakstadpollen, Norway. Β© 2023 Tim Cooper. Nikon Z6 II with a Nikon Z 14-24mm f/2.8 lens. 4 seconds, f/2.8, ISO 6400.

Iceberg in Vatnajokull National Park, Iceland. Β© 2023 Lance Keimig. Nikon D780 with a Tamron VR 15-30mm f/2.8 G lens, light painted with a Luxli Fiddle. Exposure 20 seconds, f/3.2, ISO 1600.

Nappskaret, Norway. Β© 2023 Tim Cooper. Nikon Z6 II with a Nikon Z 14-24mm f/2.8 lens. 2 seconds, f/2.8, ISO 6400.

Nappskaret, Norway. Β© 2023 Matt Hill. Nikon Z6 II with a Laowa 15mm f/2 lens. ISO 3200, f/2.8 and 2 seconds.

Lofoten Islands, Norway. Β© 2023 Matt Hill. Nikon Z6 II with a Laowa 12mm f/2.8 lens. 6 frames shot at 3 seconds, f/4, ISO 6400, stitched in PTGui.

Vatnajokull National Park, Iceland. Β© 2023 Chris Nicholson. Nikon D5 with a Nikon 14-24mm f/2.8 lens. 10 seconds, f/5.6, ISO 6400.

Aurora over Iceland. Β© 2023 Chris Nicholson. Nikon D5 with a Nikon D5 with a Nikon 14-24mm f/2.8 lens. 2.5 seconds, f/2.8, ISO 3200.

More Information

Want to learn more about this solar storm? Check out:

Want to learn more about photographing auroras? Check out our blog posts:

Your Turn

Have you been out photographing the auroras this week? We’d love to see your images! Share in the comments below, or on our Facebook page, or on Instagram (tag us @nationalparksatnight #nationalparksatnight #seizethenight).

And by the way, the show isn’t over. Auroras are continuing to dazzle dark-roaming photographers. So get out there and seize the night!

Chris Nicholson is a partner and director of content with National Parks at Night, and author of Photographing National Parks (Sidelight Books, 2015) and Photographing Lighthouses (Sidelight Books, 2023). Learn more about national parks as photography destinations, subscribe to Chris' free e-newsletter, and more at www.PhotographingNationalParks.com.

UPCOMING WORKSHOPS FROM NATIONAL PARKS AT NIGHT